Showing posts with label cooking. Show all posts

Thursday, July 19, 2007

Tortilla Sunset


It's pretty much a given that homemade goodies almost always taste better than store bought. That's assuming, of course, the person doing the cooking has at least a basic grasp of the principles and a willingness to bravely leap any chasms of ignorance.

It was a long, LONG time ago that I made my one and only attempt at homemade tortillas. Lord knows, I had an excellent teacher in one of my sisters-in-law. Tommye made wonderful tortillas and patiently did her best to educate me. That was back before everyone got all panicky about using lard so the basic recipe, if I recall it correctly, was flour, salt, lard and water.

That wasn't the problem. No. The problem was, I was learning (hah!) to use the smaller, handleless roller customarily used for tortillas when I was used to using a rolling pin with by-gawd-handles. To say the results were less than excellent would be an understatement. The very first tortilla I rolled out resembled a severely distorted elephant. In spite of my best efforts, it all went downhill from there. I will admit, Tommye didn't snort and laugh out loud -- but she was smiling an awful lot.

Okay, for whatever reason, tortilla-making was never high on my list of Things I Really Want To Learn. Besides, in recent years, I could buy pretty good tortillas -- both corn and flour -- at the grocery store so why worry, right? Right! That's what I thought.

Then, today, a revolutionary thought dropped into my alleged mind. I wonder, I said to myself, if you can make flour tortillas with oil instead of lard or shortening?

Well, almost faster than you can say "Google!" three times, I was prowling through a kajillion tortilla recipes and, blow me down, there IS a recipe that uses oil! It's a bit non-traditional in that it includes baking powder and calls for milk instead of water but it looked good and, what the hey? So I gave it a shot.



FLOUR TORTILLAS


Mix together 2 cups all purpose flour and 1 1/2 teaspoons baking powder. Measure 3/4 cup lukewarm milk and mix in 1 teaspoon salt and 2 teaspoons oil. (I used olive oil.) Add the liquid to the flour and mix well, until dough cleans bowl.

Turn out onto lightly floured board and knead for a couple of minutes. Form into ball, replace in bowl and cover with a damp paper towel. Let rest for 15 minutes.

Divide dough into 8 portions, form into balls and set on a plate with space between each dough ball. Cover with damp paper towel and let rest 20 minutes. Take each ball and flatten with fingers, then roll out thin. You can really lean into the rolling -- the dough can take it. And yes, I used a regular rolling pin with by-gawd-handles.

Set a skillet or griddle (preferably cast iron) over medium heat and lay a tortilla in the pan. Do NOT use grease. The tortilla will begin to bubble and blister. Give it 30 seconds or so, then catch an edge with your fingers and flip it over. Wait another 30 seconds, then remove to another pan and cover with foil. Keep in oven on lowest heat. (Or tuck the finished tortillas into a Styrofoam tortilla warmer, if you have one.)

Tortillas freeze well. To use after freezing, let thaw to room temperature, wrap in foil and heat in oven. I dunno -- maybe 350 degrees fairyheight for 10 minutes? I'm guessing.

This recipe makes 8 tortillas -- all of them light and fluffy and tender-chewy and so delicious there is probably a Puritan group out there somewhere, busily attempting to formulate laws that would make these gems illegal.

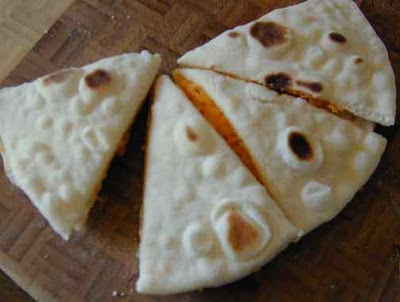
The very first thing I did was sprinkle a hot tortilla with grated cheddar, then I sprinkled the cheese with Morton's Hot Salt, folded the tortilla over and cut it into sections. Instant quesadillas! As we speak, I have a chicken breast thawing. I will cut it up tiny and stir fry it with Mexican seasonings and make some more quesadillas later. Yes. 'Tis pleasant to contemplate. Tequila Sunrise may be more famous but my money is on the Tortilla Sunset. As long as I don't lose my shaker of hot salt.

Wednesday, June 27, 2007

The Brownie Antidote


I see our cousins across the Pond are now settling in with their brand new Prime Minister. Good luck, mates! We, of course, have 16 months before any dust can begin to settle over here and it's looking to be a long season. Already the nastiness is getting thick on the ground and one has to step carefully to avoid the steaming piles.

But fear not, Coffee Mates! There is guaranteed relief for the Campaign Dyspepsia which is predicted to sweep the country in epidemic waves. Even the toxic-tongued pundits can't compete with the soothing healing power of truly decadent brownies. Trust me.

THE BROWNIE ANTIDOTE

1/2 cup butter, melted -- 1 cup white sugar
2 eggs -- 1 teaspoon vanilla
1/2 cup all purpose flour -- 1/2 teaspoon salt
1/2 teaspoon baking powder -- 1/3 cup unsweetened cocoa
1 tablespoon coffee liqueur

In large bowl, beat butter and sugar until fluffy. (You can do half white sugar and half brown sugar if you wish. Very nice change of flavor pace.) Add eggs, one at a time, beating well after each. Add vanilla and coffee liqueur. (You can skip the liqueur if you prefer and just add a tablespoon of strong coffee.) Combine flour, salt, baking powder and cocoa and add to egg mixture, beating until smooth.

Optionally, you can add chopped nuts or chocolate chips or minced dried fruit (NOT candied fruit!). A really scrumptious addition is about 1 cup of frozen, whole raspberries. Make sure they're still frozen when you fold them in. Trust me -- the result is orgasmic.

Grease an 8" x 8" baking pan and spread batter evenly. It should be thick but still pourable. If it's too thick, add some hot coffee, just a tablespoon at a time, until the consistency is right. If it's too runny, add flour, a tablespoon at a time. Place in 350 degree fairy-height (175 degrees centipede) oven for 25 to 30 minutes. Let cool before cutting.

You can spread some kind of topping on it if you wish -- either a frosting or a sprinkle of chocolate chips or whatever snaps your garter -- but I find these brownies to be so rich and moist and endowed with utterly voluptuous sensuosity that more of anything would just be greedy. As it is, we have the five major food groups represented here: chocolate, caffeine, alcohol, sugar and fat.

Well, okay -- a glob of ice cream couldn't hurt. Even whipped cream. Just be prepared to defend your share because chocoholics have no shame. But you knew that.

Friday, June 15, 2007

Lotsa Mozza


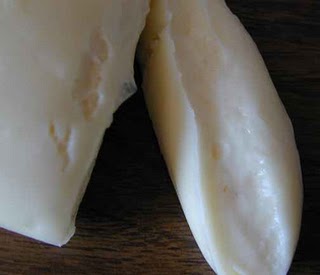
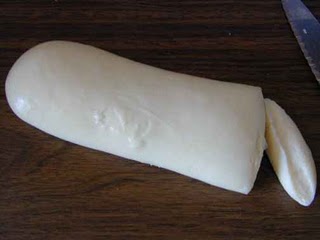
You can't see my face but trust me when I tell you there is a grin that is stretched across from ear-bone to ear-bone. The inspiration for such delight lies in the successful production of (Yay!) my very first batch of genuine, authentic, for real mozzarella.

I have yet to find a source of fresh whole milk so I fell back on dried milk laced with a couple of cups of half and half cream. As you can see, it worked like a champ.

There was a bit of time there when I thought the whole process was going to be another disaster, though. I was convinced there was no way those loose curds were going to meld together to form the cheese. Not possible. Uh-uh. Any fool could see that. More out of desperate stubborness than any real hope, I kept working the curds as directed, pressing out the excess whey and kneading the bits and pieces ever more closely together.

Then came the fun part. The curds went into the microwave for a minute and came out for some more whey separation and kneading. Then back for 35 seconds. Less whey this time and the texture was starting to come together like real cheese. I kneaded in the salt and put it back in the microwave for a last 35 second session and pulled it out.

Hot damn! I mean, it really was hot. Almost too hot to handle. But this was the stage where the cheese started stretching like taffy and I wasn't about to miss out on the fun of that. Muttering, "Ow, ow, owie," I wiggled the cheese and let it stretch from its own weight, then doubled it back and wiggled it some more. Almost before I knew it, the mass had turned smooth and shiny and ready to shape. It was magical. Astonishing.

I must confess that I gobbled up a couple of slices before I thought to weigh the durned thang so I can't tell you for sure what I ended up with. When I put what was left on the scale, there was almost 10 ounces so I figure I must have gleaned maybe 12 ounces of mozzarella out of the gallon of milk. Not too bad. I get the impression that the amount of cheese you end up with has to do with the quality of the milk, itself, but I don't know.

If you're at all interested in seeing the process from start to finish, you can go here at the web site for the New England Cheesemaking Supply Company. They are wonderful folks with whom to do bidness, let me tell you. That's where I got my mozzerella kit.

Another excellent source for information and supplies for home cheesemaking is Leener's. They have kits for all kinds of things but if you go to their cheesemaking section, you can view a video of a fellow making mozzarella.

You know what I'm thinking about right this minute? I'm thinking I ought to smack myself for not picking up some tomatoes at the store today. I am picturing a slice of homemade bread with a layer of sliced 'maters, sprinkled with some minced basil and drizzled with a bit of extra virgin olive oil, then a layer of the fresh mozzarella and a brief session under the broiler. Ahhhhhh ... it's on my To Do list for tomorrow, that's what.

Wednesday, June 13, 2007

Waffle Art Thou, Romeo?

Oh please. Stop with your groaning over my title pun. I am merely commenting on the romance of the glorious waffle. And it IS romantic. Pancakes are everyday but waffles are for special occasions. Crispy on the outside, light and fluffy on the inside. Slathered with good butter and decadent syrup of choice or piled high with fresh fruit and whipped cream. Or inundated with a rich gravy full of shredded turkey or chicken or sausage. Or serving as a unique sandwich bread, with generous dollops of cream cheese and containing tomatoes and onions and mozzarella cheese.

Excuse me. I had to pause for a moment because the first paragraph made me lightheaded. I'd have fainted dead away but I just finished a dinner of toasted waffle sections spread with beans and rice with chicken bits so I was resistant to the sensory overload. Your mileage may vary.

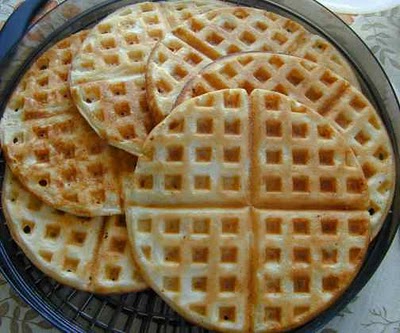
The waffle I ingested was one of those pictured above but I couldn't tell you which one, exactly. I tossed 'em all in the freezer the other day and raid the supply whenever the urge hits. A minute or two with the toaster and I'm good to go -- in whatever direction available food takes me. Hot waffles are good with peanut butter for midnight snacks, in case you haven't tried that version yet. Or with a scoop of ice cream and a drizzle of hot fudge.

This particular recipe came from a fellow waffle lover named Sheryl and you can find her here. She has other waffle recipes but I followed the one on the linked page, called Even Easier Crispy Waffles. This is a yeast batter recipe and is mixed up the night before you want to make the waffles, then put in the refrigerator to slow-rise overnight. I like it because you don't have to deal with the extra step of beating egg whites and folding them in. The batter is light as air just the way it is. I didn't have any beer handy or I would have used it as a liquid instead of the milk. Man, those waffles would have floated to the table on their own if I had!

Hmmm. Maybe I'd better copy her recipe here -- just in case. But I urge you to check out her web site for the other recipes, too. Anyway, here we go:

Even Easier Crispy Waffles
2 cups flour
1-1/2 tsp instant yeast
1 stick melted butter
2 cups warm milk (heated to about 110 degrees)
2 eggs
2 tsp vanilla extract
1 tbsp sugar
1/2 tsp salt

The night before:
Combine and whisk together the dry ingredients in a large bowl: flour, yeast, sugar and salt. Combine the melted butter and milk. Add the mixture to the dry ingredients. Whisk eggs and vanilla together in a separate small bowl. Add the egg-vanilla mixture to the other mixture, and whisk until well-combined. Cover with plastic wrap and stick in the fridge until tomorrow morning.

The next morning:
Prepare waffle iron as usual. Stir the batter to deflate it (it should be puffy and frothy). Add to waffle iron the same way you would other batter, keeping in mind that this batter will rise more than batters that use baking powder instead of yeast. Eet smakkelijke!

Thank you, Sheryl! Waffle on!

Saturday, June 9, 2007

Strawberry Lemonade

Lest you ding me for false advertising, I hasten to point out this post is NOT about making lemonade with strawberries. Rather, I've called on that slogan: If Life Hands You Lemons -- Make Lemonade. It is that principle that has salvaged a less than pleasing batch of berries into something with possibilities.

The photo will give you an idea of how much white flesh made up the content of the berries -- and it was virtually flavorless. The dehydration process worked minor wonders, however. While certainly not as intense in flavor as decent berries would have been, these specimens will suffice for munchies. The sweet strawberry flavor did indeed concentrate as I had hoped and brought the flavor quality up a notch.

As I sat there chewing on one of the slices, I contemplated the fate of those remaining. Here's what I think -- I think I'll dice up some of the slices and rehydrate them in hot berry liqueur and then add them to a good brownie batter. Yes?

Which reminds me ... I need to restock my supply of baking cocoa. Running out of baking cocoa is almost as bad as running out of coffee. Gadzooks and other similar expressions of alarm.

I am so embarrassed. After assuring Texas-residing Bonnie that summer had indeed arrived in my own more temperate location, this day dawned overcast and proceeded to stay that way. Adding insult to injury, it has mizzled off and on for the whole duration. Made it a wee bit chilly in the kitchen, where I keep a window open to catch fresh breezes. Had to put on a light sweater to survive the fresh air.

In the meantime, it was perfect weather for a good old-fashioned veggie soup. A cup of tiny seashell pasta in six cups of chicken broth and an addition of a couple of cups of frozen mixed veggies soon had the kitchen smelling wonderful.

Which reminds me of my only gripe about the assorted mixed veggie packages. I don't mind that they put broccoli in the mix. I happen to really like broccoli. What I frown at is the tendency to load the batch with big honkin' chunks of broccoli. Well, I know how to deal with that, by golly. I toss the veggies in a colander and run a bit of hot water over them -- just enough to start the thaw. Then I take my kitchen shears and snip all the broccoli clumps into smaller pieces, fit to play in polite company with others.

Once the soup was done, I filled myself a bowl and sat down with high anticipation. A few judicious shakes of the Tabasco bottle and my lunch was ready. Hot soups and stews always make me warm, both psychologically and physically. The additional thermal effect from a generous addition of chili pepper sauce could cure hypothermia. In this case, I soon found myself shedding my sweater and enjoying the cool breeze coming in the window. Capsicum has to be one of God's better inventions. Not far behind coffee and chocolate, I think.

Hmmm ... I just realized how so many of the Good Things in Life begin with the letter C. We might have to change the way we spell whiskey and sex.

Anyway, good work, God. Thank you.

Sunday, June 3, 2007

Bring On Da Braid!


OhMAN! I feel like the 97-pound weakling who took lessons from the Pillsbury Doughboy (the baking equivalent of Charles Atlas) and now they don't dare kick flour in my face! That's because, as you can plainly see, I have braided my very first loaf of bread. Let me intensify the brag just a bit. I have done a SIX-STRAND braid. Hooboy.

That might not sound impressive to you more talented folks but I've never braided anything with more than three strands in my whole life. I don't even know how to French braid, that's how iggernut I am.

I can't take credit for any brilliance, however. All the gold stars go to a nice young woman named Tracey who has put a terrific video on YouTube demonstrating just how to do this. (Video at end of this post.) If you watch it a couple of times, you'll be able to do it, too. Actually, if you watch it a couple of times, you'll see how much nicer her braids look than mine but, hey, I figure she has a teensy bit more experience. Right? Riiiiight!

In any case, she does such a good job of demonstrating, the whole experience was great fun. You can't help but grin when you start rolling out those long dough snakes for the braid. The tricky part is trying to get them all more or less the same thickness and length. It's a bit disconcerting to get to the end of the braid and find you have some strands significantly shorter than other strands. Yipe!

I just went with the time-honored tradition of the fine art of fakery. You sqooosh up the long strands just a bit and tug ever so gently on the short strands and then you fiddle them all together like a nest of cohabitating snakes and call it good. I figured if it didn't work out, I'd just eat that end first.

Mage, I want you to know I was thinking about you all the time I was doing this. You've mentioned your love of braided bread so often, I figured you were probably the resident patron saint of such things. I know you're too kind to snicker at my efforts but a gentle chuckle is permissible.

So, okay, Coffee Mates. The gauntlet (aka oven mitt) has been thrown. If I can braid a bread, so can you. And you. And, yes, even YOU. Think of it as one of the fun things you can do with your clothes on.

Thursday, May 31, 2007

To Chew Or Not To Chew


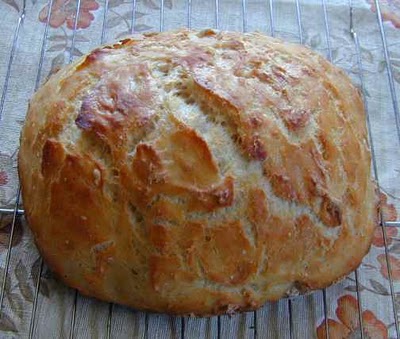
Well, Coffee Mates, how's that for a primo photographic example of artisan bread -- in this case, our recently discussed no-knead bread? Gorgeous, innit? Still hot in that pic, and smelling like heaven on a stick.

Looks can be SO deceiving.

I don't mean the bread was a bust. It really does smell -- and taste -- lovely, and that's the whole point, I guess. Trouble is, I do not personally care for the heavy-duty chewy crust you get with this method of baking. Even after generously slathering it with olive oil and keeping it in a plastic bag, it's still very chewy a day later. [sigh]

Also, I really should have left it to cook a bit longer. You may have noticed the tutorial suggested cooking with the lid on, then cooking some more with the lid off. Leo, in the video, simply cooked it 30 minutes with the lid on. I'm used to having my bread done in no more than 30 minutes at a much lower heat so this extremely high temp had me worried. While the crust is lovely, the innards are not quite up to snuff. A wee bit too moist but acceptable -- barely. It definitely could have done with some more time, no doubt about it. [sigh]

I knew I wasn't going to get along with this particular bread back in the rising stage. The flour-to-water proportions simply don't seem right. My pan de agua recipe calls for 3 cups flour and 1 cup water. This calls for 3 cups flour and 1 1/2 cups water. That extra half-cup makes a huge difference. I should have worked in a lot more flour after the first rise, that's what. But I was making myself stick with the recipe and didn't add nearly enough. Which left me with a sticky blob of dough from hell. [sigh]

On top of everything else, I fell asleep early last night, missed putting up this post altogether, and woke up at 5:30 this morning just like I knew what I was doing. Well, if I'm going to be bright-eyed and bushy-tailed before the sun is even over the hill, you'll just have to put up with me tossing this post into the pot, all out of synch with any kind of schedule at all. I vote we all get another cup of coffee and try to put this experience behind us. You, of course, may have an entirely different result if and when you make your no-knead bread. I hope you succeed beyond your wildest dreams. Truly, I do. As for me, I'm going back to my pan de agua. It doesn't make me chew so furiously that I burn up more calories in the process of eating than I'm taking on in the contents of what I'm eating.

Wait. I'm saying that like it's a bad thing.

No, never mind. With my luck, I'd just end up with skinny jaws. [sigh]

Tuesday, May 29, 2007

Leo Turns Me On

If there is a Mrs. Leo, I sincerely hope she understands the crush I have on her husband is purely platonic and I think she's blessed to have a fella who knows his way around the kitchen like he does. And dang! He picks the music with the bounce, does he not?

Oh. This is a Looooosee-'splain-yourself moment. What it is, is, for your dining and dancing pleasure (really!), I have embedded a YouTube video at the end of this post. I will warn you not to have your speakers turned up too loud if you're at the office or if it's the wee hours of the morning and you don't want to wake the baby. Otherwise, let 'er rip. Because Leo is going to take just over three quick minutes to show us how to make no-knead bread and you get to dance to the music while you watch.

Before breaking out the popcorn to view the video, however, you will find it worthwhile to go to this website for a really good photo-studded tutorial on the subject. It gives you explanations and important information you won't get in the video. Okay? Trust me on this. As much fun as I had dancing with Leo, I still bookmarked the tutorial to keep for my own future use.

So far, every site I've checked that mentions this no-knead bread (and several of the YouTube videos) all refer back to a New York Times article that introduced it. The curious thing is, although the measurements are slightly different, the basic four ingredients are identical to my favorite pan de agua -- the Latin American water bread. Another difference is the long slow rise. This is to develop more of a sourdough flavor and there's sure nothing wrong with that. Also, baking the loaf in a covered pot gives you a whole different crust.

Am I going to try it? Of course I'm going to try it! And I'm not even going to add the sugar and shortening I always add to my pan de agua to give it longer shelf life. The only thing I'll do different is the liquid will be some of the whey I saved from the homemade cottage cheese. It worked really well in the last loaf of bread and there's enough left for this one. If all goes well, I'll have a photo of the results tomorrow, okay?

Now, don't let me keep you. Go ahead and dance with Leo.


Sunday, May 20, 2007

Easy Cheesy

There really are other things to talk about but I seem to have become a sorta, kinda strange alien form of the Cheesehead variety -- and I'm not even a Green Bay Packer fan! Scary, huh?

It's this homemade cottage cheese quest, you see. I browsed through countless recipes, none of which sounded any better than the one tried in the previous post. Until I stumbled across the web site for Cooking With Kurma. If you go there, click on the recipe link on the left. Then scroll down the resulting page until you find the recipe link for homemade cottage cheese.

When you read it, you'll understand why I had to try this. How can I possibly pass on a recipe that suggests I cook it in a waxed cardboard carton? That's just too kicky-kinky to ignore. And a one-ingredient come-on is too tempting to turn down. You know how I love recipes that are easy, fast and tasty.

So I got a quart of buttermilk. This took a certain amount of blind trust in Kurma because I don't DO buttermilk. Never. A stand-up comedian of my youth, Shelley Berman, said it wasn't the taste of the buttermilk that was offensive -- it was the way the glass looked after you drank it. I tend to agree with him and have cheerfully abstained from buttermilk my whole life. I may have to reassess that position.

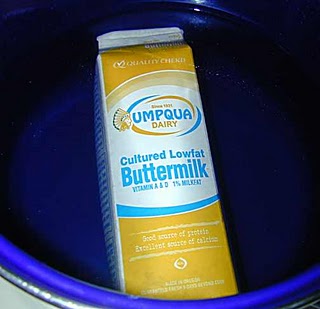
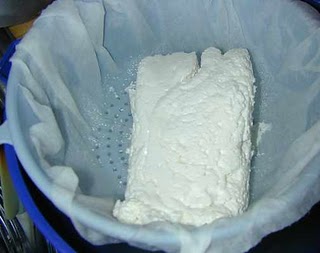
As you can see above, the quart carton fits nicely inside my big kettle. Keeping Kurma's instructions for a gentle boil in mind, I brought the water just barely up to boiling and then immediately turned it down just enough to keep a few steady boil-bubbles rising to the surface. The carton began to puff up like the cheeks of one of those old drawings of the wind god so I wasn't going to allow a vigorous boil to encourage the expansion. Even so, I kept my distance, convinced that carton was going to breech and blow like a cavorting whale at any moment. I was hugely relieved to turn the heat off after the required 30 minutes and plop the lid down to contain matters. From that point, it was just a matter of leaving everything alone while the contents of the carton incubated.

Kurma suggests a 12- to 18-hour wait. I thought about that. Gee. That's a 6-hour term of variance, folks. How do you decide where to end the process? If I stop at 12 hours, will the curds be too soft? At 18 hours, will they be too tough? It might help if I knew the deciding factors but I have no clue.

When in doubt, split the difference. I decided to open the carton at the midpoint of the extra 6 hours. As it happened, the 15-hour mark fell right at noon today.

First I lined my strainer with a paper towel and wet it down so it would hold its position when I poured off the whey. Then I set the strainer over a bowl because I want to save the whey to use for liquid in the next loaf of bread. Then I carefully opened the carton -- not an easy task with one's fingers crossed.

Oh my! Will you look at that beautiful hunk of cheese! Not only does it look good, it smells wonderful. A quick taste test had me grinning -- even before adding seasoning, this batch of cottage cheese is a flavor winner, absolutely. I should also note, the curds are not rubbery like the previous recipe, but have a nice just-barely-springy tenderness.

I pressed the chunk of cheese a bit with a fork to get out more whey, then transferred it to a bowl. A quick sprinkle of kosher salt and a few generous cranks of the pepper mill, then a good forking to break up the curds and mix the seasoning. Another taste test. Oh. MMMM. Yes.

I could dress the curds with a spoonful of sweet cream so it would be more like the store-bought stuff but it's nicely moist as is and the flavor is too good to mess with.

For the record, I ended up with 1 1/2 cups of cottage cheese from the quart of buttermilk. That makes it a little cheaper than the store-bought but even if there were no savings in price, the flavor is worth it -- to me, at least. Would I do this again? You betcha britches, Buckwheat! This method is so close to magical, I'm beginning to feel like David Copperfield. When my voice starts changing, please shut me off.

Thursday, May 17, 2007

Cottage Industry

This morning my friend, Wolfie, mentioned she was going to make homemade Chicken Pot Pie. Oh my. I looked out the window. Overcast. Gloomy. Perfect weather for comfort food and we all know chicken ANYthing is comfort food, right? So I'm thinking Chicken Pot Pie would go very well in my home, too.

Except I wasn't really in the mood to do pie crust. The delicate, flaky crust is half the fun of Chicken Pot Pie so if I wasn't going to do that part, there was no point in doing the other part.

But! Maybe a tasty Shepherd's Pie would suffice? You know -- the one with assorted veggies and meat in a gravy, with a mashed potato topping. So I Googled the subject (of course) and discovered that if the Food Police are hovering, it's only Shepherd's Pie if the meat therein is lamb. Any other meat requires it to be called Cottage Pie. Okay-swell. I can live with that. Cottage Pie it is.

In the meantime, I also wanted to check out another cottage-type adventure. Found this recipe for homemade cottage cheese that was so simple and basic, it was just begging to be done. The recipe as I got it requires 1 gallon of 2% milk, 1/2 cup vinegar and 1 teaspoon salt. I only had one envelope of Carnation non-fat instant milk, which would make a quart. [sigh] Okay. Whuddahey.

You heat the milk to 190 degrees fairy height (or until just before it boils), then remove it from the heat. Add the vinegar (1 ounce for a quart of milk) and let cool. The curds form immediately, in bodacious big clumps. After it's cooled, line a colander with a paper towel and drain. Then dump the curds in a bowl, sprinkle with salt and fork the heck out of 'em to mix in the salt and break them up. You can add some cream to make it look more like regular cottage cheese but I wasn't worried about that. It tasted fine -- sort of like a very mild feta. Maybe I should have used regular vinegar instead of wine vinegar. And 2% milk would surely have tasted richer. Ah well. Next time. [shrug]


While all that was going on, I had three nice Yukon Gold 'taters cooking and, when barely tender, cooling, so I could grate them. See, I decided I wanted grated potatoes for my pie instead of mashed potatoes. This cottage was going to be fitted with a thatched roof, don'cha know?

Somewhere in the middle of all the other activity, I opened a package of frozen mixed veggies and shook out a couple of cups to thaw. This particular mixture consists of good stuff like red and yellow bell pepper strips, julienned carrots, baby corn, water chestnuts, onions, snow pea pods and mushrooms. Any mixture that suits you, of course, will do just fine.

After the 'taters were grated (I ended up with about 2 quarts-worth), I melted a tablespoon of butter with an equal amount of olive oil and fried half the 'taters on medium heat until the bottom was nice and crispy-golden. Then I slid the whole pan full into my baking dish. We'll call that a bottom crust.

While the 'taters were crisping up, I cut one nice big boneless, skinless chicken breast into little bite-sized pieces and, once the frying pan was freed of 'taters, squirted in some more olive oil and stir-fried the chicken until there wasn't any pink left showing. The veggies joined the chicken and everything was tossed around until the veggies were hot. I looked it over and thought, hmmm, I wonder if ... and tossed the entire bowl of homemade cottage cheese into the works.

Then I mixed two heaping tablespoons of flour with one tablespoon of granulated chicken boullion and sprinkled that over the contents of the frying pan. When I'd mixed it in enough so that everything was lightly coated, I added one cup of hot water and stirred until the gravy thickened. Then the whole danged thang was spread over the hashbrown layer in the baking dish.

A quick wipe of the frying pan, another glob-glob of butter and olive oil, and the remaining shredded potato was tossed until lightly coated with the buttery oil. I covered the veggies with the 'taters, making the top crust -- a double-thatched cottage, so to speak. Then I sprinkled sweet Hungarian paprika over everything and put the baking dish in a 350 degree oven for 30 minutes. Here's what it looked like coming out.

Ah gee. This is Good Grub, Maynard. Oh yes indeedy. In spite of the fact that the overcast had disappeared and there was bright sunshine by the time I sat down to eat, I was still mightily comforted with my Chicken Cottage Pie. It is even more comforting to know there is plenty more to eat because that's a BIG pie.

The cottage cheese? Didn't hurt the flavor at all but didn't help, either. Just too bland. I'll have to experiment a bit more with that particular culinary adventure. And get some 2% milk, for heaven's sake. If any of you have suggestions, don't hesitate to yell 'em out, okay?

Sunday, May 13, 2007

Tweeners

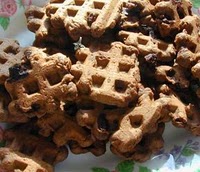
What you see here is a platter of my Mommy Day project -- a flat out fun kind of thing. Waffle Iron Brownies is the official name but these are not quite brownies and they're not quite chocolate waffles. Closely related to both, by ingredient and form, these cousins of the clan have their own interesting personalities.

The batter is thicker than either waffle batter or regular brownie batter -- more like cookie dough. In fact, when it comes time to cook these little goodies, you grab a couple of teaspoons just as though you were making drop cookies. Plunk down a walnut-sized chunk of dough in the middle of each waffle iron section and drop the lid. Although the recipe says to spray the waffle iron first, I only did that the first time. There's enough butter in the dough that the little guys wouldn't dream of sticking, bless their little hearts.

Here's the recipe: melt 1/2 cup butter and place in bowl. Add 1/4 cup unsweetened baking cocoa powder, 3/4 cup granulated sugar, 1 tablespoon water and 2 eggs, beaten. Then mix in 1 1/4 cups flour and 1/2 teaspoon salt. (I had intended to substitute vanilla flavoring for the tablespoon of water but forgot.)

You can add chopped nuts if you want, or chocolate chips. Halfway through the batch, I chopped up some Ghirardelli bittersweet baking chocolate and mixed it in. Made for some righteous results, that's what.

The original recipe suggests dusting the finished product with powdered sugar. Personally, I loathe powdered sugar on anything. Incredibobbly messy, don'cha know. Had I been in the mood for any kind of coating, I'd have grabbed a small paper bag or a plastic freezer bag and tossed in a mixture of granulated sugar and cinnamon and I'd have shaken the freshly cooked morsels in that. I might have even added a pinch of cayenne to the shaker mix for that Aztec touch.

I didn't keep track but I think I ended up with two dozen or so of the beautiful beasties, 4 at a time. Not so many that I got impatient and started whupping up Texas-sized extravaganzas to get it over with. That would have made 'em look like waffles and, really, they are NOT waffles. And, in spite of the name, they are not brownies. A little bit of both, not quite either, something somewhere in between.

I hereby dub them Tweeners. Because I can.

Friday, May 11, 2007

Faux Brioche


Hello. My name is Dee and I'm a breadoholic.

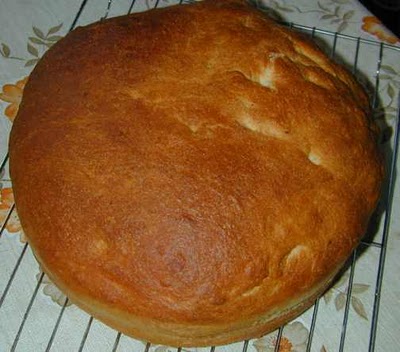
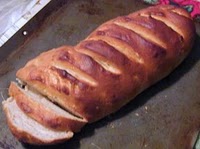
Okay. Let's not pretty it up. I'm a hot bread slut. Yes. Can't seem to help myself. Just look at this picture. What you don't see is the slice I scored right after taking the photo. I could show you that, too, except I already ate it all up ... and loved every bite. Unadorned. Bare, nekkid, nude. Good stuff, Maynard.

Oh. I just re-read that last paragraph. It was the bread that was bare, nekkid, nude, not me. Okay? We're into sublime food, not Fright Night.

You understand, I wasn't going to oppress you with yet another bread recipe. Really, I wasn't. I was just going to whup up something to do justice to my newfound skill at producing luscious homemade mayonnaise. Yeah. Right. You know how one thing leads to another ...

Well, I stumbled across this recipe for brioche. Okay, it's a sort of easy-peasy brioche. I've never done it before and from what I've been reading, those who have seem to consider this variety of bread on the same plane as religious epiphanies. That works for me. I'm fairly religious about food. I can identify.

The thing about brioche is that it's egg- and butter-rich. And I got to thinking that the mayo is something like 95 % fat and what would happen if I substituted mayo for butter? I can't say my measurements were precise but when I plopped all the ingredients in the bread machine pan, there was roughly a half-cup of freshly homemade mayo in the mix.

The recipe goes like this: in the bread machine, place 1 cup milk, 2 tablespoons sugar, 1/2 cup mayo, 1 egg, 1 teaspoon salt, 3 cups flour and 1 tablespoon yeast. Run it through on the dough cycle, then turn out into greased pan, pat down and let rise again. Bake at 350 degrees for 25 to 30 minutes. Before baking, you can brush dough with an egg wash to give it a glossy, dark brown finish but I'm low on eggs and decided to pass on that touch.

Now, you can get fancy and turn out more or less authentic brioche thingies in their little fluted pans with the little round top knot. I don't happen to have the pans and the top knot would just get me into trouble because I'd be trying to see if I could spit it into a target bowl or something. I have no couth. I admit it. But if you are more refined, please feel free to expand your culinary horizons with this wonderful bread. You could even use butter instead of mayo but I'll bet it wouldn't be nearly as much fun.

I have to leave you now. It's time to build a brioche sammich -- involving homemade mayo, of course. Yes. More bliss.


Thursday, May 10, 2007

Magical Mayo

Oh my.

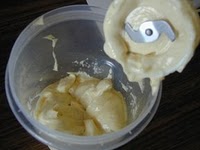
Don't let anyone tell you miracles don't happen. You can see for your own sweet selves, right over here, photographic evidence of the Miracle du jour. Coffee Mates, I present to you, homemade mayonnaise, in all its glory and -- this is the important part -- apparently foolproof and virtually instantaneous.

Whew! Those are huge claims but I can back them up.

It all began with a couple of idle comments in morning posts on a mailing list of which I'm a member. The virtues of homemade mayo, compared to commercial. My immediate reaction was a curled lip and genteel snort. Yeah, right. I've tried the homemade version. You know -- the one where you have to dribble the oil VERY SLOWLY into the mix while maintaining your beating speed with wire whisk or mixer or blender or whatever. And I always fall short in the patience department and start dribbling the oil too fast. The recommended speed is one drop at a time at first. I am congenitally incapable of that speed of dribble. It's too much like the dreaded Chinese Water Torture. Consequently, I always end up with a hopelessly runny mass of oily substance I can only consign to the garbage can because it is not fit for consumption or even proper last rites.

Given that background experience, I really don't know why I started Googling homemade mayo, but I did. And ran across a most remarkable concept!

Do any of you own that under-appreciated little kitchen gizmo often referred to as a stick blender? I have an old Rival brand that sits by its lonely self on the shelf because I keep forgetting I have it. Today I was humbly grateful for its presence.

Here's the deal: you take a small jar -- a canning jar or a clean, empty commercial mayo jar, for instance -- and you grab your stick blender. For the record, my "jar" was a 4-cup plastic Ziploc container with a screw-top lid. What follows is a basic small recipe. I wouldn't make more than this at a time, my own self, because I think the homemade mayo has a much shorter shelf life than the commercial. Besides, with all the flavor variations possible, one doesn't want to commit oneself to a single flavor experience.

Have all the ingredients at room temperature. A refrigerated egg can be quickly warmed by immersing in hot tap water for a few minutes. You can use dry mustard or wet mustard. Your call. Fresh or dried herbs are welcome. Your imagination is in charge here. Different spices for different intended uses -- one sort of mayo for veggies, another for fish, still another for burgers. You get the idea.

Anyhoo, the very BASIC recipe goes like this: in the "jar" put one egg, 1 tablespoon wine vinegar or lemon or lime juice, 1 tablespoon mustard, 1 teaspoon salt and 1 cup oil. As far as the oil is concerned, some say do NOT use extra virgin olive oil, others insist that it's great, although you might want to mix it half-and-half with a more neutral-flavored vegetable oil. Whatever quivers your taste buds.

Now ... take your stick blender and place it vertically in the jar, right at the bottom. Turn it on. This is the amazing part. Almost immediately you will see the ingredients begin to blend together in exactly the right consistency, that glorious globby goodness billowing out like a benign cloud. Slowly bring the stick blender up, moving it around to get all the oil mixed in. OHMYSTARSANDGARTERS! In less than a minute -- YES! I'm not making this up! -- you will have perfect mayo. Perfect, I tell you. Ready to spread.

I do not believe I am ever going to buy commercial mayo again.

If you go here, you will be treated to an excellent photographic tutorial of the above method -- except he doesn't put the oil in all at once. (Be sure to read all the comments because they contain valuable information about food safety, among other things.) Then, click on this link for good ideas about all the different flavors you can add to your magical mayo. And don't forget to note how you can turn it into fantastic sauces for veggies or meats -- another advantage of doing small batches. Note also, if you are wary of mayo calories, you can alleviate the problem by mixing the mayo half-and-half with plain yogurt.

Now, if you will kindly excuse me, I have to make some bread so I'll have something on which I can spread my wonderful mayo. Bliss. Oh bliss.


Saturday, April 21, 2007

Rainy Day Stuff


It's probably hard to tell in a photo this size but the shot was taken through a rain-splattered window and the branches of the trees are tossing in the wind as though they think they're at the disco. All those gorgeous blossoms just came on this last week and now, thanks to this silly April stormlet that came pouncing in this morning, it's beginning to look like pink snow down there. Dayum.

I'm happy to report this particular storm is not irrigating the innards of my humble dwelling, thanks to the heroic efforts of my landlord earlier this month. Billy spent several days slaving on the roof with assorted tools and supplies and, by golly, I think he managed to seal almost all the leaks. What a blessed relief!

There's been such a lot going on this month that I just haven't been keeping up with y'all. I will try to get all caught up now but I'll spread it out over the rest of the month, okay? Can't use up all the "stuff" in one swell foop. What fun is there in that?

One thing about which I need to alert you: the yeast content of the pan de agua recipe in the April 1st post. I said 3 Tablespoons yeast. The original recipe actually called for 2 1/2 packages of yeast. Okay, a package is 2 1/4 teaspoons and, since 3 teaspoons equals a tablespoon, I always just round it off and think of 1 tablespoon as being the same as a package. For all practical purposes, that works fine.

Where I messed up was in converting the "2 1/2 packs" to tablespoons. It really should only have read 2 tablespoons (rounded off on the generous side) but I was thinking of the 3 teaspoons and the proverbial doo-doo eventuated. Fortunately, that over-abundant measurement did not hurt the bread. On the other hand, that much yeast can put a hurt on your pocket book. I got to looking at that measurement and thought, whoa! Why so much?

Well, I did some experimenting. A loaf using 2 tablespoons came out, as far as I could see, identical to the previous loaves using 3. Okay. Fine. My last loaf, baked just yesterday, used only 1 tablespoon of yeast and, I swear, I think it was the prettiest, biggest loaf yet! So, for what it's worth, I made an editorial correction in the April 1st post and if any of you have already copied off that recipe, you might want to make the correction on your own copy.

To make up for my spendy blunder, let me give you a heads-up for what looks like a truly great baking site I just found. This link takes you to the Bread Baking Center of a place called The Prepared Pantry. I'm still wandering around the site, trying to take it all in. Not only can you order supplies and equipment there, should you choose, you can help yourself to several free and most excellent e-books on assorted baking subjects. Explanations, photos, recipes ... I've made the first download of their Free Baking Book (it comes in at a chapter a week) and I am IMPRESSED.

See? There are lots of neat things to do while it's raining!

Thursday, April 5, 2007

Is this legal?


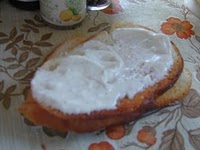
Ah gee. That photo isn't as sharp as it should be but I was in a hurry to eat the subject and didn't take time to check first. In any case, what you see there is a toasted slice of pan de agua slathered with some homemade seasoned cream cheese. Not just any homemade cream cheese, either. Nossir, nope, uh-uh. This is posilutely, absotively the easiest-to-make cream cheese in this whole world -- and several outer planets.

That's just one of the reasons I would urge you to try it -- provided, of course, that you even like cream cheese. If you don't, all bets are off. But if you love using cream cheese for all kinds of things, as I do, but can't always afford to stock it, as I can't, you're gonna love this version.

One: you make the cream cheese from plain yogurt, which, ounce for ounce, will cost you roughly half as much money for at least twice as much product.

Two: less calories than regular cream cheese and healthier for you.

Three: can be used anywhere you'd use regular cream cheese, sour cream or yogurt. Very versatile, this incredible, spreadable edible is.

Four: did I mention it's so easy to make, it's probably illegal? Shhhh. Don't tell.

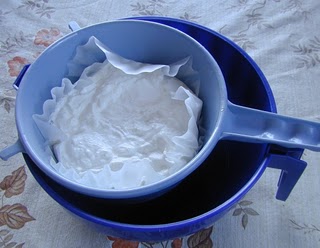
What you do is, you buy a quart (32 ounces) of plain yogurt. Read the label and try for one with all the good live cultures in it. Then you take a strainer or colander such as the one pictured here and line it with a couple layers of damp cheesecloth or coffee filters. Obviously, I used the coffee filters.

Hang the strainer on the edge of a bowl and put the whole shebang in the refrigerator for at least overnight. In the morning you will be amazed to see about 1 1/4 cups of whey has drained out and you have -- tahdah! -- close to 3 cups of cream cheese.

Now, the recipe I used (and there are several just like it online) didn't say anything about topping the yogurt with a weight but I later discovered there are versions that do suggest that. I guess I could lay a coffee filter and then a plate on top of the yogurt and weigh it down with a can of corn or something. Certainly more of the whey would be pressed out and the texture would be closer to the bricks of cream cheese you buy in the store.

(Utterly silly aside: the way to whey is to weigh. Sorry. Mild language digression.)

Some versions of the recipe tell you to add your seasoning before you drain the yogurt. Not a bad idea as that gives the flavors time to set in. Also, if you're using any dehydrated veggies like onion, garlic or whatever, they have time to plump up and hydrate. I didn't think of that, of course. Even so, a few short hours after mixing the seasoning in, the flavor is wonderful and the dried onion and garlic pleasingly moist.

There is this -- plain yogurt has a strong sharpness to its flavor compared with, say, sour cream. I don't mind that if I'm using yogurt in cooking but as a spread or topping, I'm not crazy about it. On the other hand, I don't want to add sugar or honey to take the edge off. However, I just happen to have a box of Stevia powder packets -- no calories. One little packet worked perfectly to soften the bite of the yogurt without messing with its character.

As to what kind of seasoning you use, that's entirely up to you and what particular use you may have for this batch of yogurt cream cheese. I wanted to go savory and a bit on the spicy side so I tossed in plenty of seasoned salt, fresh-ground mixed peppercorns, a dash of cayenne, dried onion and garlic, some Montreal steak seasoning and a good dose of dried dill weed. Of course, fresh herbs would be terrific if you have access to any.

How am I going to use this batch? Well, let me count the ways. I've already enjoyed it as a spread on toast. It will also make a wonderful topping for a baked potato and, mixed with grated cheddar cheese, will be magnificent on some steamed cauliflower. It will lend itself beautifully to being mixed with the mayo and other dressing ingredients for cole slaw. If there is still any left after all that, I'll probably whup up a batch of the best shrimp dip in the world.

And then I'll go buy another quart of yogurt.

P.S. I see Jo successfully tried the pan de agua. Good ON ya, Jo! Did anyone else get a chance to try it? I'm about to whup up another loaf myself.

Sunday, April 1, 2007

This is NOT an April Foolish

Given the April Foolish date, I was going to give you a long line of blather about being kidnapped by aliens and hitchhiking around the galaxy with some of Douglas Adams' friends. After I thunk on it awhile, I decided you probably wouldn't believe I had an in with that bunch. Which I don't, but why should that stop me?

Anyhoo, a much better option presented itself. Have any of you ever heard of pan de agua? That means "water bread" and is a staple in South American and Central American cultures. The curious thing is, I first learned of this gem in a murder mystery. No, I don't remember which one. Then I read about it in another murder mystery and, ohmygosh, even an article written by a murder mystery author. In every instance, pan de agua was spoken of in terms of reverence and maybe even good old-fashioned lust. How could I not start Googling to see what all the fuss was about?

Okay, you will find, should you choose to Google the subject yourself, there are variations on pan de agua but I think the most very basic recipe is this: Dissolve 3 tablespoons yeast in 1 cup of warm water. [Editorial correction: Please note, 1 tablespoon or 1 pack of dry yeast works wonderfully well. I no longer use the 3 T. amount. Your call. Explanation in post for April 21.] Add to a mixture of 3 cups flour and 1 tablespoon kosher salt. Mix well and knead until smooth and satiny. Let rise. Punch down and shape into desired form. Let rise again and bake at 425 degrees for 15 to 20 minutes, or until golden-brown.

So simple, right? I could not, of course, leave well enough alone so I added 2 tablespoons butter and 2 heaping tablespoons powdered sugar. (If I'd used granulated sugar, I would have only added 1 tablespoon.) Also, feeling absolutely no need to knead, I tossed it all in my bread machine and put it on the dough cycle.

There are any number of ways to treat the dough before you bake it. You can do it in a regular bread pan. You can divide it into 8 portions and shape into rolls. You can stretch it out like a loaf of french bread. With either the rolls or the french bread style, slash the top with a sharp knife before the final rise. Then, when it comes out of the oven, brush the crust with olive oil to keep it nice and tender.

Don't take my word for it. This bread is so flippin' quick and easy, you've just got to try it for yourself. By hand, by stand mixer, by bread machine -- hey, kidnap a teenager off the street and force them to do the kneading by threatening to play all your Barry Manilow tapes. You will be amazed at how wonderful this bread tastes, how light and smooth its texture. No wonder our southern neighbors have it for breakfast every morning. Oh my -- the sandwiches you could make with this.

I can't say why I only heard about pan de agua in murder mysteries but it must have something to do with the fact that it's bread to die for. Right? You don't believe me? Try it. Really. Just try it. You'll thank me.

Saturday, March 24, 2007

This and That

Now that Spring has officially sprung, it seems fittin' and proper to feature a photo of this spring blooming hedge plant, known variously as English laurel or Cherry laurel or simply flowering laurel. When the plant is in full bloom, it looks to be covered with about a kajillion fat, frothy lace candles.

Around here, should one keep it clipped and trimmed, the laurel makes fantastic hedges although, in some parts of the northwest, it's considered an invasive plant. I've not seen evidence of "suckering" tendencies in this area but I do know the laurel turns into a tall fat tree if left untrimmed. I know of at least two homes around here that used to have quite nice laurel hedges until the trimming amenity was neglected. They now have quite nice laurel trees that rise triumphantly above roof level of the houses.

This seems a good time to cover a couple of questions about bread that have come in, either from the Comments link or in private mail. I always give you recipes as whupped out on the dough cycle of my bread machine. I have been asked whether bread machine recipes can be converted to stand mixer and/or to old-fashioned hand mixing. Yes. Absolutely. Perhaps the easiest way to get a handle on the differences is to pull up Google and type in something like "convert bread machine recipe" and browse the links that show up. Basically, it pretty much comes down to the order in which you mix ingredients.

Sometimes I mention the addition of Vital Wheat Gluten in my recipes. This is an optional ingredient but I've learned to love it. Keep it in a container in the freezer. You can usually find it at the supermarket in the flour section. If you're making bread with all white flour, you don't really need it. Vital Wheat Gluten makes a huge difference, however, in the rising and the lightness of texture if you're using any kind of whole grain flour. For more info on this and other bread dough additions, go here and scroll down the page.

Hmmm. Well, now -- what's happened here is all this talk about the venerated Staff of Life has got my tummy perking up and asking, "What's for lunch?" Oh dear. I'll have to think on that. Excuse me while I mentally mull over the assorted contents of shelf and cupboard, preparatory to mindlessly mauling selected items into edible form. We have to keep our respective tummies happy or they will simply drive us mad. And some of us don't have far to go.


Tuesday, March 6, 2007

Sliced Vegetable Soup

I've got to share this bread recipe with y'all. It's quite different from anything I've ever tried before and the result is astonishingly good. Imagine a bread that tastes somewhat like vegetable soup! Really.

The trick is in the liquid used (tomato juice) and the seasoning (which you can vary greatly) and the grated carrots. I don't see why you couldn't experiment with adding some finely minced or grated veggies of all kinds, like bell peppers and olives and whatever grabs your fancy. Anyway, here's the basic recipe for VEGGIE BREAD:

Put two eggs in a 1 cup measuring cup and add enough tomato juice to make 1 cup of liquid. Whisk together and put in your bread machine pan. (I used a 5.5 ounce can of 'mater juice. If your eggs are very large, one might do the job.) Toss in 2 tablespoons butter or butter-flavored Crisco, 2 tablespoons sugar, 1 tablespoon kosher salt, 1 tablespoon dried minced onion and 1 tablespoon seasoning of choice -- I used Mrs. Dash. You could also use Italian seasoning or dill weed or basil or any combination of seasonings that appeal to you.

Now add 2 cups regular flour and 1 1/2 cups whole wheat flour, 3 tablespoons vital wheat gluten and 1 tablespoon yeast. On top of everything, toss in 1/2 cup grated carrots. Set machine to the dough cycle and let 'er rock and roll. When it's done, flop out on lightly floured or greased surface and knead out air bubbles. Shape into loaf and let rise again in bread pan. Bake at 400 degrees for 20 to 25 minutes.

The fragrance of this bread will drive you crazy as it bakes, that's how good it is. Can you imagine the flavor when you use it for sandwiches piled with cheese and tomatoes and onions and avocado? Oh bliss. Oh ecstasy. Oh sliced vegetable soup. Yes!


Wednesday, February 21, 2007

Baked Sammich

Off the top of my head, I can't think of anything that lends itself to more variety and creative adventure than a baked sandwich or, as we call it around here, sammich. It is plentiful, it is delicious, it is beautiful. On top of everything else, it's fun to make.

The first version I ever tried was a baked Reuben ... which you might want to remember next month when Saint Paddy's Day rolls around. (More about that in a bit.) In those days, I always thawed out a loaf of frozen bread dough to do the deed and that is still a viable option, especially if you don't have time or inclination to whup up your own batch of dough. On the other hand, the dough recipe that follows is quick and easy and lends itself to the joy of inspired seasoning.

DOUGH: I used my trusty Kitchen Aid stand mixer and dough hook for this. In the bowl, put 3 1/2 cups flour, 1/4 cup sugar, 1 teaspoon salt, 1 teaspoon Italian seasoning, 1/2 teaspoon dried minced onion, 1 package (or 1 tablespoon) yeast and 1 tablespoon softened butter. Mix together, then add 1 cup warm water. (Or warm vegetable, chicken or beef broth.) Start out slow and mix until you have a ball of dough that cleans the bowl. Plop dough out on lightly floured or greased surface, cover, and let rest for about half an hour. (I didn't have any Italian seasoning so I used some Mrs. Dash. Whatever suits your fancy is fine, I'm sure.)

FILLING: Here's where you have the real fun because the filling can be any doggoned thing you want it to be. Today I went for a vaguely Mexican chicken filling. That constitutes one layer of refried beans, one layer of chicken breast, minced to "hamburger" consistency, quickly sauteed until just done, seasoned to taste, and a final layer of shredded cheddar cheese. If I'd had any on hand, I could have tossed the cooked chicken with just enough enchilada sauce to coat it. I made the refried beans from scratch so they already contained minced onion, garlic and peppers. If you're using canned refried beans, you might want to add a layer of sauteed onion, etc.

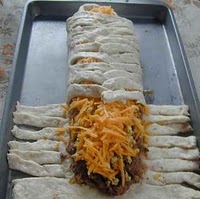
ASSEMBLY: Preheat oven to 375 degrees. Grease large cookie sheet and, with greased hands, take dough and press it out into a rectangle to cover the sheet, Down the middle third of the dough, spread a layer of the refried beans. On top of that, spread a layer of the chicken. Top everything off with a layer of shredded cheddar cheese. (Or a combo of colby jack.)

Now take your kitchen shears or a knife and cut each outer third of the dough into strips. Gently pull each strip over the top of the filling in a criss-cross or chevron pattern after folding over each end. Put in oven and bake for 20 to 25 minutes.


That's what I fixed today although, looking at it now, I realize I was fairly sloppy with the braid. It can be done neater, really. The Reuben filling, should you wish to try it, consists of a layer of rinsed and squeezed sauerkraut, a layer of shredded corned beef and a layer of swiss cheese. Even folks who think they don't like sauerkraut find they like this. Oh -- before you put any of the filling in, spread the center third of the dough with thousand island dressing.

Let's see -- tropical filling -- a layer of mashed sweet potato, layer of shredded chicken and layer of crushed pineapple, topped with shredded cheese of choice. (Or use shredded pork and very chunky applesauce.) Italian filling: layer of garlic mashed potato, layer of marinara tossed meat of choice, topped with shredded fresh mozzerella or pecorino or parmesan. How about a base layer of really thick chili, then a layer of hamburger, then a layer of cheese?

You can, of course, layer in sliced tomatoes and onions and all kinds of wonderful veggies, slathered with dressings of choice. Just make sure whatever meat you use is already cooked. Depending on what they are, some veggies could probably be pre-cooked also. You'll be able to figure out which ones require that to come out done after a 20-minute session in the oven.

You get the idea. Have fun, don't be afraid to take chances and try wild combinations and enjoy every bite of the finished sammich. I am.

Friday, February 16, 2007

Ginger Epiphany

Did you ever buy a bottle of some exotic designer booze and then regretted the impulse? I did that awhile back. Picked up a fifth of ginger vodka. Sounded cool. I like ginger in food so I should like it in vodka, right?

I hated it.

So that bottle has been sitting on the shelf, lonely and unloved for lo! these many months. I'm too scotch to throw it out and not mean enough to give it to a friend. But this evening I had a moment of dazzling brilliance. I can COOK with it!

This came to me when I was thinking about stir fry and realizing that once again I was without any fresh ginger to grate into the mix. Ginger. Say ... what if...? Hang with me here and I'll tell you how it goes when you're making a fusion Caribbean stir fry.

First you start your rice cooking. Then you get all the stir fry ingredients fixed the way you want them because, once you start, it goes fast. You need to prepare the goodies up front.

Snipped a boneless, skinless chicken breast into bite-sized pieces and dropped them in a small bowl. Then I splashed a healthy glug of the ginger vodka over the bits and added some dry minced garlic, about a tablespoon of dried crushed chili peppers, a glug-glug each of soy sauce and oyster sauce and stirred it all up good. (That might have been fish sauce. The label is in Thai and I don't remember which it is. Since I use them interchangeably, I figure it doesn't matter.) Anyway, you want just enough liquid to barely cover the chicken bits. Set that bowl aside and go on to the other ingredients.

I had picked up a lovely, crisp, juicy head of napa cabbage today so I tore off the outer leaves and washed them and put them in the fridge for later. The tight inner portion was then sliced thin, just like for cole slaw. Next, I julienned half a sweet potato for color. Julienned red or green bell pepper would have been nice but I didn't have any. Minced some onion. Another item that's wonderful in this stir fry is a barely ripe (still quite firm) banana, sliced up ... but I didn't have one of those, either. I'm just mentioning it for your edification.

In a two-cup measuring cup, I fixed 1 cup of chicken broth and added one of those little 6-ounce cans of pineapple juice. Then I stirred in a couple of heaping teaspoons of corn starch and stirred it up to dissolve the starch.

Okay. Your rice should be done so turn off the heat, give it a quick fluff with a fork and put the lid back on. Now you're ready to start the stir fry.

Set the electric wok at 350 degrees and glug in about a tablespoon of olive oil. Toss in the sweet potato first because that takes the longest to cook. It probably would have been smart to parboil the 'tater but I didn't think of it in time. Anyway, stir that around for a bit, until you feel like it's starting to cook. Now add the chicken, marinade and all, and the minced onion. Stir everything until the chicken is just cooked. Add the shredded napa and keep stirring until the cabbage has cooked down pretty good. Now pour in your chicken broth mixture and let it bubble up in a boil, stirring until it thickens. Now would be a good time to add the bananas if you have 'em.

If I'd parboiled the sweet potatoes, I'd have been done at that point. Since I goofed on that step, I turned the wok down to low, put the lid on and poured myself a mug of coffee enhanced with a bit of golden nectar. By the time I'd finished sipping that, the sweet potatoes were just done -- not mooshy, but slightly crisp.

Now you scoop some rice onto your plate and spoon some of the stir fry over it. Smell that fragrance. Shazaam! The chicken was the first thing I went for, of course, to test out the culinary use of ginger vodka. Wow! It is wonderful, Coffee Mates. I kid you not. Dayum! I just love it when my weird ideas work out.

Now I have hope for making good use of the lonely bottle of rum that's flavored with lime and lemon.