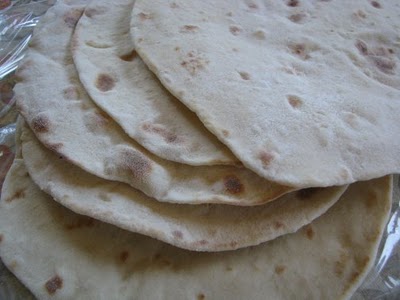
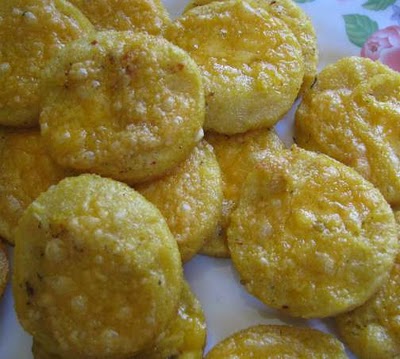
Showing posts with label cooking. Show all posts

Saturday, November 8, 2008

Kudos & Tin Can Bread

Wow! You Coffee Mates just blow me away! Look at all those comments for the last post. Now -- look at the big grin on the front of my face. Yeah. Y'all did that -- and I wish I could hug every one of you. I'm going to print off the whole comment section and save it, by golly. And, by the way, Bill (Old Guy), if I haven't mentioned it before, you are a punster par excellence. And I do love puns.

And I guess everyone loves show biz. Bonnie said she wanted a picture of the show. You meant the Wives Club show, right? Well, I think I still have a couple of snapshots laying around but I'll be darned if I know where.

Jo, you asked what part I played. Actually, several of us played more than one skit -- or act, or whatever -- because we had a limited talent pool. In one skit, I was a liddle ol' lady getting tipsy at the bar, in another, I was one of the goofy Newfie paperhangers, where we did a sort of Three Stooges routine with ladders and buckets of flour and water paste. Wherein I managed to splash some of the paste on the Wing Commander's wife's lovely blue dress because she was sitting dangerously close to the stage. Fortunately, she was totally gracious about it. (sigh) My favorite skit, though, was my stand-up comedy bit. With the help of a spare "body" of foam rubber and duct tape, I became Fat Aunt Fanny -- sort of a Phyllis Diller with heft. Wore an orange flowered mumu, high top tennis shoes and wore the most godawful wig you ever saw. It was total fun.

Now -- as a thank you for all the great comments, I'm going to share my neat new sandwich with you. Although God took pity on me yesterday and broke our run of rotten weather by letting the sun shine on my birthday (thank you, God), today we were back to rain squalls and wind flurries -- in short, business as usual. It didn't take much gazing out the window to have me yearning for a nice hot toasted cheese sandwich, that's what. Only problem was, I had so much fun with family yesterday, I forgot to make any bread. But that's okay -- as it turns out, I found a flavor suggestion that sounded good and this is how it went ...

TIN CAN SANDWICH BREAD

In your bread machine:
1 cup warm water
1 tablespoon olive oil
1 egg, slightly beaten
salt to taste
1/4 cup finely minced sun-dried tomato
1/3 cup finely grated Parmesan cheese
1 cup whole wheat flour
2 cups all purpose flour
1 package (or 1 tablespoon) yeast

Put the machine on the dough cycle and let it do its thing. In the meantime, dig out those two tall tomato juice cans you saved. (Okay, you may want to save a couple of juice cans for future use. I just happened to have these two on hand -- for exactly this kind of project.) Give the cans a good spritz with your nonstick spray and when the dough is ready, divide it into two equal parts and plop them into the cans. Spritz the tops of the dough, cover the cans, let rise for about an hour. (If you want to make the bread in a regular bread pan, this recipe makes one standard loaf.)

I didn't want to put the cans on the lowest rack because I was afraid the bottoms of the bread would burn. On the other hand, being the cans were tall, I was afraid the tops might scorch as the loaves baked. So what I did was, I put the bread in a cold oven, set it at 400 degrees and turned it on. After 15 minutes, I turned the heat down to 350 degrees and baked the bread for another 15 minutes. They came out perfectly! Whew.
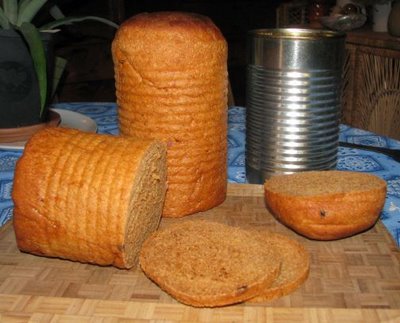

If you happen to get the juice cans that are banded with ridges, you will notice that gives the baked bread handy built-in cutting guides. Shooweet! What I like about doing the tin can bread is that you get a great size for snacking sandwiches -- as opposed to full-meal sandwiches. The can slice is only slightly smaller than regular sandwich bread.

Now, here's the kicker ... at a site called The CookMobile, a suggested variation on the classic grilled cheese sandwich called for a layer of blackberry preserves, a layer of chopped onion, some chopped nuts and a slice of cheese. One is encouraged to try other jam flavors, too. And I just happen to have some orange marmalade that was jumping up and down and yelling, "Me! Use me!"

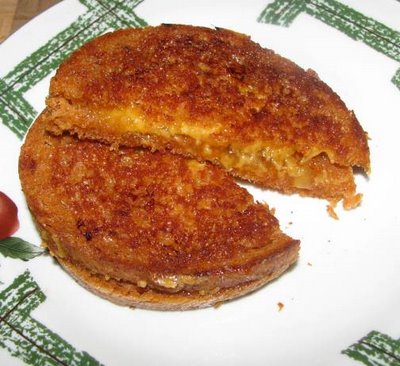
So I sliced me a couple of slices of the bread and buttered one side of each slice. Spread a light layer of marmalade on the unbuttered side of one slice, stacked on some of the shredded cheese left over from my cheese puffs the other day -- and cooked the sandwich to a lovely golden brown. And went "Nom, nom, nom!" with every delicious bite. Yes, it was great.

But now I'm really slapping myself. Did you notice what I forgot? Yeah. No onions. No nuts. Dayum! Ah well. I have plenty of bread left. I can do the other goodies with the next sandwich.
Thursday, November 6, 2008

Cheese For Your Inner Mouse

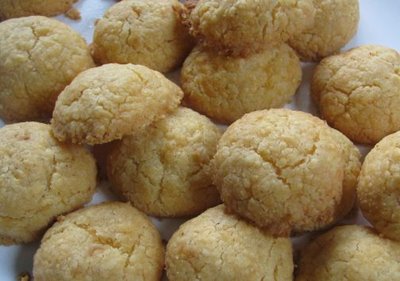
Oh, Coffee Mates. Have I got something fantastic for you! No, those are not Snickerdoodles in the above photo. The resemblance is only superficial, I assure you. For one thing, these little guys are only about an inch across. That's a Very Good Thang because, I guarandurnedtee you, there is posilutely, absotively no way on God's green earth that you can only eat one. The physical dimension might be dainty but the flavor dimension is huge.

They're called Cheese Puffs but, unlike most recipes of that name, they are not the cream puff-style puff. These are more like a shortbread cookie, all buttery and tender-crunchy and overflowing with the most marvelous cheese flavor you can imagine. Mind you, this batch was made with regular cheddar cheese. Had I used sharp cheddar, the flavor excellence would have probably put me into a state of blissful shock.

The extra added attraction of the recipe is that it calls for minimum ingredients, minimum time involved and minimum effort. Here am how it goes ...


CRUNCHY CHEESE PUFFS

1 cup shredded cheese
1/2 cup all purpose flour
1/4 cup butter, softened
1 teaspoon dry mustard

Set your oven at 400 degrees fairyheight. Grate your cheese. In a medium bowl, mix flour, mustard and butter, working the butter in until you have pea-sized lumps. Add the cheese and continue working the mixture until the dough comes together and starts cleaning the sides of the bowl.

Using a teaspoon, scoop out dabs of dough, roll into balls somewhere between hazel nut and walnut size, then place on cookie sheet about 1 inch apart. You should get 2-dozen of the little rascals. Slip the pan in the oven with the rack in the middle position. Bake for 12-15 minutes or until golden brown.

That's really all there is to it but let me add a couple of points.

I have a grater that gives me three different sizes of grate: macho, medium and mini. I can't say for sure that it makes any real difference but using the mini, or fine, grate -- and with the cheese at room temperature -- the mixing seemed to go much easier than it might have otherwise.

This is one of those basic recipes that lends itself to lots of variations. For this batch, I added a sprinkle of cayenne pepper, which gave just enough heat to leave a comfortably warm sensation in my mouth after I swallowed the last bite. I could have added any number of other seasonings, like onion powder or garlic powder or any of the Mrs. Dash salt-free mixtures. (Notice there is no salt in the recipe, other than what's in the butter and cheese.) For that matter, very finely minced chili pepper or onion or garlic would have probably gone well.

Just for laughs and giggles, the next batch I make I think I'll flatten with a fork and maybe bake only 10 or 12 minutes. No particular reason except perhaps that form would lend itself more efficiently to the task of scooping up some nummy dip.

Like my Inner Mouse really needs more snacking calories.

Thursday, October 23, 2008

Humbled by Excess

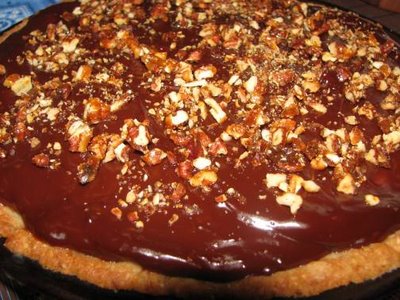
HEAD SYBARITE REPORTING FROM DECADENCE CENTRAL: This, Coffee Mates, is what happens when you get carried away and forget to moderate your immoderate behavior. That breathtaking pie in the above photo is the banana cream pie I mentioned in last night's post. It really should have been topped with whipped cream but all I had handy was a partial tub of Cool Whip that had been lurking in the freezer for months. It tasted somewhat flat and greasy and there was no way I was going to sully a perfectly good pie with something like that. (Radiating Huffy and Self-righteous.) No. A different topping entirely was surely required. Which is why I hunted down a recipe for hot fudge sauce and used that as topping.

I went too far.

Separately, each component of the above semi-masterpiece was wonderful. Really. Up to a certain point, the combination of components worked in a grand complementary chorus that added dimension to the whole. Until I added the choccy topping. Never thought I'd say this but, truthfully, the topping was -- uhmm -- over the top. Mae West assured us there was no such thing as "too much of a good thing." She was wrong. Darn it.

With that caveat, I will share the recipes for each of the aforementioned components. It is up to you to maintain the self-discipline to use the hot fudge topping on ice cream, where it belongs.

Have you ever been in the mood for a pie but just didn't feel in the mood to mess with the muss and fuss of a crust? Yeah, me too. Which is why I decided to go for a shortbread crust that went directly from mixing bowl to pie pan and could be patted into place. It goes like this:

SHORTBREAD PIE CRUST

1 cup flour
1/4 cup powdered sugar
1/3 cup ground nuts
1/2 cup butter, melted and cooled
1 teaspoon vanilla
1/2 teaspoon salt


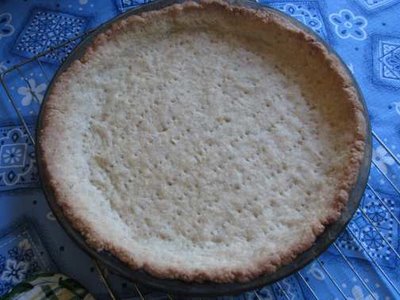
Mix dry ingredients together. (For nuts, I used honey-roasted cashews with sesame seeds. Just drop your choice of nuts in a blender and pulse them until they're the texture of corn meal.) Add butter and vanilla and mix until dough gathers together and cleans the sides of the bowl. Drop into lightly buttered pie pan and press into place as evenly as possible. Prick crust with fork and chill in freezer for 15 minutes or refrigerator for a 1/2 hour. This will keep the crust from poofing up so you don't have to blind bake it. Bake in 350 degree oven for 15 to 20 minutes or until it becomes golden brown. Let cool before filling. This is how it will look when you're done.

Okay, next step is the filling. Something easy and quick but high in the delicious factor. For that, I would urge you to click over to the BellaOnline site where Karen Hancock has an outstanding recipe for microwave cream pie along with some of the several variations possible -- including the banana version I did. I only had to use two bananas, chopped and tossed with lemon juice, to fold into the filling. Oh -- it only took 3 minutes to cook the filling (I boiled the milk on the stove.) and I gave it a good whisking at the end of each minute.

Okay. Pie crust -- check. Filling -- check. Topping -- ahhhh. I really believe this project would have been rendered a complete success had I used a light, fresh whipped cream topping. But, nooooo, I had to commit a chocolate felony. Ah well. At least I did end up with a most excellent recipe for fudge topping. And here it is:

MICROWAVE HOT FUDGE SAUCE

1/2 cup sugar
2 tablespoons baking cocoa
1 1/2 tablespoons corn starch
1/2 cup cold brewed coffee
2 tablespoons butter
1 teaspoon vanilla extract


Mix dry ingredients together, then whisk in coffee. (You can use water or, for a richer sauce, milk or cream.) Microwave 1 minute, whisk well, microwave 1 minute more. The sauce should be nicely thickening now. Whisk in the butter and microwave another 30 seconds. If it's now the degree of thickness you want, add the vanilla, whisk and serve. (The original recipe specified "2 to 4 minutes" cooking time. Your mileage may vary.)

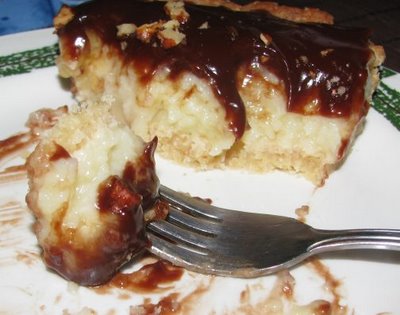
After I made the sauce (which is every bit as good as it looks), I let it cool while I sipped a mug of coffee. Then I pulled the pie out of the refrigerator and slathered the fudge sauce on top, trying not to moan with anticipation. Then I chopped up a handful of the candied pecans and artfully scattered them over everything. What followed was a dutiful photographic session, cutting the first slice out of the pie and sitting down with a fork and a healthy degree of lust.

Well, it's delicious and scrumptious and ... and ... awesomely, overwhelmingly rich. See where I stopped to take the last photo? That's also where I stopped eating. Could not bring myself to take another bite. I have been blissed out and brought to my knees. Later tonight, I'm sure I can work up enough appetite to finish it off. And I've learned a valuable lesson.

Hot fudge topping is not for cream pies. It is for ice cream or for body painting.

Wednesday, October 22, 2008

Going Moderately Nuts

It's been said that one should strive for moderation in all things -- including moderation. Which means, I'm convinced, it is good for one to be moderately immoderate on occasion. That is, while I don't dive headlong into full-blown decadence, wading about in the sybaritic shallows can be a lot of fun.

My idea of decadence has modified somewhat over the years, anyway. I blame Sean Connery for that. He doesn't write. He doesn't send flowers. I have no choice but to adjust my focus on more easily attainable self-indulgences. Such as really wicked culinary temptations.

Like (Salivation Alert!) candied nuts.

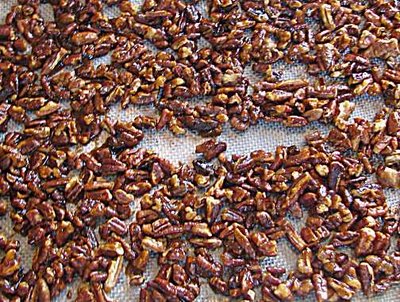
Now, I've been making candied walnuts for years, from a recipe given to me by a friend way back in the seventies. Yeah. The olden days. Unfortunately, I lost the recipe and hadn't been able to find a decent replacement. Until -- oh, thank you, Lord and Google -- today.

This is absolutely the easiest -- and tastiest -- candied nut recipe I've ever tried. No cooking a syrup to softball stage. No oven baking. All the magic takes place in a skillet on top of the stove. And I only had to modify one teensy little thing. Let me tell you about it.

First of all, just about any kind of nut can be fixed this way. Heck, mix 'em up if you feel like it. You can do this with whole nuts or half-nuts or chopped nuts. What I used today happened to be pecan bits. I rarely buy the pecan halves, which cost more, because I almost always chop the durned thangs up anyhoo.

Before you do anything else, fix whatever surface you're going to use to cool the nuts. You can lightly butter a cookie sheet or lay out a sheet of parchment paper or a silicone baking mat. You'll be spreading the nuts out in a single layer over the entire surface. And they'll be very HOT so judge your cooling surface accordingly. (Wax paper -- not a good idea.)

So okay. Put a non-stick skillet on medium heat and melt 2 tablespoons of butter in it. As soon as the butter is melted, toss in 1/2 cup of sugar and 1 tablespoon of kosher salt. That is not a typo. The original recipe calls for a mere quarter-teaspoon of salt but what I'm going for here is what I had with my lost recipe -- what I call the Kettle Korn Effect.

For those who have never had the good fortune to experience Kettle Korn (or Corn), it's simply popcorn that's been popped in a mixture of oil, sugar and salt, resulting in a lighter coating than caramel corn --but oh my stars and garters, the flavor. That's why we need a whole tablespoon of salt -- so we can obtain the precise salty-sweet taste that is utterly and unequivically addictive. And there is no cure so you might as well learn how to do it your own self. Otherwise, you're liable find yourself exploring dangerous neighborhoods, looking for a dealer to supply your next fix.

Now. Where were we? Oh yeah -- you've melted the butter and added the salt and sugar. Now dump 2 cups of nuts on top of everything else and begin stirring with a wooden spoon. You don't have to stir constantly right off the git-go but you want to move everything around enough that all the nuts get well-coated. To start with, you'll see a lot of sugar granules clumping around in there but before long the sugar begins to melt and will start turning a liquidy, gorgeous deep brown. Stir steadily now and watch it closely. You don't want to scorch anything. When the sugar is well-caramelized, remove the pan from the heat and add 1 teaspoon of vanilla extract. It will sizzle and fizz but don't be alarmed -- it's just excited. Stir vigorously and inhale deeply.

Turn the nuts out onto your prepared surface and spread and separate them as much as possible while they're still hot. Let them cool for roughly half and hour and then finish separating them by mooshing them about in your hands. The nice thing about this is that you get to lick your hands before you wash them.

What? Of course you want to lick them. It would be depraved to waste that good flavor in soap and water. Of course, that's easy for me to say. Nobody is here to catch me at it except Ralph and I don't see how he could disapprove when you consider what he licks.

What's next? Well, you put all those incredibobble nuts in an air-tight container or a sealable plastic bag and put them in the refrigerator until you're ready to use them.

Okay. You store what's left after you sample enough to be sure your high standards of culinary wickedness have been met.

How will you use them? Let me count the ways. Besides the fine art of munching indiscriminately, try throwing a handful in your next tossed salad. Bliss. I am seriously considering multiple batches of this stuff for Christmas pressies. Hell, it might even entice Sean Connery. In the meantime, as a topping on ice cream or cakes or pies, candied nuts are hard to beat. In fact, the main reason I made this batch was so I'd have some to sprinkle on top of a banana cream pie.

Yes. And I'll tell you about that tomorrow. Any more decadence tonight would simply not be -- uhmm -- moderate.


Friday, August 22, 2008

Kneading & Needing

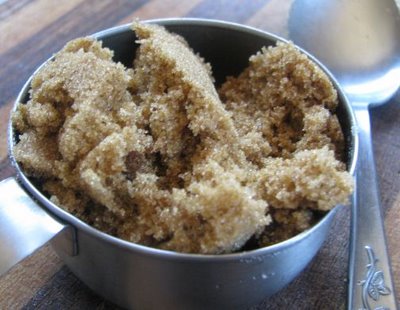
See that measuring cup piled with brown sugar? I just wanted to show you that making your own brown sugar produces an end result that is just as fluffy-light and moist as a bag of freshly opened brown sugar bought at the store.

See, I was about to embark on a cookie-making gig and it required half a cup of brown sugar. Oops! I'm out of brown sugar. I had heard you could add molasses to regular granulated sugar as a substitute -- and I do have molasses. Didn't recall measurements so a quickie Google run ensued. There are variations on the measurements but what I used was 2 tablespoons of molasses to 1 cup of granulated sugar.

The source of this particular recipe said to mix with a fork and store extra in a resealable plastic bag. Another source said to just add the molasses to the wet ingredients in the recipe to save the extra mixing. Since you have to pack brown sugar down firm when you measure it, I thought that latter method might not be as accurate so I opted for the mixing. I'm sure a fork -- or even a pastry cutter -- would do the job faster but I put a cup of sugar in a resealable sandwich bag, added the molasses, made sure it was sealed up tight and then just kneaded the bag until the sugar was evenly blended. Next time I'll use the faster method but it was fascinating to watch the sugar slowly transform as I worked the bag.

Here's the irony: this brown sugar "substitute" isn't really a substitute at all. All these years I thought brown sugar was simply sugar that hadn't been refined as much as the white. For certain categories of "natural" sugars, that's true. But the brown sugar we buy in our grocery stores is most likely to be the end result of granulated sugar that has had molasses added back in. Exactly like what I just did with my handy-dandy sandwich bag!

Which means I scratched brown sugar off my grocery list and added molasses. Heck of a deal.

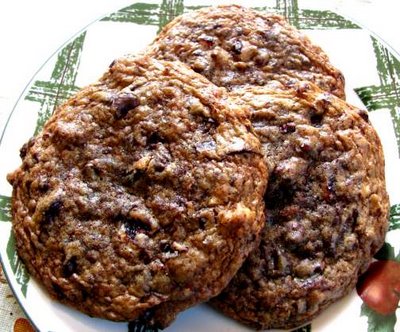
So -- on to the cookie gig. On July 9th, the NY Times printed an article and accompanying recipe about and for chocolate chip cookies. It spread like a happy virus across the food blogosphere so you can't hardly check into a foodie site without seeing mention of these scrumptious goodies. Although I didn't follow their particular recipe, I did pay attention to the "secrets" they revealed in the article, such as a very light sprinkle of coarsely ground sea salt on top of the dough just before baking. Also, although I baked a dozen of the cookies right away, the rest of the dough will be kicking back and relaxing in the refrigerator for a day or two to see if the resulting cookies are indeed as superior as they claim. I figure it can't hurt -- and, for the first time, I don't feel guilty about not baking up the whole batch of dough in one fell swoop. Yay!

The recipe I sort of used is from Smitten Kitchen and she posted some luscious photos, too. I'll copy it here more or less as she laid it out because she's nice enough to provide amounts in grams for those of you across the Pond. You'll want to check it out at her site too, though, because I tweaked it a bit here.

Tweakable Chocolate Chip Cookies

1/2 cup (100 grams) granulated sugar
1/2 cup (120 grams) firmly packed light brown sugar
8 tablespoons (1 stick) (115 grams) unsalted butter
1 large egg
2 teaspoons vanilla (she called for 1 teaspoon)
1/2 teaspoon baking soda
2 tablespoons plain yogurt (optional -- for moistness)
1 1/4 cup (175 grams) all-purpose flour
1/4 teaspoon salt -- or 1/2 teaspoon sea salt or kosher salt
1 1/2 cups (200 grams) semisweet chocolate chips
1 cup (130 grams) walnuts or pecans, toasted and chopped fine


Put rack at upper third level in oven and preheat to 300 fairy height, 150 centipede.

Mix butter and sugars until smooth. I melted the butter instead of cubing it cold like she did. Mix in the egg, vanilla, baking soda and, if using, yogurt. Stir together flour and salt, mix into batter. Fold in chocolate chips and nuts. After the little mounds of dough had been placed on the cookie sheet, I put a light sprinkle of coarsely ground sea salt on top of each mound. I have one of those little bottles with its own grinder top that works perfectly for this.

Using a small ice cream scoop or 2 tablespoons, plop mounds of dough on a lightly oiled cookie sheet (or use parchment paper or a silicone mat) and bake for about 15 minutes. Everyone's oven seems to be a bit different so you might want to watch closely toward the end of the baking time. You don't want to cook them too crispy in the oven or they'll get horridly hard on you when they cool. Let them rest for a minute or two on the cookie sheet when you remove it from the oven. Then put them on a rack to cool completely.

I usually do just one pan of cookies at a time, in case I feel the need to tweak the dough for some reason. The first half-dozen cookies were fine but I thought they needed something. Aha! I grabbed 1/2 cup of my beloved dried cranberries, chopped them to little bits and folded them in. Believe me, cranberries share the same "marriage made in heaven" quality with chocolate as raspberries. The second half-dozen cookies were an improvement, with the delightful little flavor bursts from the cranberries.

There may be a bit more tweaking in the future of this batch of dough. I'm wondering about the flour. You know that some days, depending on the humidity, you need more or less flour than what is called for. Also, that 2 tablespoons of yogurt I added may have made the dough a bit looser than it should be. Keeping it in the refrigerator between batches helps but these cookies, though tender crispy outside and soft and chewy inside, tend to spread a bit more than I'm used to. Tomorrow I may add about 1/4 cup more flour. We'll see.

The cookies came out more of a caramel brown than pale golden. That's because I only had 1/2 cup of chocolate chips but I had a cup's worth of a solid semi-sweet chocolate bar I chopped up. The chopping reduced some of the choccy to powder which, of course, went into the dough just like the bigger chunks. And that's how come these cookies have a better tan.

And there you have it -- my Friday session of kneading (the brown sugar) and needing (a choccy fix). Do I know how to head into a weekend or what?

Thursday, August 21, 2008

Not Your Mother's Noodle

Question: When is a noodle not a noodle?

Answer: When it's a zoodle!

Have you tried them yet? Zoodles, I mean. Coffee Mates, this is so cool, so tasty and SO fun, you've just got to give it a shot. Take yourself a nice firm zucchini and, by one method or another, cut it into julienne strips. You can even just slice off flat strips with a potato peeler. I used my trusty V-slicer mandoline with the small julienne blade for the results you see above. At first glance, the strips look just like the square Chinese noodles.

You can use this treatment on other veggies, too but the ubiquitous zucchini seems to get the most attention, perhaps because they end up flexible like cooked noodles rather than rigid like matchstick french fries. Which leads me to another question ... if julienned zucchinis are called zoodles, wouldn't julienned potatoes be called poodles? I'm just asking.

Anyway, you can use your zoodles pretty much any way you'd be inclined to use pasta. You can have them raw -- as I did in the salad pictured above -- or you can cook them as I did with the Sorta Spaghetti you see below.

I zoodled one zucchini that was something like 6 or 7 inches long. Should have picked up more zukes but how did I know? Anyway, I threw some of the zoodles in a salad bowl and added finely grated carrots, chopped smoked turkey, chopped tomato and a glob of the dilled yogurt mustard from yesterday. I forgot to add some minced onion but it didn't matter. That was my lunch and it was lovely.

By the way, about grating the carrots? What I had was baby carrots. Do you know how fast you can shred your knuckles when you're trying to grate those little old baby carrots? It's shocking, folks. Just shocking. Since I was not terribly enthused about shedding blood today, I thunk and thunk about it -- and came up with a brilliant solution. Got a good grip on the base of each baby carrot with my trusty needle-nose pliers and whizzed right through the grating session just like I knew what I was doing. When the carrot got reduced to what the pliers were gripping, I had myself a nice little nubbin to munch while moving on to the next carrot.

The balance of the zoodles went into my Sorta Spaghetti. "Sorta" because I didn't have the makings for spaghetti sauce so I made a quick batch of Whatever-It-Is in a small sauce pan on LOW heat. I mixed a cup of tomato-chipotle bouillon, 1/2 cup of yogurt and a cup of grated colby/jack cheese, stirring until the cheese was melted. Oh! I also added a half-teaspoon of Realemon juice because I read somewhere that vinegar or lemon juice prevents the melted cheese from getting stringy. It works.

On the other burner, I had sauteed some diced onion and chopped smoked turkey in a bit of olive oil. When the sauce was ready, I poured it over the onion/turkey mixture and let it simmer just a bit. Then I threw in the rest of the zoodles and let everything cook for maybe another couple of minutes. The zoodles were still crispy-tender when I turned off the heat.

Dang, I said to myself. I do believe I've made twice as much sauce as I needed. Then I had a second thought. Actually, the sauce was just right. I simply needed more zoodles. Ah well. We live and learn, don't we? I had all the zoodles for dinner -- bliss -- and tomorrow I'll add the bowl of leftover rice to the leftover sauce and, shazaam! More bliss. See how these things work out?

Just so you can doodle a bit with the zoodle gig, here's a link to the Health Discovery website and one of the forum pages. The Spirooli they're talking about is a kitchen gadget that spiral cuts veggies and fruits and is often used for making zoodles. Scroll down the page a bit to entry #8 and read the loooooong list of zoodle ideas offered by Aspire. I printed that part off for future reference for myself. Lots of good stuff there.
~*~*~*~*~*~*~*~*~

On a more serious note, our friend Bonnie went into the hospital today so they could do something about the painful problem she's been having with her back. Let's send plenty of healing mojo (aka prayer) her way. She's just been way too miserable for far too long. Time for fixin'!

Wednesday, August 20, 2008

Midnight Snackless

Well, I'm just having fun with all kinds of new stuff. For one thing, I'm discovering that terrific yogurt mustard from yesterday is very versatile, according to the seasoning you mix into it. Today, for instance, I gave it a good shot of lemon-dill seasoning with most excellent results. I also used the last of my red wine vinegar to make this batch so that item went on my shopping list for the next market run.

The other new "stuff" -- new to me, that is -- was learning to poach a chicken breast. I must probably be the last person in the world to poach anything. Don't ask me why. I've just never done it. Not even an egg. Now that I've tried it, I'm thinking, "Gee, how did I manage to miss out on such a neat way of cooking chicken?"

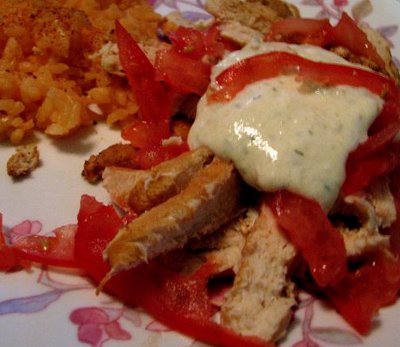
And it is. Earlier this evening I poached one chicken breast in a mixture of water, white wine and assorted spices like onion powder and chipotle and cumin and I don't know what all. It came out tender and juicy and very tasty. Cut it in slices, tossed it with some sliced tomato, topped it with a big glob of the dilled yogurt mustard and served it with a side of rice that had been cooked in tomato-chipotle bouillon. Made for a light but totally satisfying meal. But there is one thing wrong.

I don't have anything left over for my midnight snack.

Oh! Before I forget, John, did you catch the comment from Anonymous after the post about Swaptree? Just in case you missed it -- and that goes for the rest of you on that side of the pond -- go to Read It Swap It. It looks like very much the same sort of setup. Anonymous, whoever (whomever?) you may be, thank you for the tip!


Tuesday, August 19, 2008

All Wrapped Up

I love this photo. There's just something about widdle bunnies, isn't there? Even when they're happily devouring your garden, they're cute about it. In any case, I hauled this little guy into service because I want to express applause for a recipe I got out of Rosie Daley's book, "In The Kitchen With Rosie," which I featured yesterday.

First, I need to tell you this is a most excellent recipe book. Full of chatty stuff and good tips, all as bonus items behind some of the most dynamite healthy recipes you'll find. What's neat to note is that the book was published back in 1994 -- and it isn't even a minute out of date. I can hardly wait to try some of her other goodies but I am sufficiently stuffed at the moment to be willing to wait.

Being in the mood for wraps -- which I think is just a yuppie name for a type of sandwich most often made with tortillas -- I scored a package of flour tortillas at the market today. Unfortunately, there was only one package left and it was of those monster 12-inch fellers and that is not a resealable bag! Good thing I have plenty of duct tape.

Anyway, I ended up making two of those big boys -- the tortilla wraps, I mean. One is waiting in the refrigerator for later nom, nom, nomming. Half of the other is covered and standing in the wings for my usual midnight snack. The missing half is currently distending my happy tummy. And for those of you who are being careful about what you eat, this wrap stuff is so healthy it ought to be criminal. Consider: one 12" flour tortilla -- 360 calories. Divide that by 2 because I wimped out at the halfway mark so -- 180 calories.

Okay, I don't have a clue about the calorie count of what I put inside the wraps but I think it was probably quite reasonable -- one slice of smoked turkey, half of a caramelized Walla Walla onion (no sugar to caramelize it, just patient, slow cooking of thinly sliced onion rings over medium heat), several thin slices of a vine-ripened tomato, half of a thinly sliced small zucchini that has been sauteed to tenderness in a bare teaspoon of olive oil and seasoned with Mrs. Dash chipotle seasoning and a final layer of shredded colby jack cheese.

Okay, the cheese probably has as many calories as everything else put together but you can leave that out and still have a fantastic sandwich. But there is one other item that puts this concoction over the top -- and that's what I got from Rosie. (I hope I'm using only a respectful amount from the book and not breaking copyright laws. What they call a reasonable quote, I guess.) Anyway, this is the dip she serves with artichokes and she says there's only 63 calories per serving, including the 'choke (recipe serves 4).

Rosie Daley's Yogurt Mustard

1/2 cup plain nonfat yogurt
1 teaspoon Dijon-style mustard
1/8 teaspoon lemon pepper
1 teaspoon red wine vinegar
2 tablespoons minced shallot (1 small shallot)


Rosie suggested running the ingredients through the blender until smooth but I just stirred everything a bit with a spoon and put it in the refrigerator until I was ready to use it. Also, I didn't have any lemon pepper so I crumbled in one of my little chipotle cubes, which is supposed to equal one chipotle pepper. Didn't have a shallot either but 2 tablespoons of dried onion flakes plumped up just fine by the time I hauled the dip out for action.

What I did was slather some of it in the middle of the tortilla before laying down the slice of smoked turkey. Then, after everything else was stacked up, I globbed a bit more on as dressing and rolled the whole conglomeration up nice and neat. The finished wrap looked like a burrito on steroids, all bulked up and ready to kick sand in somebody's face.

I cannot TELL you what an amazing difference that sauce makes in the sandwich. If I'd had any left over after building the two wraps, I'd have used it for dip while eating them. Note to self: double Yogurt Mustard recipe next time. Correction: triple recipe next time.

I urge you to try this. It's astonishingly delicious, quick and easy and I'm thinking it's incredibly versatile. Imagine all the things you could dip in it -- without guilt. Now that's worth a serious round of clappity-clappity.

Thursday, August 14, 2008

Hot Pretzels, Cold Beer

Boy, I had such a picture for y'all tonight. Caught some of the Cedar Waxwings hangin' a bit in the birch trees outside the window. "Hooboy!" I yelled as I grabbed the camera and tore around the table to score the "money shot." (That's intrepid photographer lingo.)

I barely had time to focus on one of the waxwings who seemed almost bright yellow in the sunshine. Then, before I could try for another shot, they all flew away to another destination. No problem, I thought to myself. At least I got the one feller and the light was really good.

So when I uploaded the pictures to the computer, the first one out of the chute was the waxwing photo. Almost drooling with anticipation, I zoomed in on the yellow spot in the branches of the tree. And I blinked. And I backed out of the zoom and looked frantically around the picture. Leaves. Nothing but leaves. All of them green -- except the single yellow one which, in my haste, I had taken to be my feathered target.

It was a nice leaf photo, though. As leaf photos go. (insert sigh)

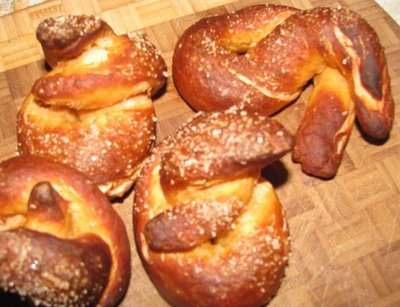
There was somewhat more success with a cooking adventure today. I have no idea how I happened to decide it might be fun to make some soft pretzels but after browsing twenty-eleven recipes, I had to give it a shot. I chose the recipe I found at Sugarlaws, mainly because it produced a small batch -- plenty enough for experimental porpoises. (Those porpoises will get greedy if you let 'em.)

You will need to go to Katy's site if you want to see the original recipe and a couple of excellent photos of her pretzels. Because you know I'm gonna mess with the ingredients, don't you? And I did the soda water thing a bit different than she did so I could get a browner pretzel.

On the other hand, if you want a good chuckle, you can just look at how my pretzels turned out. In my own defense, I've never made pretzels before. Or if I did, I sure don't remember doing it. Because you'd think I'd have figured out how to make the pretzel twist stay in place. That one in the upper right corner sort of got all relaxed and crossed its legs and there wasn't a durned thang I could do about it. Except eat it, of course.


SOFT PRETZELS

2 teaspoons yeast and a pinch of sugar dissolved in
1/3 cup warm pale ale
Let it sit for about 10 minutes until it's nice and foamy.

Add 1 1/4 cups flour, 2 tablespoons sugar, 1/2 teaspoon salt and 1 tablespoon olive oil.
I also added 1 tablespoon chipotle/tomato bouillon and 1 tablespoon onion flakes.


This won't take long -- just dig in with your hand and start mooshing everything together. It may seem too dry but keep at it until the dough cleans the bowl. Trust your instinct -- add a tablespoon or two of warm water if you think you need it. Turn dough out on very lightly floured surface (if you have a silicone pastry mat, you won't need extra flour) and knead for a couple of minutes. Grease the bowl and put the dough back in. Cover and let rise for an hour or so.

Okay, now comes the fun part. First, set your oven at 425 degrees fairyheight. Divide the dough up into 6 equal parts (I only did 4.) Roll each piece into a long rope and let the strands rest while you fix the soda water. In a nonreactive kettle, mix 2 quarts of water and 5 or 6 teaspoons of baking soda. Stir until soda is dissolved and bring to a boil, then reduce heat to a simmer.

Go back to your dough strands. The dough will have relaxed a bit so you can roll it out even longer. Twist each strand into a pretzel shape -- or any old shape that you fancy. What the heck. They're your pretzels, right? Now slip 2 or 3 pretzels at a time into the simmering water and let them cook a bit. This is what gives them the "skin" so they'll turn that lovely dark brown in the oven. Here's where I found a rather wide variance from one recipe to another. Some folks only boil the pretzels for about 20 seconds, some insist on a couple of minutes. I split the difference and let them boil for 1 minute.

Lift each pretzel out of the water with a spatula or slotted spoon and lay on an oiled cookie sheet (or parchment paper or silicone baking mat). Now is a good time to grind some coarse sea salt over the dough, while it's still wet from the water bath. Slip the pretzels into the oven on the top rack (I raised the rack one setting up from the middle) or the bottoms might get too brown. Cook 8 to 10 minutes. Eat them as soon as you think you can avoid blistering your tongue. Serve with mustard, or maybe jalapeno cheese sauce, and cold beer.

Tuesday, August 5, 2008

Soup & Crackers Day

I was going to fix myself some soup and crackers today because it's a soup and crackers day. Overcast, hinting at some form of wetness and just at the south end of a comfy temperature. So, yeah, soup and crackers. Except I didn't have any crackers.

Wait. Why not (gasp!) make my own crackers?

Have I mentioned how much I love Google? It didn't take long to browse abundant cracker recipe links and find an absolute gem of a recipe, one that handily meets my F.E.D. principle. (Fast, Easy, Delicious) If you go to Orb's website, in the food section you'll see the aforementioned recipe titled Orb's Homemade Crackers. I point you there because she deserves the visit and besides, I took certain mild liberties with her recipe so you might want to make comparisons. What follows here is my version of her version, so to speak.

ORB'S HOMEMADE CRACKERS -- TWEAKED

1/2 cup grated cheese
1/2 cup flour
2 tablespoons butter
2 tablespoons water
seasoning to taste


In a small bowl mix cheese, flour and seasoning. I grated the cheese at the smallest size, the one that looks like angel hair, figuring it would blend better. I did not put salt in the mixture because I wanted to sprinkle the dough with salt before baking. What I did do was sprinkle in a light touch of cayenne pepper but you can use any seasoning you fancy -- like onion or garlic or rosemary or whatever.

After you've tossed the mixture a bit so the cheese shreds are nicely flour-coated, plop in the softened butter and the water. TWEAK WARNING: Probably cold butter and liquid would make the crackers flakier but warm is easier to mix. Your call. The crackers will be tender-crisp either way. Also, remember my pie crust the other day? The one with vodka? Yeah. I'm gonna use that stuff up one way or 'tother. My liquid of choice today was 2 tablespoons of ginger vodka. I'll bet you could use pretty much any liquid -- water, milk, beer, tomato juice -- you get the idea.

Anyway. Quickly mix the dough until it cleans the bowl and turn it out on a lightly floured surface. TWEAK WARNING: I have one of those silicone baking mats. Figuring the less flour, the better, I turned the dough out directly onto the mat and rolled it as thin as I could, using a light dusting of flour on top of the dough and on the rolling pin. I figured it would be a lot easier to handle the dough this way. If you don't have a baking mat, tear off a sheet of parchment paper to fit your cookie sheet or, if there are no raised sides on the pan, roll out the dough directly onto its lightly oiled surface.

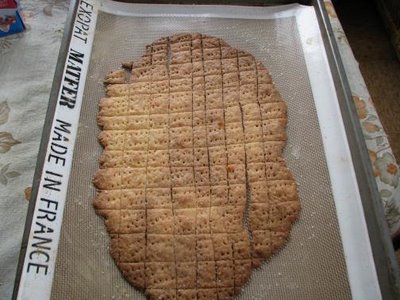
When you've rolled the dough to your satisfaction, take a table knife or wheeled pizza cutter and lightly -- lightly -- score snap lines in the dough. I stress lightly because you don't want to cut your expensive baking mat! After you've scored (heh, heh), poke your dough with a fork -- again, gently -- to minimize puffiness during baking. Now, you could go to a lot of extra effort (and there may be times you'll want to) and patiently cut out little rounds of dough -- or whatever shape you want -- and place them individually on the cookie sheet. That's fine, too. It's just that it's a lot faster and easier to score the sheet of dough and break it up into individual crackers later. So mark your dough and then pick up the silicone baking sheet or parchment paper and lay it on a cookie sheet.

Okay. Now is the time to sprinkle whatever topping you want. I grated some coarse sea salt over the surface. You can go with various herbs or finely chopped nuts or seeds. Gently press the topping into the cracker dough by patting with your fingers. I made the mistake of trying to pass the rolling pin over it. Given that the rolling pin was wider than the cookie sheet (which had raised edges), I pressed unevenly and messed up my nice neat score lines. I'm trying to convince myself that gives the crackers a pleasant artisan look.

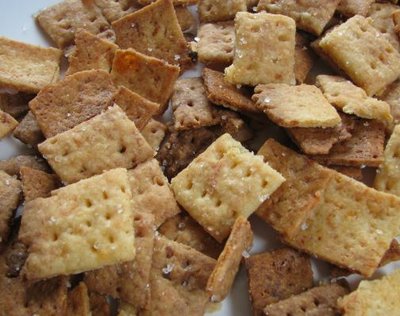
I baked these at 350 degrees fairy height for 15 minutes. You might want to experiment with temp and time. As you can see in the above photo, the sheet of dough did not bake evenly. What you can't see is that the darker part is just as delicious as the golden part. I think it's probably wise to keep an eye on progress after the 10-minute mark so the edges don't get too brown.

When you bring it out of the oven, let the pan set on a rack for a bit. When the crackers are cool enough to handle, snap them into individual little guys. They snap quite easily and it's fun to lick your fingers when you're done. You'll end up with somewhere between a cup and two cups of crackers, easily stored in a pint zip-type freezer bag.

I made the mistake of bringing the bag of crackers in here by the computer. And I keep nibbling. If I'm not careful, I'll be too full of crackers to have any appetite for soup. Self-discipline can be so pesky.


Friday, August 1, 2008

Mystery Meat & Papa Bear

You know about Mystery Meat, of course. That stuff nobody ever admits to eating but it somehow sells and sells and sells? Yeah. SPAM. Hormel's canned luncheon meat, which they like you to refer to in caps to differentiate it from the scourge of the e-mail world, lower case spam. (On a side note, the latter use of the word apparently stems from an old Monty Python skit wherein they chanted Spam! Spam! in mind-numbing repetition.)

SPAM has been around since 1937, making it (barely) older than I am. In the beginning, Hormel referred to it as "miracle meat" but I think that might be considered hopeful elevation. On the other hand, maybe not. How else can one explain its popularity in this health-conscious era when you consider its fat and sodium content? This is not a health food, folks. One 2-ounce portion contains 174 calories, 137 of which are fat!

In spite of that, I'm told it is one of Hawaii's favorite foods and the favorite way to eat it is as the SPAM musubi. That's a sort of sandwich made with layers of rice and SPAM wrapped in nori (seaweed). You can view the recipe here or watch it being made by the Single Guy Chef here.

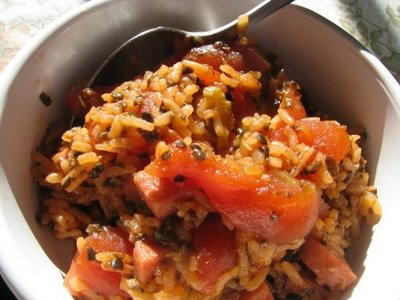
That was far from the only SPAM recipe I found while merrily Googling away. It lends itself to an astonishing number of variations, limited only by the imagination -- and pantry contents -- of the chef. What I ended up making yesterday was an adaption of something billed as Spambalaya, drawing on Cajun-style cuisine. It's quick and easy to fix and the flavor of the finished dish is good enough to almost make you forget what you're doing to your arteries.

Because you will be cooking your rice in the same pan with everything else, you need either a large skillet or a 3-quart saucepan. Now, I never remember the measurements of my saucepans. In my mind they are simply sized as Baby Bear, Mama Bear and Papa Bear. The really big kettle that goes with the set, I just call Clyde. Anyway, I used the Papa Bear saucepan for this gig.

Splash a little olive oil in the saucepan and sautee 1 (12 ounce) can of SPAM that you've cubed all nice and neat, 1 cup of chopped onion and 2 cloves of minced garlic. You can also toss in chopped green pepper and celery if you have it. I didn't. (sigh) When the veggies are tender, add the contents of 1 (14-1/2 ounce) can of diced or stewed tomatoes and shake in, to taste, your favorite hot pepper sauce. (I used the Tabasco Chipotle.) I also had a small can of minced black olives that I tossed in. It's not necessary but seemed like a fun idea. This is that kind of recipe, you know.

The recipe I worked from also called for a 10-ounce can of chicken broth but I used Knorr's tomato-chipotle bouillon in the same amount. Bring the mixture to a boil and add 1 cup of long grain rice, turn the heat down, put a lid on it, and simmer for 20 minutes. Fluff it up with a fork, put the lid back on and let it sit for a good 10 minutes or so. You'll find the rice won't stick to the pot if you do that.

What can I say? This is really, really Good Stuff, Maynard. And you know what? The next time I make it, I'm going to add 1 small can of crushed pineapple, by golly. I'll bet that would work out quite nicely. I should point out that one need not use the high-fat SPAM when making this dish. It would work just as well with any other meat, like my beloved chicken, for instance. Don't you just love dishes that are that flexible? And when they fill the Papa Bear pan, there's plenty for everyone.

Friday, July 18, 2008

Wild Dominoes

You know how they patiently build those endless lines and patterns of dominoes and when they're done, they tip over just one, which topples all the rest, one by one. A prime illustration of how one durned thang can lead you right along to another. It was sort of like that in my kitchen today. The dominoes I was dealing with were the new Whirley-Pop, a container of Jolly Time popcorn, a bowl of cooked chicken ready to be portioned and frozen, a package of bacon and an avocado.

As I sat sipping my morning coffee, my thoughts strolled leisurely from recalling the ease of using the Whirley-Pop yesterday for the coffee beans to contemplation of using it for its original purpose -- a batch of popcorn. I was also thinking I'd like to fashion another meal out of that chicken before freezing the rest of it. Had myself two burritos yesterday stuffed with spicy rice, chicken and cheese. Something similar might just hit the spot today. Like maybe some chicken patties. Except I didn't want to use a lot of the chicken supply so I'd need an extender like bread cubes. Oops. I don't have any bread. Well, I suppose I could whup out a loaf ...

I mulled this over as I got online and registered the Whirley-Pop. Couldn't help but notice all the popcorn recipes while I was at the site. Which got me to thinking -- instead of using bread cubes as an extender, why couldn't I use popped popcorn? That called for a Google session to see if anyone else had done that. Found lots of recipes where the popped popcorn is whizzed through a blender or food processor until a flour is formed. The result is used in baked goods instead of, or in tandem with, regular flour. But I didn't see anything done the way I was picturing it. Hmmm ... time to call on my inner mad scientist.

By the time I got back to the kitchen, my line of mental dominoes was proliferating at an alarming rate. The first thing I did was to whup up a kettle of popcorn (1/3 cup of kernels, which made around 6 cups of popcorn) and set it aside in a bowl.

Then I took the package of bacon and cut it in half across the strips and baked the half-strips in the FlavorWave. That was a shining success! The grease couldn't drip off of the strips fast enough and the bacon cooked perfectly -- and nicely flat, as well.

While that was going on, I started a batch of bread dough with the idea of making hamburger buns instead of a loaf. Any basic bread recipe will do for this. When the dough cycle is done, divide the dough into 8 parts, shape the buns and lay them on a cookie sheet or jelly roll pan that has been sprinkled with a thin layer of cornmeal. Cover and let rise, then bake at 350 degrees for 20 minutes. Gorgeous buns -- and they taste much better than store bought, honest.

The bacon was finished and draining further on paper towels. The dough was doing its thing in the bread machine. Time to have at the chicken. A couple of days ago I boiled the bejaysus out of a whole chicken until it was literally falling off the bones. The result was a lovely bowl of meat that can be used for so many different things it makes one dizzy.

I scooped out enough chicken to measure about 2 cups once it was thoroughly minced to a faretheewell. To that I added about a cup of shredded cheddar and a couple of tablespoons of dry onion flakes. Then I added 1 egg to 1 cup of chicken broth and whisked them together. For seasoning, I wanted to try a tip from the Rachael Ray site. She says if you don't have any smoked paprika, you can make a substitute by mixing 1 tablespoon cumin with 2 teaspoons sweet paprika. So I did. And I scared myself because, without thinking, I put the whole thing in the broth mixture instead of just a portion of it, as I'd intended. Fortunately, the result was wonderful so that goes down in the column under Serendipitous Error.

Now it was time for the "mad" part of the mad scientist experiment. I poured the broth mixture into the chicken mixture and then started working in the popcorn, a couple of cups at a time. Got my hands right into it and started going moosh, moosh, mooshy-moosh. That popcorn slurped up the liquid like a dying man in the desert and it blended itself quite nicely with the other ingredients. I used the whole 6 cups of popcorn. Or maybe it was 7 cups. I'm really not sure of anything except that it all went in before I got the consistency that would allow me to make patties that wouldn't fall apart.

Using an ice cream scoop for portion control, I shaped 8 patties out of the batch. Laid them out on a platter and popped them in the freezer until the buns were ready. That happened all in due course so, while the finished buns were resting with their towel cover, I pulled a couple of the chicken patties out of the freezer to cook. Next time I think they'll do best if they're pan fried with just a touch of olive oil. They're a bit too tender to be laying directly on the wire rack in the FlavorWave, which is how I fixed them this time. It worked out fine but there was a touchy moment there, when I was turning them over to do the other side and thought I was going to lose pieces.

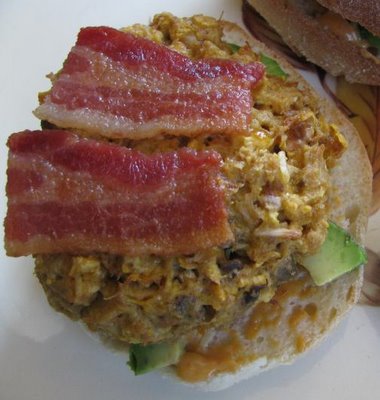
While the patties were cooking, I sliced a couple of buns in half and spread them with chipotle mayonnaise (McCormick makes a really tasty version.) and layered them with avocado slices. The patties fit perfectly on top of the avocado and the bacon settled in place on top of the patties. I cannot TELL you how sublime was the combination of flavors. And nobody would remotely imagine they were eating popcorn.

Well, they wouldn't if I'd made sure there were no unpopped kernels in the chicken mixture. Actually, I was under the mistaken impression that every single kernel had popped but, by golly, I found an "old maid" in the first burger patty. For the record, it was hidden in this one, the one in the closeup below. I think of it as the final domino in the chain.


Tuesday, July 15, 2008

Riding the Wave

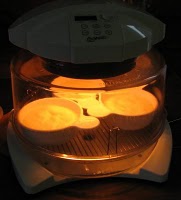
Looks sort of spooky, doesn't it? What you see is an experiment in progress. I hauled out my FlavorWave countertop oven the other day and I've been busy reacquainting myself with its sunny self. I think I've had it for something like three years but it's been stored ever since I moved in here and it fell victim to the old "out of sight, out of mind" syndrome.

There are several different brands of this type of oven out there. NuWave, Koolatron Total Chef, Morningware Halogen and Super Turbo, to name a few. They all operate pretty much the same, cooking via conductive heat (like your oven), convection (with constantly circulating hot air) and infrared. That's what you see in the photo to the left. The infrared is doing its thing.

I really love this oven. It's great for when you don't want to turn on the regular oven and heat up the kitchen. Also, it uses a lot less electricity, which cannot be a bad thing. For some things it's faster than a regular oven, for others, it takes just as long -- which isn't a problem if you're not in a hurry anyway. It really shines at perfectly cooking meats from a frozen state but it does other things well, too. And there are a few things it can do well only if you figure out the magic formula.

Baked goods, for instance. It seems to be fine if what you're baking isn't going to raise up real tall in the saddle. Don't know yet how it would do with round loaves of artisan bread but I don't think I want to try a regular loaf in there. I do know I can make killer yeast rolls and hamburger buns in it, and biscuits do just fine, thank you. The problem is, there really aren't a lot of recipes available for cooking with these ovens. That seems to be a common complaint with most owners of the little beasties. Which is why I experiment and try to figure out how to adapt regular recipes to the FlavorWave's style of doing things.

I found out it will cook my beloved Yorkshire puddings just beautifully. That was a relief. But today I got to thinking about doing a pudding cake. A lemon pudding cake, to be specific. This is a lovely concoction wherein the batter separates into a light, souffle-like cake on top and a pudding on the bottom. You can make it in a big baking dish or in individual servers, as I did here. Once the two extras cool completely, I'll pop a lid on them and put them in the refrigerator where, I'm told, they'll keep just fine for several days. That is, they would if I didn't eat them first. Wanna guess which it will be?

I did a lot of hunting for this recipe -- which is actually a conglomerate of several -- and I'll lay it out for you the way you'd do it in a regular oven and then, in case you have one of these countertop ovens, I'll 'splain what I did in the FlavorWave. Okay? Okay, this am the way it goes ...

In a bowl, whisk together: 1/2 cup flour, 3/4 cup sugar, 1/2 teaspoon salt.

Separate 2 eggs. Add the yolks to the flour mixture, along with 1/3 cup lemon juice, 1/2 teaspoon vanilla and 2/3 cup milk. Whisk until well mixed.

Beat egg whites until stiff and fold gently into the other mixture. Pour into buttered baking dish (or dishes) and place in larger pan in 350 degree oven. Pour very hot water into outside pan, up to about the halfway level of your baking dish. Bake about 45 to 50 minutes. Remove from water bath when done. Can be eaten from baking dish or turned out on serving plate. Good hot or cold.

Note: There is enough batter for a 1 quart (4 cup) baking dish. The individual Corning Ware dishes I'm using hold 2 cups max so I guess I probably put about 1 1/3 cups of batter in each one. Just so you know.

Okay, here's the deal for the FlavorWave version. The whole idea of a water bath for these cakes is to keep the pudding part from cooking too fast and getting too firm. But the FlavorWave's heat source is only at the top. Granted, hot air circulates all around the cooking item but the bottom doesn't cook as fast as the top, which means some things need to be turned over halfway through the cook cycle. With that in mind, I did without the water bath in the Flavorwave, put the puddings on the low rack and set it for 1/2 hour, on High.

There were still 18 minutes left when I gasped and said, "Whoa! These puppies are getting brown way too fast!" Cleared the control window and reset it for 325 degrees and turned it loose again. That seems to have worked just fine. Next time I'll probably do it for maybe a full 45 minutes, given the lower temperature.

I chose to turn my sample pudding cake out onto a plate. As you can see, it's not so pretty. The pudding cooked firm and had to be spooned out. I'll just eat the others right out of their cooking bowls.

As for flavor, oh my stars and garters. The cake part is extremely light and fluffy and the pudding is lemony bliss. One could add whipped cream or ice cream to this dessert but I really think that would be overkill. A sprinkling of fresh berries would be nice, though. Raspberries. Strawberries. Blackberries. Nom, nom, nom!

Note to self: next time, I'm going to try it with only 1/2 cup sugar and 1/2 cup lemon juice. I likes me that lemon.

Sunday, June 22, 2008

Wolf in the Hen House

I can only sigh when I look wistfully at that photo. What you see there is currently residing in my very happy tummy and I wish I'd made twice as much. At least.

Wolfie started it. When I dropped in at her place this morning, she was sharing a most excellent recipe with us and if you hit that link, you'll be able to see why Manning, her fireman friend, has won well-deserved fame for his most excellent chicken hot bites.

Now, I didn't have the particular kind of hot sauce Wolfie mentioned but I have some perfectly wonderful Trader Joe's Jalapeno Hot Sauce that, as far as I can tell, worked super-good. So I cut up one breast of chicken (should have done two), shook enough hot sauce over the chicken so that each piece was well coated, then put a lid on the bowl and left it in the fridge for two or three hours.

I don't know what the fish fry batter mix is like but I suspect it's similar to the tempura batter I learned to make years ago, from my Japanese sister-in-law, Betty. If you'll forgive the alliteration, I've never found a better beer batter. Here's all you have to do:

BETTY'S BETTER BEER BATTER

In a small bowl, combine equal parts all purpose flour and corn starch. Add seasoning to taste. I usually use salt, pepper and either garlic powder or onion powder. You can also add just about any kind of spice or herb that seems to fit the occasion. It's your call. Stir all the dry ingredients together well, then crack in one egg and a little bit of beer. Start mixing with a whisk, adding beer as necessary, until you have something the consistency of pancake batter. Not too thick, or you'll end up with yucky, doughy fried food. Not too thin or most of it will run off the food. You don't have to whisk all the lumps out of the batter, surprisingly enough. But you can if you want to. Unless you're making an awful lot of batter, you'll have most of that can or bottle of beer left. That's nice to sip on while you're frying all that tempura over a hot pan of oil.

As you can see, this is a highly flexible recipe. The only hard and fast measurement is the single egg. Just so you'll know, the batter I made today started with 1/3 cup each of flour and corn starch. I knew I wouldn't need much batter but felt that was the least amount I could get by with to balance out the egg. I used Blue Heron pale ale instead of beer and the result was great. There again, use your own judgment. Follow your bliss.

By the way, I'm always reading that one should use room temperature, flat beer for cooking. I don't worry about that. If the beer needs to be warm, I'll nuke it briefly and call it good. Otherwise, it gets used cold and fresh -- which makes for pleasanter sipping of whatever is left over, don'cha know?

I don't know how many pieces of chicken I had. Maybe a couple dozen. Didn't take long to fry them up to golden brown and drain on a paper towel. Then I sat down with the chicken hot bites and a bowl of lemon curd for dipping and figured I'd nibble on, ohhhh -- six or eight, give or take a couple.

Oh my. It was magic. The way every single chicken bite simply vanished. It's not the sort of thing you can stop eating before it's all gone, that's all there is to it. If you make it to share with others, all I can say is you need to get your portion out of the platter right off the git-go and be prepared to guard your plate with weapons of immediate and painful destruction.

Wolfie, thank you for sharing the recipe and please give Manning a grateful hug from me next time you see him. Just so you know, you can hang out at my hen house any time.


Saturday, May 31, 2008

Lentilicious!

Given the distance and the lighting, this is far from a good shot. Still, I'm just happy to have managed to capture even this picture of the Cedar Waxwing that dropped in the other day. Actually, they've been coming by for several days in a row but there was only once one of them perched on a branch close to my window -- in sunlight -- and sat there looking gorgeous. Until I raised the camera. Just as the focus was zeroing in on him, he flew away. (Insert sob.) Other than that single tease, the flock tends to perch briefly in the trees furtherest away, in lighting that makes it impossible to get much more than silhouettes.

As an aside, there are times I really love SpellCheck. I simply never remember how to spell silhouette. It's so nice to type in my best guess and then have SpellCheck correct me.

Ava, remember asking me about lentil recipes awhile back? Well, I can finally share one with you -- and any other of you Coffee Mates who might be interested. I don't know how it happened that lentils have never crossed my lips before. One of life's mysteries, I reckon. But I finally got around to picking up a bag of them at the market today and, for my first performance, happily whupped up some lentil burritos.


I was only going to make a couple of them but I grated up so much colby/jack cheese that I ended up with four. Which is great. Elevenses, you know. I was very impressed with the result. The lentils -- at least in this recipe -- taste very much like beans so the burrito didn't seem so bizarre after all.

What I did was bring 1 cup of chicken broth to a boil and stir in 1 cup of rinsed and drained lentils. Put the lid on, turned the heat down to low and let them simmer for 20 minutes. In the meantime, in a neighboring frying pan, I sauteed half a medium onion, minced, 1 of my lemon drop chili peppers, minced, and 1 teaspoon of minced garlic. I also added about a cup of summer sausage that I'd run through the chopper so it was like crumbled hamburger. When the onion was nicely tender, I turned that pan down to low also.

When the 20 minutes was up, I turned the lentils, remaining broth and all, into the onion and sausage mixture, stirred everything up good, put a lid on it and let everything continue to cook at the low setting until all the extra broth had been absorbed. I don't know how long that took because dotter Patti called and we chatted awhile before I remembered I was cooking my din-din.

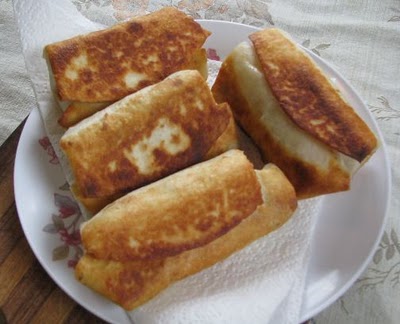
Okay. Turned the mixture into a bowl and let it cool just a little. Grated up a chunk of the colby/jack cheese and pulled out the package of flour tortillas. Yeah, I bought 'em this time instead of making them. Plopped about 3 heaping spoonsful of the lentil mixture onto each tort and rolled it up like a burrito, setting each one on a plate with the flap side down. I had a shallow layer of vegetable oil heating in the freshly cleaned frying pan. When it was ready, I laid each burrito, flap side still down, into the oil very carefully and let them fry until golden. Turned them with kitchen tongs and browned the other side, then set them on a paper towel to catch any excess oil.

As you can see in the photo, one of them tried to unroll on me when I turned it over. No harm done. All the good stuff stayed inside. And it was good stuff! Really, really good. I find it difficult to say, "Nom, nom, nom," and chew at the same time but I figure orgasmic moaning translates the same.

I had a goodly portion of the filling left over so it's sitting in the refrigerator waiting for the next incarnation. I think I'll add some diced tomatoes and a bit of 'mater juice and cook it up a bit, then serve it over rice. What do you think?

Wednesday, May 21, 2008

Klutz-Proof Kluskis

You've seen me drooling over kluski noodles before. There's something special about a kluski. It seems to have more character, more substance, than other noodles. I don't really know why that would be since the basic recipe is a simple egg-flour-water concoction. Maybe it's because the kluskis aren't all neatly trimmed and regimented but rather rough and homely and blue collar, if you will.

In any case, given that the last few days have been the opposite of last week's mini-heat wave and my thoughts have turned again to cool weather food, I got to hungering after some good old-fashioned kluskis. Originally a Polish food, it's become a staple of Amish cooking in this country. You can order kluski noodles online, which is a good thing since they aren't necessarily easy to find in the local grocery stores. In this area, I can buy kluskis at the supermarket in the neighboring town but not here at our little market.

Which is why I thought, hey! I'll betcha even a klutz like me can make kluskis. How hard can it be?

Not very, as it turns out. Your basic kluski recipe seems to require one cup of flour per egg, plus seasoning and enough water to form a kneadable dough. Since I only had one egg on hand, that made the measurements simple. Here's how it went for me. For larger batches, just keep the 1 egg per 1 cup of flour ratio.

KLUSKI NOODLES

In a small bowl, mix together 1 cup flour (any kind) and 1 teaspoon salt, plus any other seasoning you wish. (I used 1 tablespoon of chicken bouillon, which is plenty salty enough by itself. All kinds of different herbs or spices would be fine, depending on your mood.) Make a well in the flour and drop in 1 egg that's been whisked fairly well. Add a couple of tablespoons of water and start mixing everything together. Add water as necessary, 1 tablespoon at a time, until the dough forms a ball and starts cleaning the bowl. (The amount of water you need will probably vary according to how big your egg was and the humidity.) Turn the dough out onto a lightly floured board and knead for about a minute. Pat it down flat and roll it out to the desired thickness. Kluskis are thick noodles but remember, they'll swell as they cook. I sort of forgot that swelling part so I cut mine bigger than I should have -- not that it really matters.

Let the dough air out for awhile. If you dust it lightly with flour, that will help it dry a bit. Put a kettle of water on the stove and set it to boil. For this much dough I used 6 cups of water, which seemed to work fine. Roll the dough up like you were going to make cinnamon rolls and cut it into narrow slices. When you unravel the slice, toss the resulting noodle onto a dish. When you finish, you'll have a nice tangled mass of noodles all ready to cook. (At this point, if you want to, you can let them continue to air dry for a while longer, then store, covered, in the refrigerator to cook later. Or you could freeze them to cook a lot later.)

Assuming you're too hungry to go for later, slide the noodles into the rapidly boiling water and stir gently to separate them and keep them from sticking to the bottom of the pot. When the full boil comes back, turn the heat down just enough to maintain the boil and let the noodles cook for 10 minutes or so, stirring a couple more times just to be safe.

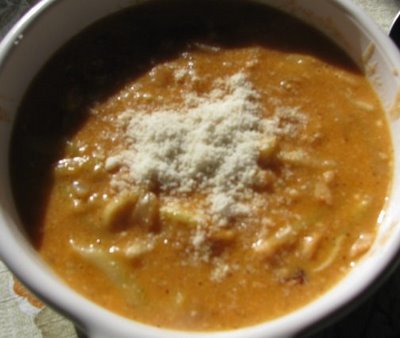
After the 10 minutes is up, drain the noodles and pour them into a bowl. You can dress them up any way you want. For the above picture, I pan fried a can of drained tuna with 1 minced lemon drop pepper and added some of my homemade cream of chicken soup mix* and enough water to make a gravy. Poured that over the noodles and tossed everything together, then ladled some out onto a plate and sprinkled it with Parmesan cheese. Then I sat down and took a taste.

Oh my sweet sybarite soul.

Not only did it taste wonderful, it tasted wonderful through two very generous meals. I'm sure it could have been stretched even further had I added something like shredded chicken and mixed veggies. And who knew something this good would be that easy to fix. When even Madame Klutz, here, can do it, anyone can. I'm already plotting variations on the next batch. Wonder how it would work to knead minced onions into the dough? Yum!

*CREAM OF CHICKEN DRY SOUP MIX

Mix together in a bowl: 2 cups nonfat dry milk, 3/4 cup corn starch, 1/4 cup chicken bullion granules or powder, 2 tablespoons dry onion flakes OR 1 teaspoon each onion powder, basil, thyme and 1/2 teaspoon pepper. Store in airtight container at room temperature. To use: combine 1/3 cup dry soup mix with 1 1/4 cup water. Mix well in small saucepan, bring to a gentle boil, stirring constantly, until mixture thickens. (Or cook in microwave 2 to 4 minutes, whisking each minute until thick.)

Saturday, May 17, 2008

Tortilla Jones

That this photo exists at all is a testimony to the power of the urge when I decide, by damn, I want some tortillas!

This was yesterday, a day that dawned sunny and by only 8:00 in the morning was already in the high seventies. Late afternoon had me flopping around and panting in eighty-plus degree heat and unwilling to expend any more energy than was required to wipe off the freshest layer of sweat. Unfortunately, if was during that latter part of the "heat wave" that my tortilla jones raised its insistent head ... and I was fresh out of the tortillas I usually buy at the store.

See, one of my favorite snacks is to throw a tortilla on the pizza pan, sprinkle it with shredded cheese and spicy seasoning, then put it in the oven until the cheese is bubbly and the tortilla starts to get crispy. Then I take it out and cut it in wedges with a pizza cutter and go "Nom, nom, nom," until I've finished the whole thing.

You can't do that if you don't have tortillas.

So I had to make some tortillas, never mind that just the effort of rolling them out made me drip like I was standing in the shower. I figured if I survived the whole silly production, I would have sweated off any calories in advance. Now that it's over, I'm sure that's true.

I shared the recipe back in July last year, the entry titled "Tortilla Sunset," but to save you the bother of looking it up, here's the quick version:

Mix together 2 cups flour, 1 1/2 teaspoons baking powder and 1 teaspoon salt. Add 3/4 cup warm milk and 2 teaspoons vegetable oil. Mix well, turn out onto floured surface and knead a couple of minutes. Cover dough and let rest 20 minutes. Divide into 8 portions, shaping into balls. Cover and let rest 10 minutes. Pat each ball out with fingers, then roll thin. Slap into dry skillet at medium heat and cook 1 to 2 minutes on each side. The torts will puff up. That's okay. Stack cooked torts on plate covered with folded kitchen towel. When cool, can be slipped in plastic bag and kept in refrigerator or frozen.

So I did all that -- with the fan turned on and aimed directly at my wilting miserable self. It was all worth it. The spicy cheese tort/pizza was sublime and my jones gland was satisfied. Not only that, later, while in the middle of a book, I slathered some butter and peanut butter on another tort, rolled it up, and snacked and read to my heart's content. Okay. My tummy's content.

Sometimes, you know, that's the same thing.

Wednesday, May 14, 2008

Little Round Hot Things

I don't mean hot as in "spicy hot." Although you certainly could spice them up if you felt like it. It's just that I snapped the pictures when they were right out of the oven and the camera lenses kept steaming up if I got too close.

What we have here is a magical incarnation of polenta that is sorta-kinda based on a recipe I found at Food Down Under. Incredible web site with all manner of recipe bounty covering just about any sort of food you can imagine. For the polenta, for instance, there are 587 recipes!

If you want to see the original for this dish, look up Recipe #93777, titled Easy Cheesy Savory Polenta. Those instructions call for pouring the cooked polenta into a pie dish and cutting it into wedges. I poured mine into a rectangular baking pan and cut out the rounds with a small biscuit cutter. The rounds were roughly 1/4 to 1/2 inch thick and I got 23 of them. The scraps will be chopped up and sauteed golden brown and added to a hash. For my version of Little Round Hot Things, here's what you do:

In a microwave-safe mixing bowl, put 3 cups water, 1 cup cornmeal, 3 teaspoons chicken bouillon and whatever seasonings strike your fancy. I used a healthy dose of Mrs. Dash chipotle seasoning. Microwave on high for 5 minutes, whisk thoroughly, microwave another 5 minutes. Whisk again, then whisk in a tablespoon-sized glob of butter, a tablespoon of dried onion flakes and about 1/4 cup (2 ounces) of grated Parmesan cheese. Spread polenta in oiled pan, trying to smooth it as level as possible, and let cool for at least 15 minutes. (I just slipped the pan in the refrigerator.) Cut out rounds and place on cookie sheet.

Now, the original recipe says to broil one side for 5 to 7 minutes, then flip everything over, sprinkle with shredded cheese and broil another 3 to 5 minutes, until cheese is bubbly and golden brown. Which is what I did. In retrospect, I'll bet I could have simply baked it at about 400 degrees until the cheese was just right and the Little Round Hot Things would have ended up pretty much the same -- without all that flipping stuff over. That's what I think. I'll find out next time I make these -- and there WILL be a next time.

I'm thinking these would make darned good party food. You could make the rounds up ahead of time and freeze them, then just take them out and bake them when ready. Or even just do them up earlier in the day, right up to the oven part, then bake them just before you want to serve everybody. They are great finger food because they hold their shape while remaining creamy-smooth and tender and addictively delicious. And, really, you could add all kinds of interesting goodies to the polenta before you spread it out to set. Minced green and red pepper, for instance. Or sun-dried tomato. Or tiny bits of cooked chicken or pepperoni or whatever.

Little Round Hot Things. Yeah. Makes me smile.

Monday, May 12, 2008

Stealth Butter

I know what you're thinking. You're thinking that is yet another shot of yet another lemon curd recipe and when the hell is that woman gonna quit making lemon curd? Hah! You will be relieved to know that is not lemon curd. Not even close.

What it is, Coffee Mates, is something called Extended Butter. Frankly, I'd never heard of it before, although I understand it was an idea in use during World War II when everything was rationed. I do remember, when I was five or six years old, something about sugar and gas rationing but we lived on a dairy farm. Butter was not something we did without.

I'm signed up for the daily email newsletter from Tip Nut, which almost always has some neat bit of information. Today was the butter thing -- "How To Turn One Stick Of Butter Into Two" -- and I said, "Huh? Really?"

This interests me because I don't do margarine anymore, preferring butter for all kinds of reasons. So it certainly wouldn't hurt my feelings to save a few cents on it, right? There just happened to be roughly two-thirds of a stick of room temp butter in the butter dish so I decided to test it out.

Now, the formula given is 1/2 cup of lukewarm water per stick of butter (which, by a lucky coinkydink, is also 1/2 cup). You're supposed to gradually cream in the water, making sure it's all incorporated as you go along. (You may use a mixer at low speed.) I'm afraid I forgot that "gradually" part and just dumped all the water in at once and hit it with my immersion blender. Which worked out fine except there seemed to be just a teensy bit too much water. I don't know if that's because I didn't add it slowly or if it's because I guesstimated too far in the plus category with the amount of water I should add. I put in 1/3 cup instead of the 1/4 cup that was probably more accurate.

Not a problem. I just held the mass of whipped butter with a spatula while I tipped the bowl and drained out the excess. The butter firmed right up in the refrigerator and I gotta say, it really doesn't taste any different now than it did before. Hmmm.

Hmmm, indeed. This raises all kinds of interesting possibilities. It isn't just a matter of saving a little bit of money. If all you're adding is water, you're simply making "light" butter, so if you slather your usual amount on your baked potato, you're only getting half the calories. Right? Therefore, by default, this extended butter is healthier than the regular butter. Think of that butter pat as a mere shadow of its former self. A sort of stealth butter if you will.

Only thing is, they don't recommend you use it in baking because the amount called for would consist of half the required fat so it may affect the texture of your baked goods in an unfortunate way. Well, we'll see. There must be some goodies that would be okay with stealth butter. I'll have to check into that. In the meantime, I have this intense craving for baked potato. Slathered with some of my freshly churned stealth butter, of course.

Saturday, May 10, 2008

Goddess Lemon Curd -- Really

I know the lemon curd recipe I gave you awhile back was good. Of course it was. But I wasn't quite completely happy with it so there was no getting out of continued research and experimentation. Some of the results were okay, a couple were, let's say, unfortunate. It all worked out in the end. The above closeup may not actually be the Ultimate Microwave Lemon Curd but it has to be at least penultimate. At least. It makes me swoon. A mere teaspoon of the blessed stuff inspires giddiness and spontaneous humming.

My research turned up interesting information. Did you know lemon curd is also known as lemon cheese or lemon butter? I would guess that latter label is meant in the same sense as apple butter, do you think? Also, although only a couple of sources mentioned it, it's supposed to be better for the texture of the curd to add the butter last. (Some recipes don't call for butter at all.) In any case, that's what I did with this new recipe and the finished curd slides like silk across your tongue.

Also, there seems to be some difference of opinion on this but some chefs say using whole eggs makes for a thicker curd while others insist using only the yolks makes it thicker. I can't vouch for the difference, if any, because I hate recipes that require me to leave out either whites or yolks. Somehow they never seem to get used in anything, in spite of my best intentions.

But enough of that. Here's how you make Killer Lemon Curd. Wait. Why do all the best foods get accused of having a lethal nature? Killer This. Death by That. That can't be right. We'll have to do better. We'll call it:

GODDESS LEMON CURD
Whisk together: 1/2 cup sugar, 1/2 cup lemon juice and 2 eggs. Microwave on high for 2 minutes. Whisk again, return to microwave for 1 more minute. Remove from oven and whisk in 1/4 cup of butter (2 ounces) that has been cut into pats, whisking one at a time until melted. Microwave for the final 1 minute, remove, whisk and let cool. Put in container with lid and refrigerate. Makes about 1 1/4 cups curd.

There you have it. Counting measuring and egg-cracking and whisking time, incredible curd in 5 or 6 easy minutes. It doesn't get much better than that. To my mind, the flavor of this version is the perfect balance of sweet and tart and, as I said, the texture is like silk. That gouge in the middle of the above bowl of curd happened when I spooned up some to fill a tart shell. And the angels sang.

I should add these notes: I'm using an 800 watt microwave. If yours is more powerful, you may want to adjust either time or power level. The thing you want to avoid is having flecks of egg white to sully the gold of your curd. That happens if you cook too high or too long. There appeared to be some flecks when I pulled it out after the first 2 minutes but a vigorous whisking seemed to solve that problem nicely.

When the curd is first done, it will seem runny. Don't be tempted to cook it longer. As long as it's thick enough to coat a spoon, it's just right. It will rapidly thicken as it cools and will end up about the consistency of mayonnaise or pudding.

I'm sure you could melt the butter before you whisk it in but that's just getting another dish dirty. Cut the pats right on the paper the cube was wrapped in, then toss the wrapping. The solid butter melts rapidly in the hot mixture and, anyway, I'll bet all that whisking is good for the curd. At the very least, it will make you feel virtuous and chef-like.

This smaller amount is perfect for me. I'm much more likely to use it all up before it gets too old. Besides, any time I want more, I can easily spare 5 or 6 minutes to fix it. I really don't know how well it would turn out if you doubled the recipe, supposing you wanted larger batches for gift giving. You might try one big batch to see, keeping in mind cooking time might be just a bit longer.

Jo had a great idea, using the curd for dipping sauce for her chicken fingers. I can vouch for how great it is in place of mayo in chicken sandwiches. Wonder how many other neat ways there are to use it? And then -- you know this HAS to happen, don't you -- there will be the fun of making curd with all different kinds of juices. Yum! A goddess just wants to have fun.