Saturday, May 31, 2008

Lentilicious!

Given the distance and the lighting, this is far from a good shot. Still, I'm just happy to have managed to capture even this picture of the Cedar Waxwing that dropped in the other day. Actually, they've been coming by for several days in a row but there was only once one of them perched on a branch close to my window -- in sunlight -- and sat there looking gorgeous. Until I raised the camera. Just as the focus was zeroing in on him, he flew away. (Insert sob.) Other than that single tease, the flock tends to perch briefly in the trees furtherest away, in lighting that makes it impossible to get much more than silhouettes.

As an aside, there are times I really love SpellCheck. I simply never remember how to spell silhouette. It's so nice to type in my best guess and then have SpellCheck correct me.

Ava, remember asking me about lentil recipes awhile back? Well, I can finally share one with you -- and any other of you Coffee Mates who might be interested. I don't know how it happened that lentils have never crossed my lips before. One of life's mysteries, I reckon. But I finally got around to picking up a bag of them at the market today and, for my first performance, happily whupped up some lentil burritos.
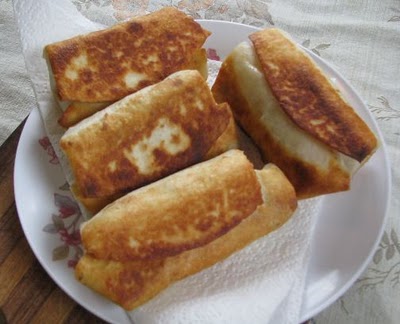

I was only going to make a couple of them but I grated up so much colby/jack cheese that I ended up with four. Which is great. Elevenses, you know. I was very impressed with the result. The lentils -- at least in this recipe -- taste very much like beans so the burrito didn't seem so bizarre after all.

What I did was bring 1 cup of chicken broth to a boil and stir in 1 cup of rinsed and drained lentils. Put the lid on, turned the heat down to low and let them simmer for 20 minutes. In the meantime, in a neighboring frying pan, I sauteed half a medium onion, minced, 1 of my lemon drop chili peppers, minced, and 1 teaspoon of minced garlic. I also added about a cup of summer sausage that I'd run through the chopper so it was like crumbled hamburger. When the onion was nicely tender, I turned that pan down to low also.

When the 20 minutes was up, I turned the lentils, remaining broth and all, into the onion and sausage mixture, stirred everything up good, put a lid on it and let everything continue to cook at the low setting until all the extra broth had been absorbed. I don't know how long that took because dotter Patti called and we chatted awhile before I remembered I was cooking my din-din.

Okay. Turned the mixture into a bowl and let it cool just a little. Grated up a chunk of the colby/jack cheese and pulled out the package of flour tortillas. Yeah, I bought 'em this time instead of making them. Plopped about 3 heaping spoonsful of the lentil mixture onto each tort and rolled it up like a burrito, setting each one on a plate with the flap side down. I had a shallow layer of vegetable oil heating in the freshly cleaned frying pan. When it was ready, I laid each burrito, flap side still down, into the oil very carefully and let them fry until golden. Turned them with kitchen tongs and browned the other side, then set them on a paper towel to catch any excess oil.

As you can see in the photo, one of them tried to unroll on me when I turned it over. No harm done. All the good stuff stayed inside. And it was good stuff! Really, really good. I find it difficult to say, "Nom, nom, nom," and chew at the same time but I figure orgasmic moaning translates the same.

I had a goodly portion of the filling left over so it's sitting in the refrigerator waiting for the next incarnation. I think I'll add some diced tomatoes and a bit of 'mater juice and cook it up a bit, then serve it over rice. What do you think?

Wednesday, May 21, 2008

Klutz-Proof Kluskis

You've seen me drooling over kluski noodles before. There's something special about a kluski. It seems to have more character, more substance, than other noodles. I don't really know why that would be since the basic recipe is a simple egg-flour-water concoction. Maybe it's because the kluskis aren't all neatly trimmed and regimented but rather rough and homely and blue collar, if you will.

In any case, given that the last few days have been the opposite of last week's mini-heat wave and my thoughts have turned again to cool weather food, I got to hungering after some good old-fashioned kluskis. Originally a Polish food, it's become a staple of Amish cooking in this country. You can order kluski noodles online, which is a good thing since they aren't necessarily easy to find in the local grocery stores. In this area, I can buy kluskis at the supermarket in the neighboring town but not here at our little market.

Which is why I thought, hey! I'll betcha even a klutz like me can make kluskis. How hard can it be?

Not very, as it turns out. Your basic kluski recipe seems to require one cup of flour per egg, plus seasoning and enough water to form a kneadable dough. Since I only had one egg on hand, that made the measurements simple. Here's how it went for me. For larger batches, just keep the 1 egg per 1 cup of flour ratio.

KLUSKI NOODLES

In a small bowl, mix together 1 cup flour (any kind) and 1 teaspoon salt, plus any other seasoning you wish. (I used 1 tablespoon of chicken bouillon, which is plenty salty enough by itself. All kinds of different herbs or spices would be fine, depending on your mood.) Make a well in the flour and drop in 1 egg that's been whisked fairly well. Add a couple of tablespoons of water and start mixing everything together. Add water as necessary, 1 tablespoon at a time, until the dough forms a ball and starts cleaning the bowl. (The amount of water you need will probably vary according to how big your egg was and the humidity.) Turn the dough out onto a lightly floured board and knead for about a minute. Pat it down flat and roll it out to the desired thickness. Kluskis are thick noodles but remember, they'll swell as they cook. I sort of forgot that swelling part so I cut mine bigger than I should have -- not that it really matters.

Let the dough air out for awhile. If you dust it lightly with flour, that will help it dry a bit. Put a kettle of water on the stove and set it to boil. For this much dough I used 6 cups of water, which seemed to work fine. Roll the dough up like you were going to make cinnamon rolls and cut it into narrow slices. When you unravel the slice, toss the resulting noodle onto a dish. When you finish, you'll have a nice tangled mass of noodles all ready to cook. (At this point, if you want to, you can let them continue to air dry for a while longer, then store, covered, in the refrigerator to cook later. Or you could freeze them to cook a lot later.)

Assuming you're too hungry to go for later, slide the noodles into the rapidly boiling water and stir gently to separate them and keep them from sticking to the bottom of the pot. When the full boil comes back, turn the heat down just enough to maintain the boil and let the noodles cook for 10 minutes or so, stirring a couple more times just to be safe.

After the 10 minutes is up, drain the noodles and pour them into a bowl. You can dress them up any way you want. For the above picture, I pan fried a can of drained tuna with 1 minced lemon drop pepper and added some of my homemade cream of chicken soup mix* and enough water to make a gravy. Poured that over the noodles and tossed everything together, then ladled some out onto a plate and sprinkled it with Parmesan cheese. Then I sat down and took a taste.

Oh my sweet sybarite soul.

Not only did it taste wonderful, it tasted wonderful through two very generous meals. I'm sure it could have been stretched even further had I added something like shredded chicken and mixed veggies. And who knew something this good would be that easy to fix. When even Madame Klutz, here, can do it, anyone can. I'm already plotting variations on the next batch. Wonder how it would work to knead minced onions into the dough? Yum!

*CREAM OF CHICKEN DRY SOUP MIX

Mix together in a bowl: 2 cups nonfat dry milk, 3/4 cup corn starch, 1/4 cup chicken bullion granules or powder, 2 tablespoons dry onion flakes OR 1 teaspoon each onion powder, basil, thyme and 1/2 teaspoon pepper. Store in airtight container at room temperature. To use: combine 1/3 cup dry soup mix with 1 1/4 cup water. Mix well in small saucepan, bring to a gentle boil, stirring constantly, until mixture thickens. (Or cook in microwave 2 to 4 minutes, whisking each minute until thick.)

Saturday, May 17, 2008

Tortilla Jones

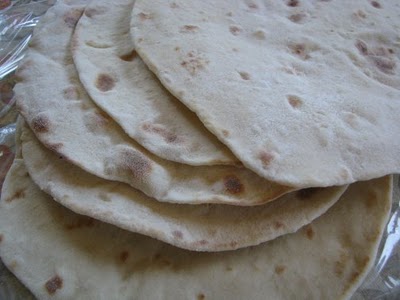
That this photo exists at all is a testimony to the power of the urge when I decide, by damn, I want some tortillas!

This was yesterday, a day that dawned sunny and by only 8:00 in the morning was already in the high seventies. Late afternoon had me flopping around and panting in eighty-plus degree heat and unwilling to expend any more energy than was required to wipe off the freshest layer of sweat. Unfortunately, if was during that latter part of the "heat wave" that my tortilla jones raised its insistent head ... and I was fresh out of the tortillas I usually buy at the store.

See, one of my favorite snacks is to throw a tortilla on the pizza pan, sprinkle it with shredded cheese and spicy seasoning, then put it in the oven until the cheese is bubbly and the tortilla starts to get crispy. Then I take it out and cut it in wedges with a pizza cutter and go "Nom, nom, nom," until I've finished the whole thing.

You can't do that if you don't have tortillas.

So I had to make some tortillas, never mind that just the effort of rolling them out made me drip like I was standing in the shower. I figured if I survived the whole silly production, I would have sweated off any calories in advance. Now that it's over, I'm sure that's true.

I shared the recipe back in July last year, the entry titled "Tortilla Sunset," but to save you the bother of looking it up, here's the quick version:

Mix together 2 cups flour, 1 1/2 teaspoons baking powder and 1 teaspoon salt. Add 3/4 cup warm milk and 2 teaspoons vegetable oil. Mix well, turn out onto floured surface and knead a couple of minutes. Cover dough and let rest 20 minutes. Divide into 8 portions, shaping into balls. Cover and let rest 10 minutes. Pat each ball out with fingers, then roll thin. Slap into dry skillet at medium heat and cook 1 to 2 minutes on each side. The torts will puff up. That's okay. Stack cooked torts on plate covered with folded kitchen towel. When cool, can be slipped in plastic bag and kept in refrigerator or frozen.

So I did all that -- with the fan turned on and aimed directly at my wilting miserable self. It was all worth it. The spicy cheese tort/pizza was sublime and my jones gland was satisfied. Not only that, later, while in the middle of a book, I slathered some butter and peanut butter on another tort, rolled it up, and snacked and read to my heart's content. Okay. My tummy's content.

Sometimes, you know, that's the same thing.

Thursday, May 15, 2008

Zap Zap Zsssst!


The question is whether or not food cooked in the microwave is safe for hoomun beans. The answer is, at best, ambiguous. Testing has been done, to be sure, but there seem to be as many conflicting results as tests. It's enough to make you stick your head in the microwave and turn it on -- except it won't work if the door is open. In that way, at least, we know it's safe for hoomun beans.

Bex, when you asked the question, I think you were talking about reports that microwave cooking altered the structure of food in ways that were nutritionally destructive and unhealthy for consumption. I've read those reports too and was concerned about them. I'll try very hard not to inundate all y'all with the boring stuff through which I waded while wearing protective hip boots and tossing grains of salt all around. Because no matter which side of the pro/con argument you find yourself, it's necessary to discriminate and weigh.

Of primary concern would be the quality of the testing. How many "samples" and how often or for how long? Blind testing? Double-blind? Laboratory conditions, controls? And, very important in the "follow the money" method of detection -- who is funding the research?

I have great respect for science and scientific research. That doesn't mean I'm not aware that scientific methodology can be sloppy and inaccurate or simply insufficient for conclusions. Or that it can be slanted according to desired results. Sometimes, no matter how smart those scientist critters are, we just have to go with what we laughingly call our own common sense. After all my Google activity and reading and contemplating, I'm left with this -- a microwave oven is like any other tool. Used wisely, it's helpful. Used foolishly, not so much, as anyone who has ever blown up an egg can tell you.

Some testing will insist microwaving food retains more nutrients than any other method of cooking. The same claim is made about steaming. As near as I can figure out, that really depends on the food in question and little things like the amount of water used and the time factor. Water will leach out nutrients no matter what cooking method you use and overcooking screws up your dinner all the way around.

Does microwaving change the structure of the food in a detrimental way? I don't know. I do know that the dairy industry processes milk in ways that change structure, solely for the purpose of adding to shelf life and thereby extending the radius of the retail market. Ultra-pasteurized milk is one of those processes, one I hate because it renders the milk unusable for making homemade cheese by preventing the coagulation of the milk curd. Boo! Hiss! But does it make milk unhealthy? Well, aside from the fact that I don't believe adult mammals need milk and I only use it for cooking anyway, I really don't know how nutritionally valuable the ultra-pasteurized version is.

When you think about it, the raw food enthusiasts use much the same anti-microwave type of arguments against ALL methods of cooking. Let's face it -- cooking by any method changes the structure of the food. As for the retention of nutritional value, that is influenced by so many variables, it's a wonder we're still alive anyway. The further food gets from harvest, the more nutrition it loses. The way it's stored contributes to nutrition retention or loss. The way it's cooked, likewise. And the way each individual body assimilates that food, at whatever stage, varies wildly from person to person.

I think we just have to use common sense. Microwave ovens have been around for something like 60 years without, apparently, decimating the population. In fact, they may be one of the most underused appliances in the kitchen. Most of the folks I know use their microwaves for little more than heating coffee or convenience food or for baking potatoes.

This is my opinion but I think we are probably in more danger from preservatives, chemicals, hormones and insecticides in our foods than from any method we use to prepare it. As far as preparation goes, simple rules of cleanliness go a long way in terms of safety and maintaining the balance between undercooking and overcooking addresses both safety and nutrition.

There are, I think, some reasonable precautions to take with microwave cooking. There seems to be some question as to the safety of plastics so ceramic or glass are the recommended utensils to use. I haven't found any prohibition against paper plates or paper bowls but I would assume the safest would be those without dyes. To avoid uneven heating, cover foods and stir during the cooking cycle. And never overcook the goodies.

I had a whole slew of web sites to pass on to you, both pro and con, but it would probably be easier for you to just Google with key words like microwave, nutrition, safety and so on. But I will pass on this Snopes page because (a) it has interesting photos, (b) it indicates the requirements of valid testing and, (c) at the very bottom of the article, addresses the often-used scare item about the microwaved blood killing a patient.

There is one more thing about microwave ovens I want to pass on to you -- the guaran-damn-teed easiest way to clean the durned thangs. Splash a couple of ounces of either vinegar or lemon juice into a bowl. I use vinegar because I save the lemon juice for curd. Add water. We're talking about maybe a cup of liquid, total. Nuke on high for 3 or 4 minutes. Leave undisturbed for at least 5 or 10 minutes. Read a chapter in a book. Go for a walk. Play with your furkid. When you open the oven, pull out the bowl and wipe down the inside with a damp sponge. All that residue that was clinging to the walls and door and turntable has become softened by the steam and absolutely NO scrubbing is required to clean it out. Would plain water do the same thing? Durned if I know. Using the vinegar makes me feel more -- uhmmm -- technologically robust. There's something about vinegar that, when you set it to do a job, you just know the job gets done.

Wednesday, May 14, 2008

Little Round Hot Things

I don't mean hot as in "spicy hot." Although you certainly could spice them up if you felt like it. It's just that I snapped the pictures when they were right out of the oven and the camera lenses kept steaming up if I got too close.

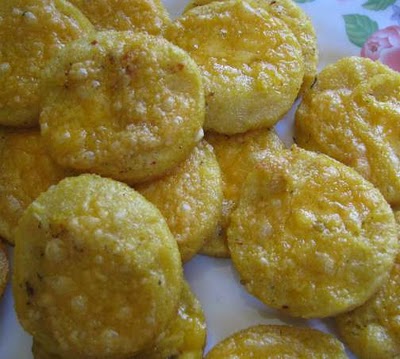
What we have here is a magical incarnation of polenta that is sorta-kinda based on a recipe I found at Food Down Under. Incredible web site with all manner of recipe bounty covering just about any sort of food you can imagine. For the polenta, for instance, there are 587 recipes!

If you want to see the original for this dish, look up Recipe #93777, titled Easy Cheesy Savory Polenta. Those instructions call for pouring the cooked polenta into a pie dish and cutting it into wedges. I poured mine into a rectangular baking pan and cut out the rounds with a small biscuit cutter. The rounds were roughly 1/4 to 1/2 inch thick and I got 23 of them. The scraps will be chopped up and sauteed golden brown and added to a hash. For my version of Little Round Hot Things, here's what you do:

In a microwave-safe mixing bowl, put 3 cups water, 1 cup cornmeal, 3 teaspoons chicken bouillon and whatever seasonings strike your fancy. I used a healthy dose of Mrs. Dash chipotle seasoning. Microwave on high for 5 minutes, whisk thoroughly, microwave another 5 minutes. Whisk again, then whisk in a tablespoon-sized glob of butter, a tablespoon of dried onion flakes and about 1/4 cup (2 ounces) of grated Parmesan cheese. Spread polenta in oiled pan, trying to smooth it as level as possible, and let cool for at least 15 minutes. (I just slipped the pan in the refrigerator.) Cut out rounds and place on cookie sheet.

Now, the original recipe says to broil one side for 5 to 7 minutes, then flip everything over, sprinkle with shredded cheese and broil another 3 to 5 minutes, until cheese is bubbly and golden brown. Which is what I did. In retrospect, I'll bet I could have simply baked it at about 400 degrees until the cheese was just right and the Little Round Hot Things would have ended up pretty much the same -- without all that flipping stuff over. That's what I think. I'll find out next time I make these -- and there WILL be a next time.

I'm thinking these would make darned good party food. You could make the rounds up ahead of time and freeze them, then just take them out and bake them when ready. Or even just do them up earlier in the day, right up to the oven part, then bake them just before you want to serve everybody. They are great finger food because they hold their shape while remaining creamy-smooth and tender and addictively delicious. And, really, you could add all kinds of interesting goodies to the polenta before you spread it out to set. Minced green and red pepper, for instance. Or sun-dried tomato. Or tiny bits of cooked chicken or pepperoni or whatever.

Little Round Hot Things. Yeah. Makes me smile.

Monday, May 12, 2008

Stealth Butter

I know what you're thinking. You're thinking that is yet another shot of yet another lemon curd recipe and when the hell is that woman gonna quit making lemon curd? Hah! You will be relieved to know that is not lemon curd. Not even close.

What it is, Coffee Mates, is something called Extended Butter. Frankly, I'd never heard of it before, although I understand it was an idea in use during World War II when everything was rationed. I do remember, when I was five or six years old, something about sugar and gas rationing but we lived on a dairy farm. Butter was not something we did without.

I'm signed up for the daily email newsletter from Tip Nut, which almost always has some neat bit of information. Today was the butter thing -- "How To Turn One Stick Of Butter Into Two" -- and I said, "Huh? Really?"

This interests me because I don't do margarine anymore, preferring butter for all kinds of reasons. So it certainly wouldn't hurt my feelings to save a few cents on it, right? There just happened to be roughly two-thirds of a stick of room temp butter in the butter dish so I decided to test it out.

Now, the formula given is 1/2 cup of lukewarm water per stick of butter (which, by a lucky coinkydink, is also 1/2 cup). You're supposed to gradually cream in the water, making sure it's all incorporated as you go along. (You may use a mixer at low speed.) I'm afraid I forgot that "gradually" part and just dumped all the water in at once and hit it with my immersion blender. Which worked out fine except there seemed to be just a teensy bit too much water. I don't know if that's because I didn't add it slowly or if it's because I guesstimated too far in the plus category with the amount of water I should add. I put in 1/3 cup instead of the 1/4 cup that was probably more accurate.

Not a problem. I just held the mass of whipped butter with a spatula while I tipped the bowl and drained out the excess. The butter firmed right up in the refrigerator and I gotta say, it really doesn't taste any different now than it did before. Hmmm.

Hmmm, indeed. This raises all kinds of interesting possibilities. It isn't just a matter of saving a little bit of money. If all you're adding is water, you're simply making "light" butter, so if you slather your usual amount on your baked potato, you're only getting half the calories. Right? Therefore, by default, this extended butter is healthier than the regular butter. Think of that butter pat as a mere shadow of its former self. A sort of stealth butter if you will.

Only thing is, they don't recommend you use it in baking because the amount called for would consist of half the required fat so it may affect the texture of your baked goods in an unfortunate way. Well, we'll see. There must be some goodies that would be okay with stealth butter. I'll have to check into that. In the meantime, I have this intense craving for baked potato. Slathered with some of my freshly churned stealth butter, of course.

Saturday, May 10, 2008

Goddess Lemon Curd -- Really

I know the lemon curd recipe I gave you awhile back was good. Of course it was. But I wasn't quite completely happy with it so there was no getting out of continued research and experimentation. Some of the results were okay, a couple were, let's say, unfortunate. It all worked out in the end. The above closeup may not actually be the Ultimate Microwave Lemon Curd but it has to be at least penultimate. At least. It makes me swoon. A mere teaspoon of the blessed stuff inspires giddiness and spontaneous humming.

My research turned up interesting information. Did you know lemon curd is also known as lemon cheese or lemon butter? I would guess that latter label is meant in the same sense as apple butter, do you think? Also, although only a couple of sources mentioned it, it's supposed to be better for the texture of the curd to add the butter last. (Some recipes don't call for butter at all.) In any case, that's what I did with this new recipe and the finished curd slides like silk across your tongue.

Also, there seems to be some difference of opinion on this but some chefs say using whole eggs makes for a thicker curd while others insist using only the yolks makes it thicker. I can't vouch for the difference, if any, because I hate recipes that require me to leave out either whites or yolks. Somehow they never seem to get used in anything, in spite of my best intentions.

But enough of that. Here's how you make Killer Lemon Curd. Wait. Why do all the best foods get accused of having a lethal nature? Killer This. Death by That. That can't be right. We'll have to do better. We'll call it:

GODDESS LEMON CURD
Whisk together: 1/2 cup sugar, 1/2 cup lemon juice and 2 eggs. Microwave on high for 2 minutes. Whisk again, return to microwave for 1 more minute. Remove from oven and whisk in 1/4 cup of butter (2 ounces) that has been cut into pats, whisking one at a time until melted. Microwave for the final 1 minute, remove, whisk and let cool. Put in container with lid and refrigerate. Makes about 1 1/4 cups curd.

There you have it. Counting measuring and egg-cracking and whisking time, incredible curd in 5 or 6 easy minutes. It doesn't get much better than that. To my mind, the flavor of this version is the perfect balance of sweet and tart and, as I said, the texture is like silk. That gouge in the middle of the above bowl of curd happened when I spooned up some to fill a tart shell. And the angels sang.

I should add these notes: I'm using an 800 watt microwave. If yours is more powerful, you may want to adjust either time or power level. The thing you want to avoid is having flecks of egg white to sully the gold of your curd. That happens if you cook too high or too long. There appeared to be some flecks when I pulled it out after the first 2 minutes but a vigorous whisking seemed to solve that problem nicely.

When the curd is first done, it will seem runny. Don't be tempted to cook it longer. As long as it's thick enough to coat a spoon, it's just right. It will rapidly thicken as it cools and will end up about the consistency of mayonnaise or pudding.

I'm sure you could melt the butter before you whisk it in but that's just getting another dish dirty. Cut the pats right on the paper the cube was wrapped in, then toss the wrapping. The solid butter melts rapidly in the hot mixture and, anyway, I'll bet all that whisking is good for the curd. At the very least, it will make you feel virtuous and chef-like.

This smaller amount is perfect for me. I'm much more likely to use it all up before it gets too old. Besides, any time I want more, I can easily spare 5 or 6 minutes to fix it. I really don't know how well it would turn out if you doubled the recipe, supposing you wanted larger batches for gift giving. You might try one big batch to see, keeping in mind cooking time might be just a bit longer.

Jo had a great idea, using the curd for dipping sauce for her chicken fingers. I can vouch for how great it is in place of mayo in chicken sandwiches. Wonder how many other neat ways there are to use it? And then -- you know this HAS to happen, don't you -- there will be the fun of making curd with all different kinds of juices. Yum! A goddess just wants to have fun.


Thursday, May 8, 2008

Tart Bliss

Whooeeee! Coffee Mates, I think I've found my tart bliss. Which is not meant to indicate either the presence or quality of personal behavior patterns -- ahem -- aside from those of a culinary nature. Darn it. (Pausing to stare dreamily into space while recalling "back in the day" moments.)

See, I'm on a mission. My friend Julie is getting hitched and she wants goodies that are easy and tasty and neat for the reception. Mini-cheesecakes were mentioned favorably and I got to exploring the possibilities via the Great Google. And mini-cheesecakes are well represented out there in recipe land because folks like the idea of having bite-sized portions of rich desserts instead of dealing with the full-sized version. Cheesecake, after all, freezes well so you only have to take out whatever number of minis you need at any given time.

Exploring the world of itty bitty cheesecakes led me to the kissin' cousin worlds of tassies and tarts and I began to edge away from the cheesecake versions. I've been tracking the perfect crust, you see, and I've messed with 'em all, from graham cracker or cookie crumbs to pie crust to phyllo and even vanilla wafers dropped in the bottom of the muffin cups. For one reason or another, none of the different versions made me cheer. Most of them were a pain in the derrierre to press against bottom and sides of muffin cups. Terribly time-consuming. I knew I was close with the whipped shortbread cookies from a couple of months ago but they weren't quite IT either.

I struck gold at the great RecipeZaar web site. If you go there and type 215530 in the Search box, you'll be taken to a page with the recipe for Lemon Cookie Tarts. I'd recommend it because when you print it off for yourself, you'll even get the box with nutrition facts on the page. Kewl. Now -- let me tell you why I think this is a Keeper recipe.


As you can see, the dough forms up into perfectly excellent little cups to contain whatever filling you decide to use. The recipe gave me 3 dozen tart shells and I made them 3 different sizes, just to check them out. What you see in this photo are the larger ones, already baked, and the smallest ones, still in round dough-ball form, ready for the oven. The neat thing is, you can make up a bunch of shells ahead of time and freeze them for later. When you're ready to use them, take out what you need, let thaw to room temp and fill with whatever pleases you.

Although Calee instructs us to make a depression in the dough before putting the pan in the oven, I took the advice of one of the commenters and put the tarts in while still in ball form. When the timer goes off at 9 minutes, you pull the pan out of the oven and gently press into the nearly-cooked tarts with whatever you decide to use to make the indentations. A rounded tablespoon measure is recommended. I used a shot glass at the 9-minute mark. The bottom of a Tabasco bottle works too. You can buy tart shapers but, as you can see, they aren't vital.

There's a trick to pressing the dough. As you press down (gently), twist the shaper once to the right, then back to the left. As you twist left, raise it out of the dough cup. That second twist seems to prevent the shell from being pulled out of the pan when you lift your shaper. I also lightly oiled the shaper so maybe that helped.

You put the tarts back into the oven for another 3 minutes or so, letting the edges turn golden brown. Then you let them sit for 5 minutes in the pan when you pull them out. Be sure you do that because they need that little bit of time to set into their shape. That's also a good time to gently repress the indents in each tart if you want to.

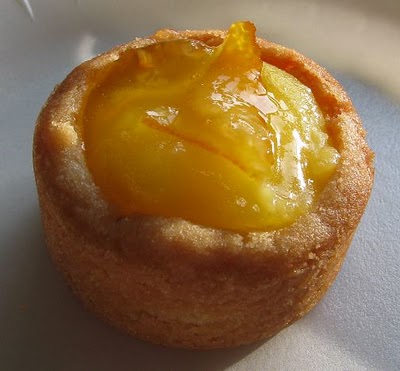
The tart at the top of the page is filled with lemon curd, with just the teensiest bit of orange marmalade on top for pizazz. But you can, of course, use just about anything for filling. Any flavor of thick pudding/pie filling. Or no-bake cheesecake. Or fresh fruit with a thick glaze.

You can make these in regular muffin tins but if at all possible, I think you'll prefer the size you get from the mini-muffin pans. The tarts are just a bite or two in size and this dough bakes up like a tender rich shortbread cookie. In spite of its tenderness, it won't crumble in your hand or onto your fancy clothes when you take that first bite.

Besides, doing the mini size won't spoil the decadent pleasure by drenching you in waves of guilt. It's a lot easier to pretend there are no calories in just a couple of bites of anything. This is one of those times when less is really more.

Wednesday, May 7, 2008

Simply Simple

I beg your pardon -- what?

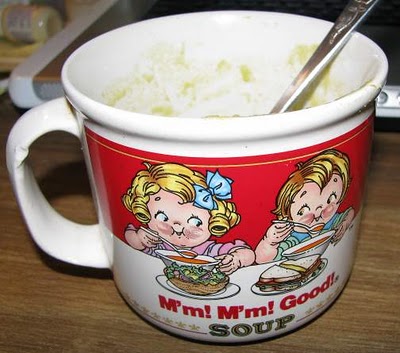
Oh. Yes, now that you mention it, that is a photograph of an empty soup mug. And, no, I'm not trying to emulate Andy Warhol. The picture is not meant to be artsy fartsy. It's simply a testament to a really good split pea soup and the compelling need to get it into my whimpering tummy. Which is whimpering no longer. Actually, I think it's purring.

I haven't had split pea soup for, oh, close to a hundred years, give or take a week. I picked up a package of dried split peas at the market something like a month ago on a grungy wet day that made me long for soup. Then I promptly forgot I had it. So there I was, today, looking out at another grungy prospect that was threatening to deteriorate to wet and I said to myself, "Goddess? Don't you think this is the perfect kind of weather for split pea soup?"

My Inner Goddess began to drool, which means, of course, I had to do all the work. Fortunately for me, that turned out to be really easy. One cup of split peas in 4 cups of chicken broth, simmered gently for 30 minutes or so. Easy peasy -- but I didn't stop there. Are you kidding?

Remember that homemade dry soup mix I raved about back in February? Just so you won't have to go look it up, here it is again:

CREAM OF CHICKEN DRY SOUP MIX

Mix together in a bowl: 2 cups nonfat dry milk, 3/4 cup corn starch, 1/4 cup chicken bullion granules or powder, 2 tablespoons dry onion flakes OR 1 teaspoon each onion powder, basil, thyme and 1/2 teaspoon pepper. Store in airtight container at room temperature. To use: combine 1/3 cup dry soup mix with 1 1/4 cup water. Mix well in small saucepan, bring to a gentle boil, stirring constantly, until mixture thickens.

I mentioned then that I thought it would lend itself quite nicely to microwave magic -- and it does. One minute on high, whisk furiously, one more minute on high, whisk again. Perfect. Oh -- I just used one cup of water this time, for more thickness.

I spooned the microwave soup into the split pea soup, sprinkled in a healthy pinch of poultry seasoning and then had at it with my trusty immersion blender until the whole thing was pureed to a fine fare thee well. Stirred in a sprinkle of dried onion flakes, turned the burner down to low, put a lid on it and then wandered off to do other stuff until my tummy threatened mutiny.

I was going to fry up a few snippets of bacon bits to add to the mixture but it was too late. One deep inhalation of the soup and there simply wasn't time to waste on inessentials like bacon. And, oh my. Smooth and creamy doesn't begin to describe it. Not to mention flavor. Don't you think split pea soup from scratch tastes much better than canned? And none of those pesky preservatives and unpronounceable ingredients to mess up the good stuff. That's nice.

There are a couple more servings left in the pot. Always good to look forward to. Sometimes, you know, the simple things satisfy like nothing else can. My Inner Goddess agrees.

Tuesday, May 6, 2008

Hot Stuff

Are those not just the purtiest little ol' peppers you ever did see? My very first two Lemon Drop chili peppers have ripened, praise the Lord and pass the asbestos.

It was great fun to watch them turn from green to gold -- which took roughly 24 hours from start to finish. You might think that's akin to watching paint dry but you would be wrong. Nobody salivates, anticipating dinner when watching paint dry.

I did some research during the transformation, curious to see what the general Scoville rating is for this particular pepper. It seems to fall somewhere between the milder jalapeƱo and the hotter Serrano. On a scale from 1 to 10, the Lemon Drops are about an 8. Curiously enough, one source said they were hotter while still green.

They're almost too pretty to cut into. The skin is so shiny, they look like enameled jewelry instead of something edible. If I happened to have pierced ears (I don't), I guess I could stick a couple of hooks in the stems and let them dry while making a fashion statement.

In trying to decide what dish was going to be the showcase for my first taste, I wasn't very original. Good old-fashioned fried rice always hits the spot with me. Especially when it's my beloved Jasmine rice, cooked with chicken broth. I sauteed about half a diced onion and a chicken breast that had been cut into tiny pieces, then added one of the peppers, cut very small, guts, feathers and all. Then I added the rice and a little seasoning and, shazaam! Perfection.

Turned out, one Lemon Drop was just right. The heat was pleasant instead of lethal. And there really is a very mild citrus scent and flavor to them. Nice touch. Works well with the chicken.

Now all I have to do is figure out what my next peppery meal is going to be. Stir fry? Chicken chili? Cheese and pepper bread? Decisions, decisions.

Thursday, May 1, 2008

Not Montivani

There are two windows in the south wall of my bedroom. Outside, there are some vigorous, glossy-leaved laurel trees that border the building and are tall enough to almost reach the bottom of the windows. Hidden deep within the branches of the laurels is what must surely be a suburban sparrow conclave populated by sadistic insomniac blabbermouths. I suspect this to be true because every morning, somewhere between five-ish and six-ish, they start chirping. Incessantly. Loudly. Ruthlessly. Relentlessly. And they WAKE ME UP!

You know how a smoke alarm sounds when the battery is running low? That one-note beep that is just the right tone to emulate a staccato version of fingernails scraping across the blackboard of your nerves? I won't say the sparrow sounds exactly like that but it sure is close.

Now sparrows have a larger vocabulary than just that intensely annoying barbed wire chirp. Which is why it drives me absolutely banana-crackers to hear their wakeup call. It's like the infamous Chinese Water Torture, one cruel drop at a time, forever. If you don't believe me, go here and give a listen to the short sound track of a sparrow cheeping it's little lungs out. Play it over and over. With the volume UP.

They're doing this on purpose. I know that because, when I stagger into the kitchen and sit at the dining table with a mug of healing sacred brew, I can listen to the multi-bird chorus that rises from the cluster of trees outside that window and it's a whole different ball game, Coffee Mates. The sounds that surround me on that side of the building form a gorgeous symphony that soothes the soul and lifts the heart. The sparrows are over there, too, along with finches and swallows and flickers and jays and I don't know what all, but they blend in with the other avian voices in a thoroughly pleasing manner.

I don't mind getting a wakeup call. Really. What I mind is getting a wakeup call that is presented in such an abrasive tone that I want to roll out of bed and start slapping people. It's a good thing there are screens on those windows, that's what I think. Because, if I took those screens off, I could lean out the window with a big pot of ice-cold water and RAIN on those rascals like they've never been rained on before. Oh yeah!

Wonder if I could put speakers in the windows and teach the sparrows to sing Montivani?