Showing posts with label cooking. Show all posts

Sunday, October 28, 2007

I Think I "Get" It

I think I finally "get" it. Maybe. It really is a bit confusing, all things considered.

See, there is this relationship between our cocky high hat popovers and the Brit's traditional Yorkshire Pudding, in that they share pretty much the same ingredients and often even the same proportions, given the variations in the recipes for both. To make matters more confusing, a lot of people use the terms interchangeably. I would read the recipes and think, well, really -- they're the same breed of cat. Just raised in different litters, that's all.

For some time now, my buddy John has been trying to enlighten me but the essential difference between the two was hidden by the essential sameness. All I could see was, hey -- flour, milk and/or water, eggs, seasoning -- you will always end up with either popovers or Yorkie puds -- or Dutch Baby pancakes, fer cryin' out loud.

Then something John said the other day flipped a switch in my alleged mind. He was talking about making some of his famous Winter Chicken Stew with Yorkie Puds and he promised to share the recipe with his readers. (And he did -- if you follow the above link, you, too, can enjoy a truly fabulous dish.) What he said was something to the effect that one served the stew by ladling it into -- into -- the Yorkshire puddings and he recommended the 6-inchers.

Oh wait. Wait just a flippin' minute. My popovers are baked in muffin tins (no, I don't have the similar-but-deeper popover pan) and I split 'em and slather them with butter but I don't serve my meal IN them. They're not big enough for that.

Then a vision of past Dutch Babies floated across my mind's eye and I sighed. Of course. It isn't the ingredients. It isn't the name. It's how the thing is used. At least that was my working theory when I went googling for a proper Yorkie pud recipe. There is most definitely an abundance of those out there and I consider myself fortunate that I didn't get too far in before I found and chose to try a rough version offered on a cooking forum. The fellow said it came from a celebrity chef and always worked. (More about that in a minute.) The trick, he said, was to measure the ingredients in equal portions by volume.

For instance, take a cup. Any size cup, be it precision measuring cup, coffee mug or gallon whiskey jug. But be sure to use the same cup for all the ingredients. If you use 1 cup of flour, then you also use 1 cup of eggs and 1 cup of milk. (This recipe called for half milk and half water in that turn with the cup.)

Okay, fine. But I measured the eggs first because a whole cup of eggs sounds like a huge amount. I guess not. Three eggs gave me 2/3 of a cup and I decided that would be fine because I didn't want to make a big Yorkie. (Insert chilling background music and an ominous voice-over saying, "Little did she know.")

So I whupped up 2/3 cup of flour, 2/3 cup of eggs, and 2/3 cup of half milk and half water. To that I added, as instructed, a toss of salt and a toss of malt vinegar. Well, I didn't have any malt vinegar but the cider vinegar seemed to work. At least it didn't do any harm.

I did that early, before I'd properly started the chicken stew, and left it covered, at room temperature for a couple of hours. When it was finally time to cook it, all I had to do was give it a quick whisk and pour it in the pan. After looking over my pan supply, I decided to use the 10" casserole dish. Larger than the 6-incher John recommended but it's the best I could do.

Now, it's very important the batter is poured into a hot pan with sizzling oil (or meat drippings) of choice. I put in roughly 1 tablespoon each of olive oil and butter and put the pan in a 400 degree fairyheight oven for about 10 minutes. The butter was beginning to sputter. I think the idea behind pouring the batter into the hot oil is to let it hit the ground running when it's time to cook. Well, you'd move fast, too, if somebody sat you down in hot oil.

I don't know what I expected, really. Certainly I've never had a Dutch Baby behave so aggressively. When I peeked in the oven window somewhere between 5 and 10 minutes into the 30-minute baking span, I nearly fainted. The Yorkie was most visibly swelling up with a speed that made me think it must be on steroids. I knew I would have to defend myself with a chair and a whip if it ever got the oven door open.

Then I became utterly enchanted as I watched it form itself into the most wonderful edible bowl. And now I was pretty sure this was the kind of thing John had been talking about. Although he didn't mean for it to be this large. To give you an idea of scale, that's my 2-gallon kettle right beside the Yorkie.
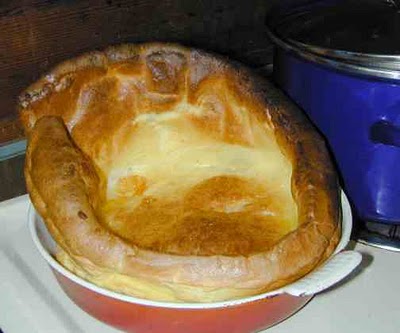

I happily ladled the entire chicken stew into what turned out to be a perfect fit. It's a thick stew and, when I went for seconds a little while ago, it had cooled enough in the fridge that I could actually cut it like a piece of pie before I put it in the microwave for a quick nuke. Too kewl.

Here are some neat sites for you, should you care to explore a bit further. The celebrity chef who seems to be associated with my recipe is Brian Turner and you can see his version of the story here. I love his explanation for the presence of vinegar in the recipe. If you go to Recipezaar, you will be staggered by 44 recipes for the beastie, many of them with photos. It's a fun browse -- you'll get a chuckle out of the Swedish Yorkshire Pudding, I promise. Especially if you know any Norse drinking songs.

Finally, in trying to find a good site to illustrate the Dutch Baby pancake, I was delighted to find Orangette. Her writing knocks me out and I can't wait to click back to the page and read some more. But do read about her Dutch Baby morning. It's a delicious entry in more ways than one.

Thursday, October 25, 2007

Cauliflower Out of Proportion

Usually I can look at a recipe and have a pretty good idea about the volume of the finished product. Usually. Sometimes my sense of proportion seems to have taken a vacation without leaving a forwarding address. The above picture is an illustration of what happens when I sail into something without a clear vision of the goal. It happened like this ...

There was this big head of cauliflower in the refrigerator. Cauliflower, I am learning, is a much more versatile vegetable than I had realized for far too many years. It's great fun to explore new and different ways of dealing with it. Then I ran across a recipe that sounded SO good. Something called Curried Cauliflower and Redskin Potatoes. Well sure. Why not? This is more or less the way it went:

You can skip this first step if you want to go strictly vegetarian. It wasn't in the recipe, just in my personal vision of nirvana. I diced up some sliced bacon and fried it in my big wok-style frying pan, then drained the bits on paper toweling and set them aside. Then I dumped one large, chopped Vidalia onion into the drippings and cooked it on medium heat for about 10 minutes, stirring now and then, until the onion bits were soft and slightly browned. You can start the process with a tablespoon of olive oil for your onion and get to the same place I did.

Then I added a heaping teaspoon of minced garlic (or you can use two cloves, smashed or minced), 1 tablespoon grated fresh ginger and a bare teaspoon of red curry paste. The recipe called for 1 teaspoon of curry powder but I didn't have any. I was also supposed to add 1/2 teaspoon of coriander and I would have sworn I had some. Maybe I do but I still haven't located it. Ah well. I stirred all that around for about a minute and then added 3 small potatoes that had been cubed up while I was waiting for the onions to cook. They weren't redskin potatoes but, hey, that's a minor technicality. Then I added 1 1/2 teaspoons kosher salt and 2 cups of liquid. The recipe called for the liquid to be water. Well, where's the fun in that? I opened a can of beer, added enough water to make 2 cups, and poured it in. Brought everything to a rolling boil, turned the heat to low, put a lid on it and let it simmer for 5 minutes.

While it was simmering away, I wrestled the cauliflower into submission, scoring a bowl of neat little flowerettes. It pretty much filled a bowl. I looked at the cauliflower and I looked at my big frying pan with its gently bubbling contents. Oops. All of this is not going to fit in there, even if I pray for a miracle. Time to make an adjustment and implement Plan B.

I hauled my BIG kettle out (I dunno -- I think it holds a couple of gallons.) and transferred the onion and tater mixture from the frying pan to the roomier accommodation. Then I dumped in the bowl of cauliflower and about a cup and a half of frozen peas. Oh -- I also dumped the bacon bits into the mix. Brought it back to a boil, stirred everything good, turned it back down to simmer, put a lid on it and set the timer for 15 minutes.

Well! I'm here to tell you, that is a wicked good meal. I was kicking myself for not having thought to whip up a little pot of rice because the cauliflower mixture would have been nice, ladled over a fluffy pile of, say, jasmine rice. Just as well I didn't. I had one small bowl and feel as though I've indulged in a seven-course dinner. Hooboy, that is some kind of fill'erup food.

Oh -- for a change, I found I'd under-estimated the amount of curry paste. Which is okay. I just sprinkled a healthy portion of my precious Mrs. Dash Southwestern Chipotle seasoning over my portion. Total perfection.

The fact that I have so much left is rather a bonus. I'm already planning on fixing a little bit of dill sauce to go with one serving. For another, I think I'll make a bit of beer/cheese sauce and bake it. Then I think I'll freeze the rest for another day. Who needs a sense of proportion?

Prayers and major mojo for our friends in the San Diego area. The fact of the fire is only part of their grief.

Sunday, October 21, 2007

Faux For Fun

I don't know about all y'all but I'm always finding myself wanting to try a recipe, only to discover I'm lacking an essential ingredient or two. Or three. There was a time when, if that happened, one either did without or had to wait until the next foray into the aisles of one's friendly local supermarket. With the advent of the mighty Web, we can now sift and dredge for the cream of ingenuity in substitution genius. If we're lucky, the suitable substitution can be found on a pantry shelf or hidden in the refrigerator.

A 'for-instance" can be illustrated with my use, yesterday, of a slice of minced dill pickle for capers. Yes, darlin' Mage, I promise you, pickles are mentioned often in that role. I imagine the thinking there is that one pickled object can replace another pickled object. In small amounts, it surely couldn't hurt. Of course, never having actually tasted capers, I wouldn't know the difference. (insert smile) To be fair, the most often mentioned substitute for capers is a pickled portion of the nasturtium plant. Which portion depends on the source. Here you'll find a recipe for Poor Man's Capers, made with pickled nasturtium seed pods. Other sources say the pickled flowers and buds will serve that purpose. Pickled elder flowers also have been recommended for the job, as have the buds of marsh marigold, broom and some species of thistle. I guess what matters is what you have on hand ... and what I had on hand was a pickle.

Milk is such a universal ingredient, you just about have to have a supply on hand, in one form or another. Since I don't drink the stuff, if I want to keep it available, I need to store a supply of either powdered milk or evaporated milk. With a little bit of messing around, either of those forms can be pressed into service for something they aren't.

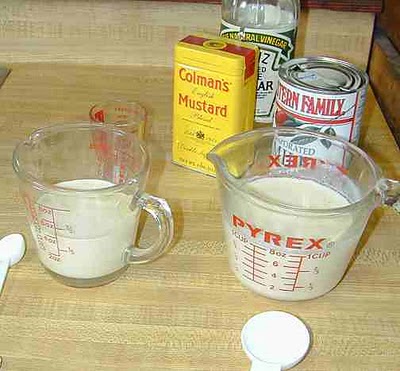
Evaporated milk, for instance, can be used to make a mock sour cream or even mayonnaise. Yes, that's the New Zealand mayo I was taunting you with yesterday. In the photo above, you see two measuring cups containing evaporated moo-juice. The one on the left is the faux sour cream, on the right is the NZ mayo. I only had one can of evap so had to halve the recipes. I'll give you the full version, though, just in case.

The sour cream was really quite simple. To 8 ounces of evaporated milk, add 1 tablespoon of vinegar or lemon juice. Let stand for 5 minutes. That's it. That's all there is. Okay, we all know adding vinegar or lemon juice to any milk will give you a substitute for sour milk or buttermilk for cooking. Adding it to the evap does the same thing but it doesn't get any thicker. I'm sorry but I expect sour cream to be thick, dammit. As for flavor, okay, it tasted like it lived in the same general neighborhood as the sour cream. Perhaps in the little house at the end of the road with the nasturtiums climbing the fence. (wink)

Scratch the sour cream experiment. That boat won't float. Although it did work just fine in a bread recipe so it wasn't wasted.

Now the other measuring cup. I ran across a discussion group talking about things like this and one lady swore, in New Zealand, they don't call it mayo unless it's made like this: 1 can evaporated milk, 1 teaspoon dry mustard and about 2 ounces of vinegar. Stir with a fork and let stand to thicken.

Now this is tasty. It doesn't get any thicker than, say, hand lotion, but it would serve very nicely as a salad dressing. In fact it's very like cole slaw dressing. It does make a nice spread on a slice of bread but you have to be careful you don't slather on so much it runs over the edge. I can imagine experimenting with different seasonings and using it pretty much anywhere you might put sauces. And if you need to be cautious about such things, you can take comfort in the fact that there is neither egg nor oil in the mixture.

I consider this a good change of pace from regular mayo. But New Zealand folks need to know (whispering) it ain't mayo!

Saturday, October 20, 2007

Thanks For All The Fish

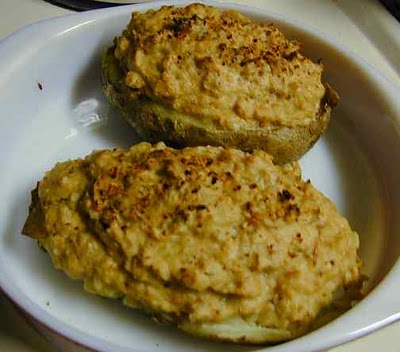
Maybe I've been reading too much Douglas Adams. I look at that photo and have this overwhelming urge to say, "Thanks for all the fish!"

Nah. One cannot possibly read too much Douglas Adams. But I do thank ol' Poseidon for the gift of salmon, a key ingredient in the above. Just for the record, said above is Baked Potato Stuffed with Smoked Salmon Souffle. As you will see, there have been some slight variations in the core recipe but that only proves the basic premise is a highly flexible one. I'm going to give you the recipe as I found it on the everlovin' web, then I'll tell you how I tweaked it.

You'll need:

4 large baking potatoes
Sea salt flakes
3 ounces smoked salmon, cut into strips
2 tablespoons chopped fresh chives
1 tablespoon capers, rinsed, drained and coarsely chopped
4 sun-dried tomatoes in oil, drained and finely chopped
1 tablespoon butter, diced
1/3 cup milk
2 large eggs, separated
Salt and freshly ground pepper.

1. Wash potatoes, dry, prick with fork or knife. Oil skin and sprinkle with sea salt.
2. Bake in 400 degree oven (205 C) for about 1 hour. Remove when done and reduce oven temperature to 350 degrees (175 C).
3. In a bowl, combine salmon, chives, capers and sun-dried tomatoes and set aside.
4. While potatoes are still hot, cut off a 1/2 inch slice lengthwise and reserve those slices for another purpose. Using a spoon, scoop out the flesh of the potatoes, leaving about a 1/4 inch shell. Push the scooped out flesh through a potato ricer, food mill, or sieve into a large bowl.
5. Place potato shells on a cookie sheet.
6. Add butter to the potato and mix well.
7. Heat milk to just below boiling, then beat into potato mixture. Beat the egg yolks and add to the potato mixture, blending well. Stir in the salmon mixture and season to taste with salt and pepper.
8. Beat egg whites until stiff but not dry. Fold in a third of the whites to loosen the mixture, then gently fold in the rest.
9. Spoon the mixture into the potato shells, heaping the tops. Bake on cookie sheet in oven for 15 to 20 minutes until slightly risen and lightly browned on top.

Okay. Here's how I messed with it. First, I only had two bakers. I didn't have any smoked salmon but I had a 6-ounce can of salmon and some dry smoke seasoning. (If you have honest-to-goodness smoked salmon, for goodness sakes, USE it. Ain't nothing better!) I drained the salmon and dropped it in a bowl, sprinkled it with the smoke seasoning and forked it around a bit.

Didn't have any capers, either. I never have capers. But I'm told gherkins are a fine substitute. Didn't have any gherkins. (Insert shrug.) But I had some sandwich-sliced dill pickles so I grabbed one slice and minced it up good.

My "sun-dried" tomatoes were what I dehydrated and weren't stored in oil. Not a problem. I diced some up and rehydrated them with a bit of boiling water, then added them to the salmon.

Didn't have any fresh chives. (Do you see a pattern developing here?) But I have some great Vidalia sweets. Diced up about a quarter of one and threw it in the mix.

I had completely forgotten to eat today so my tummy was giving me fourteen kinds of nag-nag-nag. That's why I shaved about 45 minutes off the prep time by baking the spuds in the microwave. They really are better if done in the oven, though. I'm just saying ...

That stuff about running the potato flesh through a ricer or whatever is a hound that doesn't hunt in this house. I plopped in a lump of butter and had at the mess with my immersion blender. Zap! Zap! Perfectly smooth mashed spud. Didn't do the milk bit as per the recipe. I happen to have some New Zealand mayo (more about that later) so I spooned in an appropriate amount and hit it with the blender again. Added the egg yolk (since I only had the two potatoes, I only used one egg) and whipped it up good. Then the egg white went in and, just for laughs and giggles, I sprinkled in some of my beloved Mrs. Dash Southwestern Chipotle seasoning.

Into the oven for 20 minutes and -- be still my heart -- my dinner was perfectly done. Several dinners, in fact. As hungry as I was, there is still a hefty third of one potato left. That will be my midnight snack. The other one may or may not be consumed tomorrow. I might freeze it for later.

The slabs I set aside? That'll be perfect for football munching tomorrow. First I'll slather on some of that New Zealand mayo, then sprinkle on some of my McCormick's Dilly seasoning with onion, garlic, dill and lemon. On top of that I'll sprinkle shredded cheddar and on top of that I'll sprinkle some chipotle. Into the oven for a slow broil until the cheese is melted and bubbly and I'm ready for some football!

The New Zealand mayo? That's a teaser. I'll 'splain about it tomorrow, somewhere between football games.

Wednesday, October 17, 2007

Possible eBay Project

I'm calling this my Autumn Stew and filing it under All's Well That Ends Well -- I Think. It turned out to be scrump-diddly-icious -- which is Goddess-speak for "Hot dayum but that's good!" Which is only fair because I went through seventeen kinds of fresh hell to achieve it.

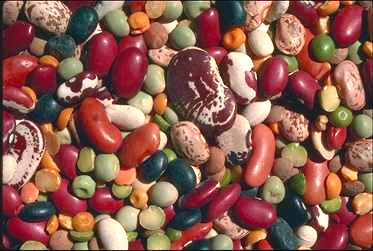
You know how I was figuring on sprouting those Cranberry beans? Yeah. Well, I must have done something wrong because when I checked them this morning, the damned things not only weren't showing even the slightest indication they were going to cooperate in the project, they were starting to get slimy! Bleech! I took that as a personal insult, given that I've been faithfully and frequently rinsing them since Friday evening. Nothing for it but to dump the whole batch in the garbage and start fresh.

Only this time I figured to do them the regular way. No more Ms. Plupatient. (If pluperfect means "more than perfect," I figure plupatient is a legitimate extrapolation.) Anyway, I brought them to a boil, let 'em bubble for 2 minutes, turned off the heat, put on the lid and let them soak for an hour. Then drain, rinse, cover with water, bring to a boil again, and turn heat down so they will cook nicely while my back is turned. Because I had other things to do.

Well, guess I didn't turn the heat down far enough. Seemed like no time at all had gone by when I walked into the kitchen for a refill of the sacred brew, only to realize there was an ominous stench of scorched beans in the air. I had let them burn dry! In my really good cookware, I might add.

A quick dose of hot water and baking soda and a lot of expletive deleteds later, the pot was like new again, another batch of beans hit the garbage and I had calmed down enough to say, "Okay, third time, etc." and started yet another pot of beans. I figure at that point I'd bollixed up about a buck-fifty in beans. Don't you just hate when that happens?

This time I made sure the heat was low enough and that there was plenty of water because those puppies sure soak up the moisture. Remember that nice squash I cooked and cubed and put up in quart-sized freezer bags? One of those turned out to be just right to add to the beans. Then half a Vidalia sweet onion sliced thin, two more cups of water and some chicken bullion, a sprinkle of cayenne and a handful of some of those pineapple chunks I was drying. As the squash broke down, it provided just the right amount of thickening for the stew, which I thought was considerate.

I could have put some bacon in it. Or, if I had it, some ham would have been good. But I was more than happy with the stew just the way it is. For a change, I managed exactly the right amount of cayenne -- enough to warm the cockles of my heart. Warm cockles are very important. And the pineapple provided a great accent. I've become quite fond of mixing fruit with savory dishes.

Maybe I should sell this service on eBay. Tell folks that for a reasonable bid -- which would be enough Yankee dollahs to cover possible emergency room expenses -- I would try out their culinary adventure of choice, thereby making all the awful mistakes so they don't have to. I haven't studied the demographics but I'll just bet there's a market out there.

Sunday, October 14, 2007

A Fine Kettle of ... Beans?

Yesterday I mentioned soaking some beans until they sprout and then cooking them. And Bonnie asked how one cooks sprouted beans and I said just like unsprouted beans. And then I cruised around in my Googlemobile, to find examples to share. The best site for that info seems to be the one at Walton Feed. If you scroll down just a little way, under Cooking Beans you will find the key paragraph on soaking, including the sprout-and-cook bit.

Mind you, I heard of this method many years ago, probably from some source like Organic Gardening or Prevention or maybe Mother Earth News. Never tried it, though, because I was always too impatient to wait that long.

In the process of hunting down the above details, I ran across some information that is totally new to me. Did you know there is a toxin in the common bean that can make you sick if you eat the bean raw or undercooked? Red kidney beans are supposed to be worst for that. Now, I remember we were always warned to be sure to boil home-canned green beans but I sure never heard any such scuttlebutt about dry beans.

Probably because there isn't a whole lot of likelihood that one is going to fall victim to the toxin. For one thing, the raw sprouts of kidney beans are supposed to taste so awful, you wouldn't ingest enough to get sick. Cooking changes the flavor to pleasant -- and gets rid of the toxin. However, undercooked beans can be more toxic than the raw ones. That, apparently, is most likely to happen if folks cook the beans in their crock pots at too low a temperature. It's important to be sure they boil for at least 10 minutes, according to the info I found.

For what it's worth. In any case, I'm still waiting for my Cranberry beans to sprout. Tonight is the end of the second day so I figure I'll see some action tomorrow or the next day. I'm curious to see if there is any particular difference in flavor. The sprouted beans are supposed to cook faster. Astray Recipes lists comparative cooking times for different kinds of beans. I think the Pinto beans are pretty close to my Cranberry beans. For Pintos, the timing is: "Unsoaked, 3 hours; soaked overnight, 2 hours; sprouted 2-3 days, 10 minutes." We'll see.

Oh! I keep forgetting to answer Jo's question from awhile back. Jo, you asked what the problem was with the sourdough gingerbread cake that I made a few days ago. I'm not sure exactly why it turned out the way it did. Perhaps my starter was of a thinner consistency than it should have been. All I can tell you is the outside of the cake looked fine. The inside was congealed pudding. It broke my heart because the flavor was wonderful. Ah well. The fellow who provided the recipe for the carrot cake also has one for gingerbread so I'll give his version a try somewhere down the road.

First, though, the sprouted beans. One culinary adventure at a time, thank you very much.

Monday, October 1, 2007

It Just Growed

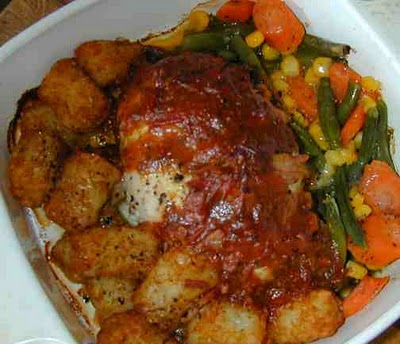
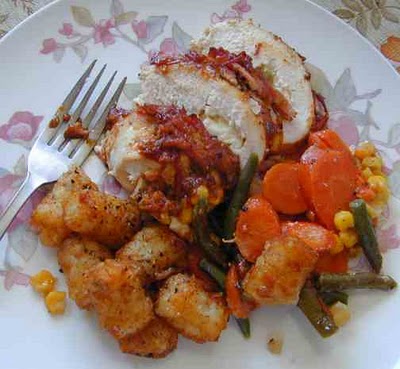
This is what you call a "Topsy Roast Dinner" because, as Topsy, the irrepressible slave child in Uncle Tom's Cabin famously said, "I s'pect I just growed. Don't think nobody never made me." And if ever a meal just growed, it was this one.

As things often do in this day and age, it started with Google. I was doing all the research I could to be sure I handled the baby tomato plants properly. Somewhere in the middle of all that information, a gardener on a forum list tossed in a recipe for a salad with Roasted Tomato Dressing. She said the dressing was good drizzled on crab cakes as well as over salad mixin's. The thing was, it called for a pint of cherry tomatoes -- and I still had the pint of cherry tomatoes youngest dotter Patti had brought me the other day.

Well, okay, there might have been a little less than a full pint because individual 'maters seemed compelled to jump into my mouth whenever I came within range. I squinted my eyeballs and determined there was still enough left to do the recipe. More or less. And I don't see why you couldn't use any old 'mater you have around, although I'd chop up the bigger ones if I went that route. Anyhoo, what you do is this:

Preheat oven to 350 degrees fairyheight. In a roasting pan (or pie plate or whatever works), place a single layer of cherry tomatoes (1 pint, more or less.) Either smash a clove of garlic and scatter it in with the 'maters or sprinkle in a heaping teaspoon of the minced garlic you have in that jar in the refrigerator. Drizzle some olive oil over the 'maters, sprinkle with kosher or sea salt and fresh ground pepper. Roll 'em around a bit with a fork or spoon, until the tomatoes are lightly coated with the oil and garlic bits and seasoning. Put in the oven and roast for about 30 minutes. The skins will pop and the juices will mix most delightfully with the olive oil and garlic bits.

In the meantime, in a measuring cup, pour 1/4 cup olive oil and 1 tablespoon wine vinegar. (I used balsamic vinegar because that's what I have.) Add a bare teaspoon sugar. I didn't think until it was too late but I'll bet brown sugar would have been better than the white. Your call. I was also supposed to put in a handful of chopped parsley but I didn't have even a smidgen of that. I tossed in a couple of snipped up basil leaves, though, and that seemed to work well.

When the 'maters have roasted nicely, take them out of the oven and using a spatula so you get every wonderful drip and morsel, scrape everything into your blender. Add the oil and vinegar mixture. Pulse the whole shebang until it's smooth and well-blended. It will be slightly thick and a gorgeous dark terracotta color. Taste test it in case you might want to add anything. I added some cayenne pepper and a few more grinds of sea salt. Anything over 3 dainty tastes is indulgence, not testing. Slap yourself and put the dressing away in the refrigerator to cool.

Okay. I had the dressing. But I didn't have the salad stuff (which comprised thin slices of French bread drizzled with olive oil and toasted in the oven until crisp, then smeared with soft goat cheese and draped with a generous helping of watercress, over which you drizzle the dressing) and I didn't have any crab cakes. Or fish sticks. Or even corn dogs, for cryin' out loud. But I did have chicken breasts. I nearly always have chicken breasts.

Took one out of the freezer and thawed it in the microwave. Pounded it flat. Layed in some feta cheese and minced onion and rolled it up nice and neat. Put it in the middle of a baking dish. Took the package of bacon strips out of the freezer and cut three or four very narrow strips off one end of the layers. Spread those bits over the chicken breast. Took some mixed frozen veggies (green beans, corn and carrots) and poured them into the baking dish on one side of the chicken. Then took some frozen tater tots and poured them in on the other side. Put a lid on the baking dish and slipped it in the oven (still at 350 degrees) for 45 minutes. When the time was up, I removed the lid and spooned some of the Roasted Tomato Dressing over the chicken. Let it cook for another 15 minutes with the lid off. The fragrance almost drove me mad.

And that's how my dinner "just growed." There had to be something to put under that dressing, you see. It's sort of like reverse engineering.

I was going to get two meals out of it. Really I was. Couldn't stop myself, though. I had to let the first helping settle a bit before I waded into the second -- and final -- portion but the whole thing is nothing now but a most pleasant memory. And that Roasted Tomato Dressing is seventeen kinds of fantastic! There's still some left in a little jelly jar in the refrigerator. Wonder what kind of a Topsy meal will go with it next?


Thursday, September 27, 2007

Quick Fix In A Mug

This has been a long day of waiting. Seems I'm long overdue for some Microsoft downloads, which I hadn't noticed because I've been using Firefox as a browser. Today, because I needed to download a program that allowed me to view Excel files from versions newer than mine, I also had to update the Service Packs. Oh woe.

I do not believe these people in Redmond. I mean, they have to peek into the innards of your computer so they'll know what you need to download, right? So they lined up the three packages I needed and assured me that with the connection I had, it should take less than a minute.

Excuse me? They can't tell I'm on dial-up? Really? Just one of the three downloads I'm supposed to have was 108MB. My connection speed averages 5k/sec -- and that's when it's running hot! It took almost six hours to get all those megabytes in the barn! One minute, my ass-terisk.

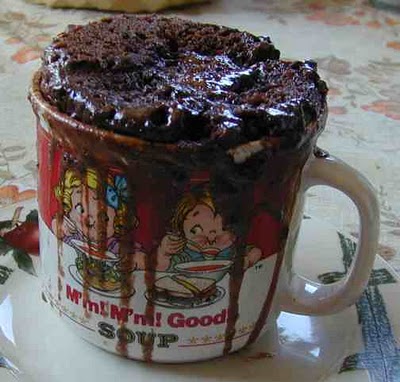
Somewhere in the middle of all that download angst I got an overwhelming urge for a quick chocolate fix. Now, I have succumbed to that temptation more than once, whupping up a batch of wonderful brownies or maybe a couple dozen cookies. Unless I'm able to share the bounty with others, invariably the better part of the goodies goes to waste. What I needed was something large in satisfaction and small in volume. The thought of cake in a coffee mug, nuked in the microwave, floated across my inner vision.

Ah, no. I've done that. Microwave "baked" goodies just don't quite get it. No. I don't want to do that.

I fidgeted. I casually browsed along with Google, pretending I wasn't really looking at the recipes for cake in a mug. Just slumming, you know? Then there was this one site with photos of different experimental cakes. She used plastic freezer containers but I don't think that's a good idea. Still, there didn't seem to be any reason why the same recipes couldn't work in mugs.

If I was going to do that, I mean. Not that I was.

Then there was another choccy cake in a mug recipe that looked to be in just the right proportions for a quick fix. I mean, if it turned out as bad as I remembered that sort of thing, I wouldn't have wasted much. On the other hand, if I got lucky, my jones for choccy would be temporarily appeased and I would be fit for human company again.

So I sort of mixed and matched a couple of different recipes and techniques and went for the gusto. One thing I think I can dispense with next time -- although some recipes say to use a loose lid or covering, I would suggest not. The first minute I forgot the lid, so I put it on for the second minute -- and that's when my cake ran over. Screw the lid, okay?

The mug I used is actually a soup bowl that holds about 1 and 2/3 cups of whatever. I'm not sure how much batter I got out of this recipe but I might have been better served to divide it between 2 smaller mugs. In any case, this is how it goes:

Lightly oil or butter the inside of your mug(s). In a small bowl, mix 3 tablespoons vegetable oil (or melted butter), 1 egg, 1 teaspoon vanilla, 1/4 cup brewed coffee. Whisk together well. Add 1/2 cup flour, 1/2 cup sugar, 4 heaping tablespoons baking cocoa, 1/2 teaspoon baking powder, 1/2 teaspoon salt. Mix together just until blended. (One source said if you beat the batter too much, you get rubbery cake from the microwave.) Pour the batter into the mug(s) and microwave 2 to 2 1/2 minutes. You'll have to experiment with your own setup. I continued to nuke it in 30-second increments for a total of 3 1/2 minutes and it was perfect. In spite of the run over. With 2 mugs going simultaneously, it might take longer. Or not.

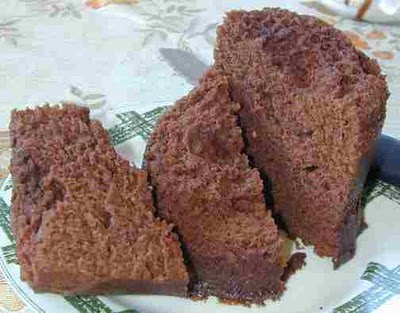
I was amazed at the result. Not just the flavor -- which was great -- but the texture. It was firm but softly fluffy. It was moist without being gooshy. The part that sort of ran over looks raw but is really a bit on the fudgey side so it's like have just a touch of frosting. Which you don't need. The cake is fine, bare-nekkid-nude. And the amount is perfect for me. I munched away at half of it over the course of the afternoon. I'll probably finish it off in the wee hours. And nothing will go to waste.

Gee, I like happy surprises like that. It will sustain me as I wearily continue with the Download From Hell tonight.


Sunday, September 23, 2007

Aunt Della's Unexpected Dills

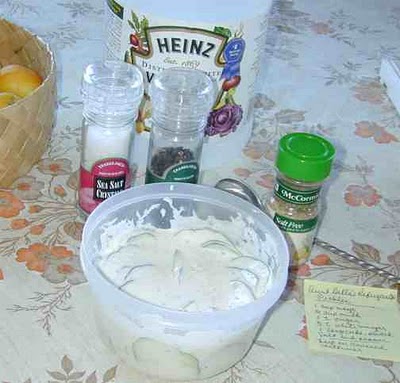
While exploring the world of pickle potential in my Googlemobile, I found one site where the blog owner asked readers for favorite refrigerator pickle recipes. The response that charmed me came from a woman who said, simply, "I always use Aunt Della's recipe," and she laid it out for everyone. It called for 1 cup mayo, 1/4 cup milk, 1 teaspoon sugar, 1/2 teaspoon white vinegar, salt and pepper to taste. Mix well. Slice in 1 large cucumber. Keep in covered container in refrigerator.

Okay. That's just about exactly the same mixture I was taught to use when making traditional cole slaw dressing -- except I was taught to go heavier on the sugar and vinegar. And I had one regular green cuke in the basket. And I was pretty sure Aunt Della wouldn't mind if I dilled up her recipe. See, it tastes pretty good the way Aunt Della lays it out and, to my mind, tastes even better when I jack up the sugar and vinegar portions. Still, something was lacking.

Aha! As I munched away at a dressing-coated slice of cuke, my gaze fell upon the bottle of McCormick's "It's A Dilly" seasoning. This is good stuff, Coffee Mates. A salt-free mixture of onion, garlic, dill weed, lemon peel, dill seed, and jalapeno pepper. (Don't worry -- I think they just waved the jalapeno pepper in the general direction of the mixture because I sure can't taste any.) I sprinkled a generous portion into Aunt Della's dressing, mixed everything up good and sampled another cuke dripping with the thick and now dill-speckled dressing.

Oh yeah. Oh, this is righteous. It is. During the early football games, I had a most excellent sandwich that consisted of a layer of cukes, a layer of cheddar, and another layer of cukes. Although the dressing is thick, it really is a good idea to eat the sandwich over a plate because it's messy, messy, messy. Good stuff often is, have you noticed?

Now for the report on the pickles I packed away yesterday. I'm happy to tell you they turned out pretty close to perfect. Okay, fairly close. Well, they would have probably been fantastic if my grandson James -- who is a Steelers fan but otherwise a great kid -- hadn't been laying some serious smack on my Raiders just as I was sprinkling the dried chili peppers into the pickle mixture. I vaguely remember thinking the chili was old so maybe not as robust as fresh so I should probably use a bit more. Mostly, though, I was concentrating on defending my gridiron guys so there was, perhaps, not quite as much attention paid to detail as there should have been.

What I'm saying is, when I sampled the pickles this morning, they were crunchy and tasty and crispy and -- HOLY FLAMETHROWER, BATMAN!

I think there are only skid marks where my tonsils used to be but I'm afraid to look. Needless to say, I have performed emergency procedures to alleviate the crisis. First I drained the pickles and then I rinsed the bejaysus out of 'em. Then I dumped them in a bowl and covered them with equal parts cider vinegar and water, 1/4 cup brown sugar and 1 tablespoon kosher salt. Put everything back in the freezer bag and returned it to the refrigerator. I just checked -- the procedure was successful. Although the pickles still generate heat, now it's merely Pleasantly Toasty instead of Raging Inferno From the Third Ring of Hell.

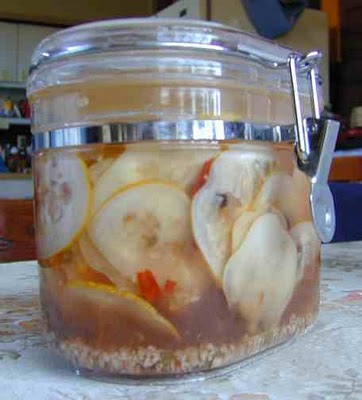
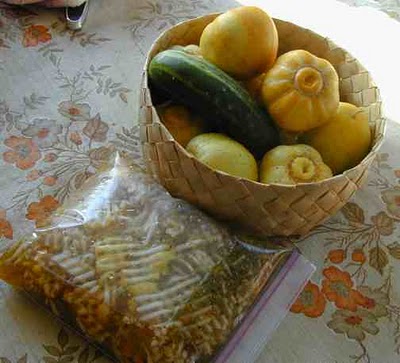
The final pickle procedure of the day was a far more sedate sort of production and is pictured below. In a small saucepan, put 1 cup water, 1 cup cider vinegar, 1/2 cup wine vinegar, 1/2 cup sugar, 3 tablespoons kosher salt, 2 teaspoons mixed pickling spice and 1 tablespoon minced garlic. Bring to a boil, turn down and simmer four minutes. Thinly slice 2 or 3 cucumbers (a couple of cups?) and put in container. Slowly pour hot liquid over cukes, filling to the top. Let cool to room temperature, top off with remaining liquid (if any) and keep covered in refrigerator.

Okay, the thing is, with refrigerator pickles, you're not supposed to leave them sitting there forever, the way you can do a jar of pickles that has been seriously processed, either commercially or at home. Which is why most refrigerator pickle recipes are for small quantities that, theoretically, can be consumed in a couple or three weeks. And I now have one small batch of the sneaky hot pickles, one small batch of the sedate pickles and a dilly of a bowl of Aunt Della's pickles.

And I still have some cucumbers left.

Well, guess what? You can also make freezer pickles! These can be kept up to 6 months in the freezer but should be consumed in a week or so after being thawed in the refrigerator. Which means one should freeze them in small portions, correct? Okay. I've got a couple of recipes lined up for freezer pickles but haven't decided which one is gonna make the cut. In the meantime, here are a couple of links that might interest anyone wanting to pickle any excess produce. This one, for instance, is a Yahoo Directory of 15 links to pickle sites. One of which is my guy, Alton Brown. If that's not enough for you, venture over to Hungry Monster for an unbelievable list of 286 pickle recipes. That'll keep you from playing in traffic!

Now if you'll kindly excuse me, there is an evening football game to entertain me as I munch on some more of Aunt Della's Unexpected Dills. To which I'm going to add some cherry tomatoes -- just because I can.


Saturday, September 22, 2007

Pucker Up!

Well, you know, I do love a good pickle, especially in my sandwich fixin's. So today, when youngest dotter, Patti, brought me a batch of lemon cukes from their bumper crop, I thought, "Gee, there must be an easy way to pickle these puppies." Because, you also know, I like my food preparation to be fast and easy. All that muss and fuss with regular canning is simply not on my list of Things I'm Eager To Do.

Nothing for it, then, but to Google for the appropriate refrigerator pickle recipe. I can't tell you I've got a bingo on it yet because the pickles have only been in the refrigerator for an hour or so. They sure smell good, though. And, Lord knows, they were definitely fast and easy.

This is one of those gigs where you play the amounts by ear. I made enough to fill a 1-quart freezer bag so you take it from there. In this case, 2 of the lemon cucumbers, lattice-sliced, were enough to do the job.

The recipe I found calls for 2 cups water and 1/3 cup vinegar. At that point, Patti and grandson James assured me a friend had told my son-in-law, Roger, to just use straight vinegar -- no water at all. "Are you sure?" I asked. "Absolutely. Roger says they taste great and they 'pickle' quicker." Hmmm. Okay. Whuddahey. If the vinegar comes across too strong, water can always be added later. I merrily splashed in enough vinegar to just cover the cuke slices in the bowl. Pucker power, that's what I say.

Then I added 2 heaping tablespoons brown sugar, 1 tablespoon salt, approximately 1 teaspoon freshly ground black pepper, 1 tablespoon minced garlic, about a teaspoon of dill and probably another teaspoon of dried chili peppers. Gave it a good stir and had James hold the plastic bag while I spooned everything in. It just fit.

So it's doing its pickling thing as we speak and sometime tomorrow I'll give it the first taste test. Might want to add a bit more of this or that or the other thing. On the other hand, I might want to call the Poison Control Center. I'll let you know.

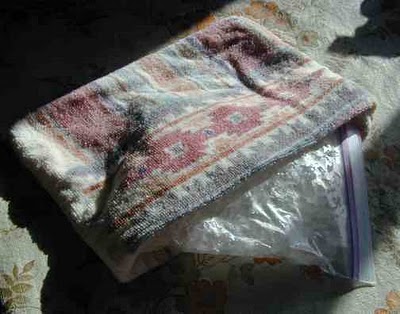
On another front, more fun and games with the water gel crystals. I loaded another 1-quart freezer bag with hydrated crystals and designated it as my homemade heat/cold pack. First I nuked it, 30 seconds at a time, until it reached what seemed to be the appropriate temperature. The final total was 2 minutes but if you do this, I recommend the 30-second segments because different microwaves do things at different speeds, okay?

I have this terrycloth bag made from a kitchen towel that is the perfect size to use as a comfort cover for the pack. Forgot to note the time but the pack held its heat for a good hour I think. Once it completely cooled down, I tossed it in the freezer. It freezes up just beautifully and, once again, slipped into the terrycloth cover, it performs perfectly.

This is a comfort to me. If I strain myself fixing pickles, I already have the healing heat/cold pack in place, ready to go. You can see it below, in its cold mode. Schweet.


Thursday, September 20, 2007

Squeezin's

There should be a glorious photo in this spot. If it existed, it should send your salivary glands into instant overtime. You would have liked that, really you would.

So what do you get instead? My version of the Blond Moment, the Oh, Duh syndrome. Because I took the glorious photo of which I spaketh above. And then I ate-eth up that which I photographed. And then, when I went to prepare the photo for this post, I found I had rushed things a bit in my eagerness to partake of the bounty and the picture was disgustingly blurred. And now it's too late to do anything about it.

But don't take my word for the fact that the dish I'm about to lay on you is nothing short of fantastic. It's also fast and easy so you'll have a ball whuppin' up a batch for your own self. This is actually two separate recipes that I ran across when I was looking for inspiration to use up all that orange juice the family left with me when their vacation was up. You can call it whatever you want but I call it:

THAT ORANGE STUFF

Part One: Orange Rice. Use a heavy sauce pan that has a lid. Drop in 3 tablespoons of butter and let it melt over medium heat. Dump in a 1/2 cup of finely diced celery, leaves and all, and 2 tablespoons of minced onion. Saute until onion is tender but not brown. Add 3/4 cup water and 1 cup orange juice, 1 teaspoon salt and, if you've got it, 2 tablespoons finely grated orange peel. Bring to a boil and slowly stir in 1 cup of long grain white rice. Immediately turn the heat down to low, put a lid on it, and let it simmer for 25 to 30 minutes. (If you use brown rice, you'll need to cook it more like 45 minutes.)

Part Two: Orange Chicken Stir Fry. Take a nice big boneless, skinless chicken breast and cut it up into little bite-sized pieces. Toss the chicken in a mixture of 2 tablespoons cooking sherry or rice wine and 1 tablespoon corn starch. Let marinate about 30 minutes. While the chicken is doing its thing, in another bowl mix together: 1/3 cup orange juice, 2 tablespoons soy sauce, 1 teaspoon sesame oil (I used olive oil -- so sue me.), 1 teaspoon brown sugar, and 1/4 teaspoon chili paste (or whatever hot sauce you have handy). On the side, mince up 1 clove of garlic and about a teaspoon of fresh ginger. If you want to add any veggies, prepare about a cup of whatever you fancy. I used up the fresh snow peas because they were begging to get into the game. Yay, team.

Okay. The rice should be done. Lift the lid and fluff it a bit with a fork and cover it again. (Don't forget to turn off the heat.) Put a deep frying pan on medium-high heat and drizzle in about 2 tablespoons of olive oil. Throw in your garlic and ginger and stir fry a bit. Then toss in the chicken and stir that around until the chicken bits have all turned nice and white. If you decided to include veggies, now is the time to add them. Keep stirring everything around for another minute or two, then shove it all to the sides and pour your orange sauce in the middle. It will start bubbling almost immediately. Stir the chicken and veggies into the sauce and cook for about another minute.

Pile a steaming, aromatic mini-mountain of rice on your plate and then drape a few big spoonsful of the chicken stir fry over it. Sit down at the table with a fork and a napkin. Light a candle for ambiance, pour a glass of wine, remember to acknowledge an Attitude of Gratitude and dig in.

Now, wasn't that easy? And fun? And unbelievably delicious? We should all commit to doing That Orange Stuff more often, that's what.

Monday, September 17, 2007

Cabbage Marathon

Okay, I promised to tell you about my cabbage marathon -- like you're waiting with bated breath to hear about it, right? Nod your head and mutter, "Yes." Thank you.

Where were we? Oh, yes -- I had mentioned being in possession of 2 1/2 heads of cabbage. I believe I also mentioned my brother and his wife were here for a 2-week visit. Before they closed up the lake house, they emptied the refrigerator and brought all the remaining food to me -- Old Hollow Leg -- so it wouldn't go to waste. Part of what they brought was 1 1/2 heads of cabbage -- and I already had 1 head. Of cabbage, I mean.

I don't care what anybody says, that's a lot of cabbage for one liddle ol' leddy. Two heads are not only better than one, they're way more. Not that I'm complaining, nope, nossiree. Cabbage is good. I love cabbage. Really. But, gee, how was I going to fix all this cabbage before it spoiled on me?

The first thing I did was to haul out my trusty little V-Slicer and shred every single bit of it. Such a pile of cabbage! Very impressive. I got four rather full quart-sized freezer bags right off the git-go. Then I made the 30-day salad I told you about yesterday. Then, with the remaining cabbage, I made the Grandmother of all veggie soups.

Took my next-to-biggest kettle -- which holds something like six-plus quarts -- and threw in the cabbage. Next came a couple of cups of lattice-cut carrots, a couple of cups of sliced zucchini, one large diced Walla Walla sweet onion, and most of a clump of celery. This might make you blink but it works for me -- I also tossed in a cup of very spicy-hot grape salsa which included cilantro and jalapeno. Didn't need any other seasoning after that. (Wiggling eyebrows wickedly.)

I had made cottage cheese with a quart of buttermilk so I drained off the whey into the pot. Then came, oh, I dunno, probably 6 cups of chicken broth and 1 can of V-8 juice. The last item to go into the pot was 1 cup of uncooked rice.

Brought all that to a boil, then turned it down and put a lid on it so it could cook slow until everything was tender. And it did. And everything was. I had a bowl for dinner and pronounced it sublime.

All of which is fine but it must be noted one bowl hardly makes a dent in that much soup. I was now faced with the logistical problem of portioning out all that good stuff for later consumption and -- lord have mercy -- finding room in the freezer to put it.

Well, if one excavates deeply enough, one can find assorted items that are so far past their Use-By date they could hail from the Jurassic period. I'm not sure how long that half-quart of ice cream has been in there but I think it had fossils in it. And there were all those packets of sauce that come with the frozen stir-fry veggies. I don't know why I save them because I like my own sauce better. Lots of space gained by tossing them.

After much diligent and fairly ruthless effort, I'm happy to report my freezer is now neatly rearranged and all the soup is safely stored and there is even a little room left over for more stuff. Heh, heh ... I'll think of something to cram in there.

Sunday, September 16, 2007

Crime Prevention

What you see here are cookies, of course. On the back of the Baker's Semi-Sweet baking chocolate box, the recipe is labeled "Chocolate Chocolate Chunk Cookies." They are, I assure you, so completely decadent, depraved and delicious that they could topple empires, cure fourteen different diseases and prevent crime. I don't know what more you could ask from a cookie.

Yes, they will prevent crime. I was ready to put out a hit on Mike Shanahan, coach of the Denver Broncos, for his despicable time-out call a nano-second before See-Bass kicked what would have been the winning field goal in this afternoon's hugely exciting game. As a consequence, the kick was negated, the next try barely missed and the Broncos went on to win in overtime.

Okay. There is a long tradition of "icing" the kicker by calling a timeout just before they get ready to do their thing. The theory is, the longer they have to wait, the more nervous they will be and, possibly, the more likely to miss. But you rarely see the timeout called almost simultaneously with the kick. It just seems -- well -- mean-spirited, you know?

Granted, it might have backfired. It might have been that Janikowski missed the first one and made the second one. Boy, that would have been sweet. Alas, it was not to be and we lost a real heartbreaker. And I was ready to start Googling for hit men. Fortunately for Mr. Shanahan (not to mention me and my own karma), my cookies were done and ever so capable of soothing my bruised feelings and cooling my rage. Just in case you, too, need something to lift your spirit and save you from yourself, here is the recipe.

BAKER'S CHOCOLATE CHOCOLATE CHUNK COOKIES

You'll need two 8-ounce boxes of semi-sweet choccy. I only had one but I also had a pounder-plus of Trader Joe's dark choccy so I used half of it. Anyway, take half of your chocolate and coarsely chop it and set it aside. Take the other half and melt it in the microwave (2 minutes on high should do it), stirring to smooth it out.

Now add 3/4 cup firmly packed brown sugar, 1/4 cup (half a stick) butter, 2 eggs and 1 teaspoon vanilla. Beat it really good with a wooden spoon. Add 1/2 cup flour and 1/4 teaspoon baking powder. (I really didn't believe that was enough so I made it 1/2 teaspoon.) When that's all mixed in good, add your chopped choccy and 2 cups coarsely chopped walnuts. I think I only had 1 cup of nuts but it seemed to be enough. I toasted them before chopping them up because I think they taste better that way.

Pre-heat your oven to 350 degrees fairyheight and take a couple of soup spoons to drop dabs of dough on ungreased cookie sheets. The recipe suggests 1/4 cup per cookie and says your yield will be 18. I got 20. Your mileage may vary. Bake the cookies for 14 minutes. When you remove them from the oven, let them sit for a minute, then transfer them to wire racks to cool completely.

I know. I was going to explain about my cabbage marathon today but that will have to wait until tomorrow. I consider this choccy recipe to be a mission of mercy -- just in case you feel like hunting down a hit man your own self.

Saturday, September 15, 2007

Thanks, Gordy!

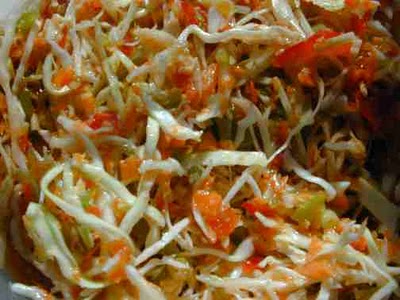
That colorful collage above is a mouthwatering view of one of my favorite salads -- Gordy's 30-day Cole Slaw. Gordy, alas, is no longer with us. He was a vet and a regular customer when I was bartending at the VFW. In civilian life, he sold and installed carpets and would often come in after a hard day for a few beers and conversation. His libation of choice was always Heidelberg in the can.

There was maybe half a dozen of us in the canteen when he came in one afternoon. When he finished his second beer, he shoved the empty across the bar and asked me for a new one while he visited the men's room to recycle what he'd already imbibed. I picked up the can and started for the cooler when -- I dunno -- a Wicked Moment overcame me. Instead of tossing the empty, I filled it with ice-cold water from the tap and put it neatly on his coaster. The other customers smiled ... and waited.

Gordy came back and rejoined the conversation. Every now and then he'd raise the can to take a sip and we'd all lean slightly forward, anticipating. Then he'd think of something else he wanted to say and replace the can on the coaster while he talked. And we'd all sit back and wait some more. This happened several times -- Gordy raises can, crowd leans forward, Gordy lowers can and talks, crowd sits back and sighs.

Finally the moment came. Gordy raised the can, took a good slug and swallowed. His eyes ballooned out in shock as he shot the can forward and exclaimed, "This beer is FLAT!"

And half a dozen people immediately collapsed in laughter, trying really hard not to pee our pants. It was years before that man would let me open a can of beer for him.

Fortunately, that didn't stop him from giving me the recipe for the 30-day cole slaw and he was absolutely right -- it will probably be eaten long before the 30 days are up but it just gets better every day. Since I just found myself in possession of 2 1/2 heads of cabbage (more about that tomorrow), one of the things I did today was fix a batch of the slaw. And this am the way it goes:

GORDY'S 30-DAY COLE SLAW

You'll need a large bowl for tossing everything. Shred or dice the following: 1 large head of cabbage, 1 each red and green bell pepper, 1 medium onion (or 2 large leeks or half a dozen green onions), 1 cup of celery and 1 large carrot. Toss everything together.

In a sauce pan, mix 1/2 cup of honey, 1/2 cup cider vinegar, 2/3 cup vegetable oil, 2 tablespoons sugar and 2 teaspoons salt. (I don't know why one needs sugar when one has honey but that's what Gordy said and the results tend to validate him.) Bring mixture to a boil and immediately remove from heat. I say "immediately" because that puppy will boil over in a New York minute if you're not careful. Let cool. You may need to skim off the foamy stuff from the honey after it cools down.

Once the dressing is cool, pour it over the slaw and toss thoroughly. Now you can transfer everything to a smaller bowl. Keep covered in the refrigerator and give it a stir every day. And don't forget tip your spoon (after you lick it) and say, "Thanks, Gordy!"

Friday, August 31, 2007

Gold In Them Thar Loaves


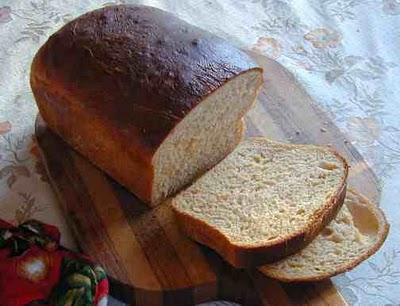
I can see from the hole in the heel, I didn't get all the air bubbles out when I shaped the loaves for the bread pans. Not that it matters. I got two loaves of some wicked good bread ... and I'd better enjoy it because it might not happen again.

You know how that happens. You get to fooling around, tossing in so much of this and a little bit of that and maybe just a tinch of thus and so. Lo! It turns out most excellent and you're not at all sure you will ever be able to remember how you did it this time so how the hell can you count on doing it again next time?

It started with the remainder of the can of coconut milk that I had used for the Thai peanut sauce in yesterday's culinary adventure. There was almost a cup left and I sure didn't want to waste it so I thought, hmmm, wonder how it would be in bread?

Then I got to thinking about the squash I had cooked up. You know, the mystery squash I showed you a couple of weeks ago. I had cooked it in the oven, then sliced and diced it. Some of it went in a veggie soup and I scored a couple of bags for the freezer. There was about a cup of it left that I figured just might go well in the bread.

So I pulled out the pan for the bread machine and set to work. First I whisked an egg into the coconut milk and warmed it in the microwave, then dumped it in the pan. Then I tossed in, oh, say about half a cup of sun-dried tomato wedges. (translation: dried in my trusty dehydrator) Then 3 cups of all-purpose flour and 1 cup of whole wheat flour and 3 tablespoons of vital wheat gluten. That latter really does seem to make a huge difference in how well the dough rises when you use whole wheat flour.

I thought about it for a bit and decided to add something like 1/3 cup of sugar, figuring it would compliment the squash. I was looking for something in between sweet and savory. Then a tablespoon of kosher salt. Yes, a whole tablespoon. Trust me. I topped all that with the cubed squash and a tablespoon of yeast.

Dayum, I said to myself. That isn't going to be enough liquid for that much flour. There was a wine glass sitting on the counter so I grabbed it and filled it half full of warm water and tossed that in with everything else. Looked spiffy to me.

As you can see, everything was done seat-of-the-pants style. If you want to duplicate the adventure, I see no reason to get obsessive about measurements. Your version may well come out a whole lot better. For instance, I'm thinking now that using brown sugar instead of white would have been even better. Go for the gold!

And there is a lot of gold in this bread. The machine does such a good job of kneading that both the tomatoes and the squash were reduced to picturesque little flecks of red and gold throughout the dough. And the flavor. Oh bliss. I had some plain. I had some with blackberry jam. I smiled a lot. I'm awfully glad I made two loaves. This is going to go fast!

Sunday, August 5, 2007

Pass the Pizza

That might not be the purtiest pizza in the world but it is, by golly, right up there with the tastiest. That is, if you like white garlic sauce and spicy chicken. And I do. I really do. I also like the way the recipe I found for crust just made a great timing framework for everything else -- including occasional contemplative coffee breaks. It's hard to enjoy cooking if you're so rushed you can't take time to smell the spices.

PARTY OF THE FIRST PART -- CRUST: In a small bowl, put 6 tablespoons of warm water and dissolve 1 teaspoon of sugar in it. Sprinkle 1 teaspoon yeast over the top and let it sit in the sunshine to get all bubbly and frothy.

In a larger bowl, put 1 cup of flour and stir in 1 teaspoon salt, 1 teaspoon dried sweet basil and 1/2 teaspoon poultry seasoning. Make a well in the center, pour yourself a cup of coffee and sit and sip while waiting on the yeast.

When the yeast mixture is ready, add 1 tablespoon of olive oil to it, then pour the whole thing into the flour mixture. Sing "I've Got Friends In Low Places" to keep the rhythm while you beat the dough into submission. It should be cleaning the bowl by the time you hit the chorus for the third time. Put a cover on it and set it somewhere warm to rise. You should have some more coffee until you quit panting.

PARTY OF THE SECOND PART -- TOPPING STUFF: Whatever pleases you is what should go on top of a pizza, of course. Second choice is whatever pleases you out of what you happen to have on hand. I diced up 1 skinless, boneless chicken breast and quick-fried it in a drizzle of olive oil and sprinkled it with a generous portion of McCormick's taco seasoning mix. Put it in a bowl to cool.

The only cheese I had on hand was cheddar but I concluded that was okay, given the Mexican flavor of the chicken. Shredded up a very generous cup or so of it. Then I sliced and diced some of that wonderful garden-fresh real tomato. Thought about dicing up some sweet Walla Walla onion but forgot.

PARTY OF THE THIRD PART -- WHITE GARLIC SAUCE: Take a couple of fat cloves of garlic, peel and smoosh and mince them. Get out the frying pan again, put the heat on medium and plop in half a stick of butter (2 ounces) and, as it's melting, toss in the garlic. Stir everything around a bit, then add 2 heaping tablespoons flour. Stir and stir and stir and stir. Add 1 cup of milk and use the whisk to keep the sauce from lumping up. Season with kosher salt and fresh-ground pepper to taste. Turn off heat when it thickens. How thick? I dunno -- thick enough that it won't run off the edge of the pizza but not so thick that it could pass for a second crust.

Preheat oven to 425 degrees fairy height. Turn the dough out onto a very lightly floured surface and knead about a minute. Shape into a ball, cover and let rest about 10 minutes. Might as well have another mug of coffee while you're waiting.

PARTY OF THE FOURTH PART -- GETTING IT ALL TOGETHER: Roll out the dough and lay it in the pizza pan. Mourn the fact that you can't seem to get the knack of spinning it around on your fist to spread it out. That would be so cool. Spread the white garlic sauce around on the dough, leaving a margin around the edge because it suddenly occurs to you that you need to roll the edge a little bit to contain the filling. Artistically sprinkle the sauce with the colorful bits of tomato and chicken and then cover it all up with the shredded cheese. Do a sorta-kinda roll all around the edge of the crust and shrug. It'll have to do.

Put the pizza in the oven, bottom shelf, and set the timer for 15 minutes. Ovens vary so you might need to go 20 minutes. As it happened, the 15 seemed perfect.

When the pizza comes out of the oven, try not to sob with pride. Take pictures, slice pizza, take more pictures. Eat some of the pizza. Moan with ecstasy.

See those two slices below? They don't exist any more. Neither do two more slices I didn't bother to photograph. I think my current level of satiation is pretty much at Overkill so I'll save the rest for a midnight snack. I almost said "midnight mass." That works. Good food is a lot like a religious experience.

Saturday, August 4, 2007

Squash, Mayo and Clooney

My buddy Linda N. and I were talking on the phone this morning, arranging for a quick run to the library.

"Do you like butternut squash?" she asked.

"You bet!"

"Oh good," she said. "I like summer squash but I don't care for winter squash. If you want it, I have this nice butternut you can have."

Well, you don't have to slap me up alongside the head when friends are sharing summertime produce. We all have to do our parts to keep the good stuff from going to waste, don't we? (We won't discuss how many lies we end up telling to get out of taking on outrageous supplies of zucchini but that's the exception.)

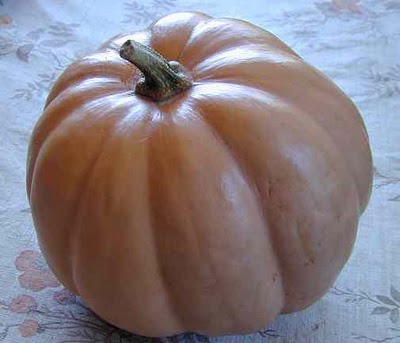
Anyhoo, the above photo is what she gave me. Unless it's some kind of hybrid, I don't believe that's a butternut. At least it doesn't have the familiar jug shape, nor is it as thin-skinned or as pale as the usual butternut. It's more the shade of light, unglazed clay pottery -- the color tones on the right side are closest to true. Definitely not the orange of a pumpkin, although it's shaped like a small one. This specimen is about dinner plate-size. It might be a Gold Nugget. It's close to the same color as the Long Island Cheese squash -- except it's not flattened on top like the cheese squash. Hmmm.

Doesn't matter. It's going to be delicious, I know. It's a good thing winter squash keeps well because I haven't decided yet how I'm going to fix it. Lord knows there are a blessed variety of recipes online and I can assure you I'm perusing them with a fine-toothed comb. Or maybe a slotted spoon would be more appropriate.

Linda also gave me a couple of absolutely perfect garden-fresh tomatoes. Ohmygawd. I'd forgotten how utterly sublime a real tomato can taste. I've already had two sandwiches with dill-sprinkled 'mater slices and cheddar cheese. Heaven!

Before I could make the sandwiches, I had to whup up a fresh batch of my magick mayo, which you may recall from this entry. And I did. And it was wunnerful, wunnerful. As I was sitting here munching away on my sandwich and occasionally moaning in ecstasy, I got to wondering about all the possible flavor variations one can do with mayo. Next thing I knew, I was munching and Googling and having a great time.

And that's how I found Chef John at Food Wishes. This is a terrific foodie site wherein the recipes are demonstrated on short videos, hundreds of them. For instance, here's Chef John's version of the immersion/stick blender mayo. His recipe is just a bit different than mine: he uses 2 egg yolks, I used 1 whole egg. He uses a half-cup more oil than I do. From the looks of things, his mayo and mine come out the same. This tells me the method is a forgiving one that allows creative tomfoolery. (Insert wicked chuckle.)

I hope you'll visit Chef John -- and bookmark his site. Speaking for myself, watching a dish being made is immensely more informative than simply reading a recipe and crossing your fingers. Besides, the man is funny and unassuming and gives good vid. And how could you not love a guy whose profile photo is a George Clooney look-alike?

Thursday, August 2, 2007

Sometimes You're The Windshield

... other times you're the bug.

When we last heard from our gallant heroine (that would be me), she was about to crack the secret of spicy dried peas, sans wasabi.

As Charles Schultz would say when a comic strip deadline approached: "Back to the drawing board!"

The peas dried up just fine, thank you, and the spicy sauce in which I tossed them was tasty. The result, however, in a word -- sucked. Garbage pail stuff. Really.

I was not completely stymied by this discouraging state of affairs. After thinking on the problem a bit, I began to wonder what would happen if I deep-fried some fresh peas. I scooped out about half a cup of frozen peas, thawed them, then dropped them into some vegetable oil at 375 degrees fairyheight.

Well, that was fun! The peas sizzled and scooted around in the oil like they were equipped with tiny invisible motors. Some of them went spiraling across the surface of the oil like whirling dervishes. Some of them snapped and popped and one actually blew up with such a loud bang that I must have jumped three feet in four directions at once.

When they began to turn brownish, I scooped them up and drained off the oil and spread them out on a paper towel. Then I sprinkled them with kosher salt and chili powder. That's what you see in the photo above. You know what? They weren't bad at all. Some were tender-crunchy, some were soft, all were tasty.

Will I do this again? No. While the french fried version smoothed my ruffled culinary feathers, it just wasn't good enough to bother with another time. As for the dried pea version, I don't even want to think about it.

And now I've got that oil sitting there in the pot. That's why I hardly ever deep fry anything. I hate dealing with the oil afterward.

On the other hand, I haven't made doughnuts in just forever ...


Tuesday, July 24, 2007

Pita and Potter

Let me steer you to what I think is the very best site to learn how to make pita bread. Not only that, I think you'll like the whole tone of the place and want to bookmark it for future reference. I did.

It's called Farm Girl Fare and is the brain-and-heart child of a woman named Susan. By the time I'd perused the text and pictures of her pita project, I was well and truly hooked. I'm not even going to put the recipe here because she does the job so well at her place.

Yes, I whupped up a batch of pita bread according to her instructions just this afternoon. Mind you, that was even after I had picked up my copy of Harry Potter from the post office. In the past, once the new Potter book arrived, I had always been adamantly incommunicado until I'd read every word. The world could have crashed around my ears -- I wouldn't have noticed.

This time, however, I'm teasing myself, drawing out the pleasure and savoring each delicious chapter. So I got the book home and slid it out of its box. I stroked the cover. I sniffed the pages, which we are assured are made of 30% recycled fiber and over 65% certified as coming from "forests that are managed to insure the protection of the people and wildlife dependent on them." Whatever that means. They do not say what constitutes the remaining more-or-less 5%, which leaves room for speculation. For all we know, that could be recycled panty hose or dehydrated Jelly Bellies.

Anyway, I set Harry Potter and a mug of coffee at one end of the table and laid out my pita tools and ingredients at the other end. (I should mention that I varied Susan's recipe just a tiny bit by using 2 cups all purpose flour and 1/2 cup whole wheat flour. I also put in 1/2 a cup of dry milk.) It took practically no time at all to mix up the dough, knead it and divide it into eight portions, then form those portions into tidy little balls. Then I draped a damp paper towel over them, set the timer for 30 minutes and sat down with Harry Potter.

I read the dedication page. Then I realized I hadn't put the oven on preheat. Took care of that. Sat back down and read the Table of Contents and the Aeschylus and William Penn quotations. Remembered I was going to try Susan's suggestion to bake the pita on foil placed directly on the oven rack. Got up and spread a couple sheets of foil over the rack, closed the oven door and sat back down with Harry.

The timing was uncanny. Just as I read the last sentence of the first chapter, the buzzer went off and it was time to roll out the pita rounds. I can't say J.K. Rowling planned it that way but you can't completely disregard the possibility.

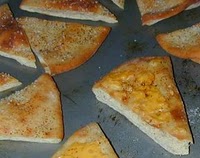
The dough rolled out easy-peasy and went in the oven, four pitas at a time. And they puffed up fine. And I figured out the best way to get out of making a proper meal was to take Susan's suggestion and turn a couple of the finished, butter-brushed pitas into a pan of pita chips. And it was unbelievably easy to do. Half the chips were sprinkled with kosher salt and a bit of cayenne, the other half were sprinkled with salt and shredded cheddar and a bit of cayenne. In the oven for 5 minutes at 400 degrees fairyheight and SHAZZAM! I had me a nifty platter of semi-crispy chips to munch while I curled up with Harry and settled in for a proper read.

I'm taking this break to get the post up before I get completely distracted. Aren't you proud of my self-discipline? As soon as I send out the notify, I'll check my email one last time and then make another pot of coffee. One should always have a good pot of coffee when one is facing an all-night session of anything. Well -- anything but sleep, that is. I sincerely doubt there will be any sleep tonight.

Bliss. Oh bliss.


Monday, July 23, 2007

Naansense


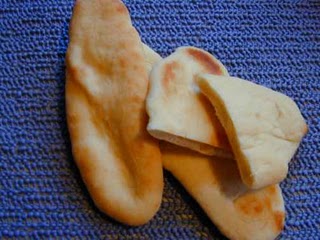
Okay. Naan. A middle-eastern flat bread whose popularity has spread all over the place. The shape tends to vary from the long oval you see here to triangular or round. It's good with any desired spread or to dip and scoop. It seems to me it's somewhere in between a flour tortilla and pita bread.

I'm still trying to figure some sense out of all the varying naan recipes and tips I find on the Internet. I guess you could call it "naansense." (Insert smug smile.)

That's why I'm not including a recipe this time around, although the one I used was similar to the one provided in the YouTube video included at the end of this post. That is, my recipe used yogurt (some naan recipes don't) but a lot more than what Manjula uses.

Some of the naan I made were rolled out round. The last few I made were like in the photo but I didn't roll them out. I just flattened them with my fingers. What I learned was, the finger-flattened ones did very little puffing and, as you can see by the one cut in half, they did almost no separating inside.

The ones I rolled out garned two different results. If I got them too thin, they were more like crispy crackers. When I got them just right, they puffed up like fat pillows (see the video) and separated into big pockets suitable for stuffing. I liked that! In fact, it didn't take me very long to whip up a batch of diced potatoes, onions, chicken and shredded cheese and pack it into a couple of naan halves. Good grub, Maynard!

I don't have a baking stone but my big cookie sheet seemed to work just fine. Apparently some folks have success cooking the naan on a griddle or in a hot skillet on top of the stove, just like doing flour tortillas.

What I'm going to do now is to check out a couple more types of flat bread, specifically chapati and pita. I figure they're worth getting to know. After all, they've been around for thousands of years and you don't maintain that kind of approval rating unless you're GOOD.