Showing posts with label cooking. Show all posts

Thursday, May 8, 2008

Tart Bliss

Whooeeee! Coffee Mates, I think I've found my tart bliss. Which is not meant to indicate either the presence or quality of personal behavior patterns -- ahem -- aside from those of a culinary nature. Darn it. (Pausing to stare dreamily into space while recalling "back in the day" moments.)

See, I'm on a mission. My friend Julie is getting hitched and she wants goodies that are easy and tasty and neat for the reception. Mini-cheesecakes were mentioned favorably and I got to exploring the possibilities via the Great Google. And mini-cheesecakes are well represented out there in recipe land because folks like the idea of having bite-sized portions of rich desserts instead of dealing with the full-sized version. Cheesecake, after all, freezes well so you only have to take out whatever number of minis you need at any given time.

Exploring the world of itty bitty cheesecakes led me to the kissin' cousin worlds of tassies and tarts and I began to edge away from the cheesecake versions. I've been tracking the perfect crust, you see, and I've messed with 'em all, from graham cracker or cookie crumbs to pie crust to phyllo and even vanilla wafers dropped in the bottom of the muffin cups. For one reason or another, none of the different versions made me cheer. Most of them were a pain in the derrierre to press against bottom and sides of muffin cups. Terribly time-consuming. I knew I was close with the whipped shortbread cookies from a couple of months ago but they weren't quite IT either.

I struck gold at the great RecipeZaar web site. If you go there and type 215530 in the Search box, you'll be taken to a page with the recipe for Lemon Cookie Tarts. I'd recommend it because when you print it off for yourself, you'll even get the box with nutrition facts on the page. Kewl. Now -- let me tell you why I think this is a Keeper recipe.


As you can see, the dough forms up into perfectly excellent little cups to contain whatever filling you decide to use. The recipe gave me 3 dozen tart shells and I made them 3 different sizes, just to check them out. What you see in this photo are the larger ones, already baked, and the smallest ones, still in round dough-ball form, ready for the oven. The neat thing is, you can make up a bunch of shells ahead of time and freeze them for later. When you're ready to use them, take out what you need, let thaw to room temp and fill with whatever pleases you.

Although Calee instructs us to make a depression in the dough before putting the pan in the oven, I took the advice of one of the commenters and put the tarts in while still in ball form. When the timer goes off at 9 minutes, you pull the pan out of the oven and gently press into the nearly-cooked tarts with whatever you decide to use to make the indentations. A rounded tablespoon measure is recommended. I used a shot glass at the 9-minute mark. The bottom of a Tabasco bottle works too. You can buy tart shapers but, as you can see, they aren't vital.

There's a trick to pressing the dough. As you press down (gently), twist the shaper once to the right, then back to the left. As you twist left, raise it out of the dough cup. That second twist seems to prevent the shell from being pulled out of the pan when you lift your shaper. I also lightly oiled the shaper so maybe that helped.

You put the tarts back into the oven for another 3 minutes or so, letting the edges turn golden brown. Then you let them sit for 5 minutes in the pan when you pull them out. Be sure you do that because they need that little bit of time to set into their shape. That's also a good time to gently repress the indents in each tart if you want to.

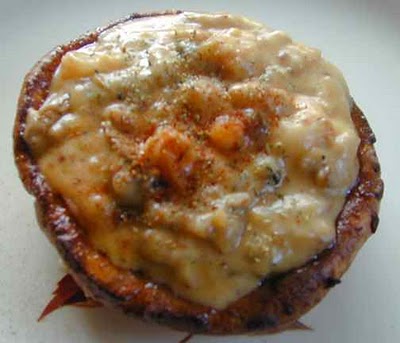
The tart at the top of the page is filled with lemon curd, with just the teensiest bit of orange marmalade on top for pizazz. But you can, of course, use just about anything for filling. Any flavor of thick pudding/pie filling. Or no-bake cheesecake. Or fresh fruit with a thick glaze.

You can make these in regular muffin tins but if at all possible, I think you'll prefer the size you get from the mini-muffin pans. The tarts are just a bite or two in size and this dough bakes up like a tender rich shortbread cookie. In spite of its tenderness, it won't crumble in your hand or onto your fancy clothes when you take that first bite.

Besides, doing the mini size won't spoil the decadent pleasure by drenching you in waves of guilt. It's a lot easier to pretend there are no calories in just a couple of bites of anything. This is one of those times when less is really more.
Wednesday, May 7, 2008

Simply Simple

I beg your pardon -- what?

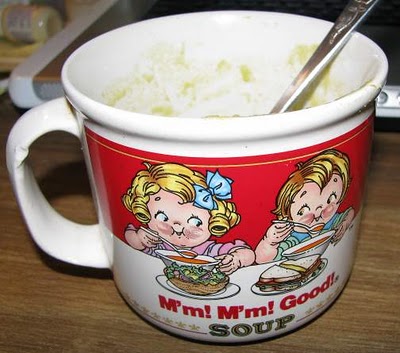
Oh. Yes, now that you mention it, that is a photograph of an empty soup mug. And, no, I'm not trying to emulate Andy Warhol. The picture is not meant to be artsy fartsy. It's simply a testament to a really good split pea soup and the compelling need to get it into my whimpering tummy. Which is whimpering no longer. Actually, I think it's purring.

I haven't had split pea soup for, oh, close to a hundred years, give or take a week. I picked up a package of dried split peas at the market something like a month ago on a grungy wet day that made me long for soup. Then I promptly forgot I had it. So there I was, today, looking out at another grungy prospect that was threatening to deteriorate to wet and I said to myself, "Goddess? Don't you think this is the perfect kind of weather for split pea soup?"

My Inner Goddess began to drool, which means, of course, I had to do all the work. Fortunately for me, that turned out to be really easy. One cup of split peas in 4 cups of chicken broth, simmered gently for 30 minutes or so. Easy peasy -- but I didn't stop there. Are you kidding?

Remember that homemade dry soup mix I raved about back in February? Just so you won't have to go look it up, here it is again:

CREAM OF CHICKEN DRY SOUP MIX

Mix together in a bowl: 2 cups nonfat dry milk, 3/4 cup corn starch, 1/4 cup chicken bullion granules or powder, 2 tablespoons dry onion flakes OR 1 teaspoon each onion powder, basil, thyme and 1/2 teaspoon pepper. Store in airtight container at room temperature. To use: combine 1/3 cup dry soup mix with 1 1/4 cup water. Mix well in small saucepan, bring to a gentle boil, stirring constantly, until mixture thickens.

I mentioned then that I thought it would lend itself quite nicely to microwave magic -- and it does. One minute on high, whisk furiously, one more minute on high, whisk again. Perfect. Oh -- I just used one cup of water this time, for more thickness.

I spooned the microwave soup into the split pea soup, sprinkled in a healthy pinch of poultry seasoning and then had at it with my trusty immersion blender until the whole thing was pureed to a fine fare thee well. Stirred in a sprinkle of dried onion flakes, turned the burner down to low, put a lid on it and then wandered off to do other stuff until my tummy threatened mutiny.

I was going to fry up a few snippets of bacon bits to add to the mixture but it was too late. One deep inhalation of the soup and there simply wasn't time to waste on inessentials like bacon. And, oh my. Smooth and creamy doesn't begin to describe it. Not to mention flavor. Don't you think split pea soup from scratch tastes much better than canned? And none of those pesky preservatives and unpronounceable ingredients to mess up the good stuff. That's nice.

There are a couple more servings left in the pot. Always good to look forward to. Sometimes, you know, the simple things satisfy like nothing else can. My Inner Goddess agrees.

Sunday, March 30, 2008

Not Pudding

WhooHAH! Do you see that? Do you? That little green thingie sticking up behind the blossom is my very first baby Lemon Drop chili pepper. From the very first blossom to open. I don't know whether this proves I'm doing a good job with my trusty Q-Tip pollinator or that the plant is perfectly capable of producing its bounty in spite of my efforts.

There are several other peppers in the act of becoming but almost all of them are mere nubbins as yet. Pepperlettes if you will. This one stretches out a whole inch-and-a-half and the pepper closest to it in size is a one-incher. I don't know how long it will be before it ripens to yellow but I'm really curious. From what I've been reading about this particular variety, it's supposed to actually have a citrus-like scent and flavor -- behind the fairly righteous thermal attribute, of course.

If anyone is interested, the Lemon Drop (sometimes called Hot Lemon) chili pepper comes from the Aji variety, of which there are many interesting forms. This particular type originated in Central and South America.


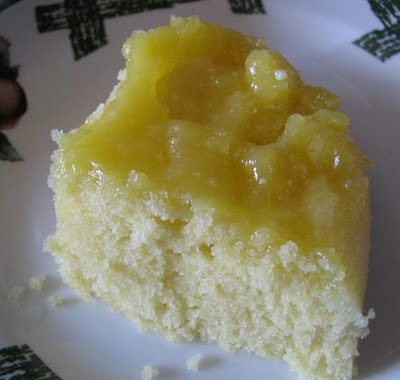
Speaking of lemony things, what do you know about the Sussex pudding? What you see above is the result of following what appears to be a most unconventional version of an old Brit classic. I whupped it up mainly because it seemed the ideal way to use up what was left of the lemon curd I made last month. (See My Lemon Jones.) It wasn't until after I did this microwave version that I browsed assorted recipes for the old-fashioned way of doing it -- the one that requires steaming the pudding for 90 minutes or more.

Well, guess what -- none of those recipes even remotely resemble this one. Just to give you an idea, look at the Wickipedia information and photos. Hooboy. Whole different animal, don't you think? It doesn't seem to matter whether one calls it Sussex Pudding or Sussex Pond Pudding, every single recipe seems to call for the crust around a whole lemon, nested in sugar and butter and steamed for hours. And I'm sure it's just great done that way but, to tell you the truth, it looks way too rich for my taste. I think I'll stick with my version, even if I can't bring myself to call it Sussex Pudding. How about if we call it ...

NOT-SUSSEX PUDDING

Butter a 2-pint (1 liter) microwave safe baking dish. Cover bottom with thin layer of lemon curd or orange marmalade (at least 2 heaping tablespoons). In separate bowl, mix 1 stick (1/2 cup) butter, softened, and 1/2 cup sugar. (I semi-melted the butter in the microwave, then gave it a good whisking with the sugar.) Add 2 eggs and 1/4 to 1/3 cup lemon juice and whisk well. Add 3/4 cup flour, 1 teaspoon baking powder, 1/2 teaspoon salt. Whisk until batter is smooth. Spread evenly over lemon curd. Microwave on high for 2 1/2 to 3 minutes, or until knife in center comes out clean. Please note, the timing depends on the power of your microwave. I had to nuke it for 8 minutes before it was done in mine. Your mileage may vary.

You can turn out the finished cake -- it is a cake in this incarnation -- onto a serving dish, with the curd on top. I found it simpler to leave it in the baking dish and taking out just a single serving. As you can see in the photo, the topping came with it without any fuss at all. I haven't had any of it cold as yet but I can certainly vouch for the fact that it's wicked good while still hot.

You know, I think this would be good with just about any fruity preserve-type topping. Raspberry. Apricot. Rhubarb. Oh my. And it would be nice done up in individual serving bowls too. That makes it a mighty flexible dessert. I like flexibility in my decadence.

Monday, March 17, 2008

Itty Bitty Choccy Fix

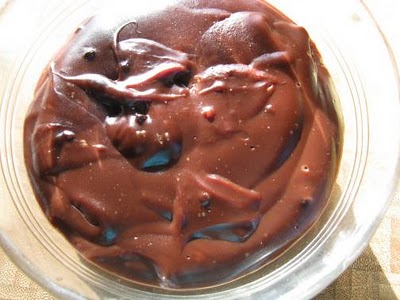
Does that make you salivate? Did it ring your bell? Float your boat? Rumble your tum-tum?

Good! It's supposed to do all of the above. This is my St. Paddy's Day gift to you -- a really, really quick comfort food goody that will surely soothe any possible yearning you may have for just the right amount of decadent chocolate therapy. Did I mention it's fast?

There are two ways of doing this, depending on what you happen to have on hand on your pantry shelf. If you have chocolate chips, use Official Method Uno. If you are out of choccy chips but have baking cocoa, use Official Method Dos. What you see above is the result of Dos. I did Uno today, after stocking up on the choccy chips and really couldn't detect any difference in quality so both methods pass the F.E.D. test.

Official Method Uno
In a microwave safe bowl, mix together 1 tablespoon corn starch and 1/2 cup milk. Add 1/4 cup chocolate chips. Nuke on high for 1 minute. Whisk until chocolate is melted and stirred well into liquid. Nuke on high for 1 more minute. Whisk and pour into serving dish.

Official Method Dos
In a microwave safe bowl, mix together 3 tablespoons baking cocoa, 3 tablespoons sugar and 1 tablespoon corn starch. Add 1/2 cup milk and whisk well. Nuke on high for 1 minute, whisk again. Nuke for 1 more minute, whisk in 1 tablespoon butter. Pour into serving dish.

A word here about microwave wattage: my unit is a little 800 Watt Sharp Carousel model. If your machine is more powerful, you might want to do the pudding in 30-second intervals until you're sure of the timing. Or maybe cook the pudding on, say, 70% power.

You can eat this pudding as soon as it's barely cool enough to avoid burning your tongue or you can slip it into the refrigerator until it's cold. Depends on how urgent your choccy urge happens to be at the moment. It's great as is, of course, but you can flop a dollop of whipped cream on top if you want. Or fold a big glob of the whipped cream into the pudding for a more chiffon-like result. Or smack a honkin' big helping of the pudding on top of a piece of cake in lieu of frosting.

But, you ask, is it Irish? This is, after all, St. Patrick's Day, is it not? Well, no. It isn't Irish and, yes, it is St. Paddy's Day. Chocolate and the wearin' of the green are not mutually exclusive, you know. I'll tell you what. You whup yourself up a mug of the choccy pudding and indulge yourself in its glorious goodness while you enjoy the Irish Blessing video below and then you tell me ... isn't this a lot better than green beer?


Monday, February 25, 2008

The Ugly Sandwich

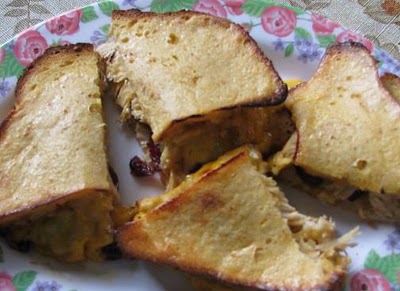
Let's get this over with. The sooner we face up to the truth, the sooner we can put the shock behind us. While we may certainly treasure gorgeous photos of fabulous food (aka Food Porn) and while we may understandably cringe to see the above abomination, we will be strong and, more important, we will refuse the shallow path of superficial judgment.

What I'm saying here is, that may be the ugliest sandwich you've seen in a long time but appearances are deceptive, you can't judge a book by its cover, blah, blah, blah and assorted other similar cliches.

It started when I got to thinking about the possibilities of enjoying a Monte Cristo sandwich, which is basically two kinds of meat, plus cheese, dipped in batter and deep fried. Except I really don't much care for deep frying. Although it certainly would have photographed well. All that golden crust, you know. I could have chosen to fry it in butter in a skillet. That would have been photogenic, too, with its golden lacy pattern cooked into the coating. Heck, I might have even cooked up a face I could have sold on ebay.

No, I decided I wanted to bake the darned thing. Even then, I could have baked it on a buttered cookie sheet, thus probably enabling the batter crust to develop that appetizing golden glow. But if I was going to butter the cookie sheet, I might as well fry it in the skillet, right? So I chose to bake it on one of those silpat pan liners of woven silicone, my defense against having to buy parchment paper for greaseless baking. And the sandwich baked up quite nicely, with the innards piping hot and the cheese all gooshy and melty. It just didn't have the healthy glow, like a high-dollar sun tan. It looks more like it's been a cave dweller for a long time. A Gollum sandwich. Preciousssssss.

I was able to overlook the less than appetizing appearance of my ugly sandwich because, after all, I had engineered the rather lovely content, which, I'm happy to report, lived up to my expectations with room to spare.

I would have spread the slices of bread with cream cheese, had I had any. Lacking that delight, I slathered on a generous amount of mustard instead. Then came a layer of thinly sliced smoked chicken breast, a layer of cranberry bliss (more about that in a minute), a layer of sliced cheddar and finally a second layer of chicken. Traditionally, ham would be the second meat but you go with what you've got, right?

Anyway, I toothpicked the sandwiches together (I made two of them), sliced each one in half kitty-cornered, dunked them in an egg and milk and flour batter that was generously seasoned with Mrs. Dash chipotle and baked them in a 425 degree oven for 10 minutes. Carefully turned each sandwich half over and baked them another 10 minutes.

I cut each of the halves in half again, thus you see the mangled results on the first sandwich in the photo above. Didn't bother doing that with the second sandwich, which I had for a later meal. They tasted wonderfully scrumptious either way.

Oh. The cranberry bliss. I have these dried cranberries that I just love. I also like to rehydrate them with various fruity-flavored liqueurs. Today I took a small saucepan and plopped a honkin' big tablespoon of orange marmalade into it. Then I tossed in a handful of cranberries. Then a splash of peach schnapps. Just a splash. Peach schnapps has a terribly, shall we say, assertive character. Give it half a chance and it will overwhelm the other flavors. Muffle its exuberance and it provides a nice accent in a flavor blend. I mixed everything up good and cooked it on medium heat until it was all bubbly. Then I set it aside to cool. By the time it had cooled, the marmalade had begun to congeal again, holding everything together. Cranberry bliss. That tart-sweet is heavenly against the savory flavors.

So we can lay all the ugly we want on my poor old sandwich. It's performance, its very mission in its brief life, was filled with righteous beauty. Yea, verily I say unto you, there is no ugly in a satisfied tummy.

Sunday, February 24, 2008

Still Souped Up

It might be the continual drizzly drippy weather that's inspiring the mood but I do seem to be fixated on soup lately. Running across the recipe for dry soup mix has whetted my curiosity as well as my appetite so I've been researching and experimenting since the last post. It's been such fun, I'm getting a bit worried about developing an unseemly zealot tendency, ready to inflict upon innocent bystanders. You know -- "Make instant soup mixes or you'll go straight to culinary hell and your soup spoons will all leak."

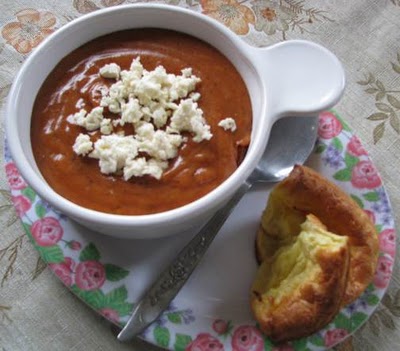
That said, look at what I did with the basic soup mix made in the previous post. In a mixing bowl, I dropped a rounded measure (1/3 cup) of the dry mix and added some chili powder and cumin (don't ask how much -- I just shook-shook-shook until it smelled right) and then whisked in an 11 1/2 ounce can of V-8 vegetable juice. Put the bowl in the microwave and nuked it for a total of 6 minutes, taking it out every 2 minutes and giving it a good whisking. The last time I took it out, I whisked in a handful of shredded cheddar cheese. Poured it in the soup bowl (it's a perfect one-portion amount), topped it with some crumbled feta cheese and -- oh my -- it was wicked good. The bread beside the soup bowl consists of a couple chunks of Yorkie pudding. Went great with the soup.

Now, see ... I was able to satisfy my soup urge without going to a lot of trouble or ending up with so much I had to freeze leftovers. And I VERY much like the idea that I can control the ingredients, leaving out the crappy stuff we're stuck with when we buy off the shelf. Nor should we ignore the economy of the homemade mix. And the news is even good about calorie content. (I'm not going to bother with figuring fat and fiber and carbs and all that because a quick scan seems to indicate more good news in that direction.)

So -- if we think of the soup mix as consisting of just the dry milk, corn starch and seasoning (leave out the bouillon), we have approximately 840 calories total. There are roughly 8 one-third cup portions therein so each one should run about 105 calories. I used chicken bouillon in my mix so I have to add 60 more calories to the total, making the individual portion come in at about 112 calories. Since I used a full can of V-8 vegetable juice in making the soup, I add another 70 calories. Therefore, without resorting to rocket science or calling up the spirit of Einstein, I would compute the final bowl of soup to weigh in at 182 calories.

No, wait. There was something like 133 calories worth of cheddar cheese in there. Okay. Now we have a total of 315 calories.

Uhmm ... not counting the crumbled feta cheese or the two Yorkies I ate with it. Don't know about the feta and I'm getting tired of looking stuff up but the Yorkies (which I made in the muffin tin this time) come to about 75 calories each. And they're so rich-tasting I didn't add any butter or anything.

Okay. How am I doing? Lunch for 465 calories, plus a few feta thingies, and I only ate half the soup because I got full. Aha! Subtract 150 calories -- now we're down to 315 for lunch. And it was healthy. And good. And fast. I'll eat the rest of the soup and another Yorkie later. So it's hugely economical.

Seems to me, this basic little soup mix is also hugely versatile. Think of all the flavor combinations one could achieve with various spices and seasoning mixes and dehydrated veggie bits. Plus the flavor from whatever liquid you choose to add, whether it be a broth or a juice. Not to mention the addition of noodles and rice and beans and the kitchen sink. And let's not forget it works well as a sauce for assorted casseroles and pastas. Yeah!

Okay. I think I'm going to wander into the kitchen and finish up that soup. I will leave you with the following chuckle from the lolcat site. But you have to hunt down your own biscotti recipe.

Friday, February 22, 2008

Souped Up

A can of Cream of Mushroom soup probably gets tossed into more recipes than is decent to think about. Sometimes the call is for Cream of Celery or Cream of Chicken or Cream of Whatever but mostly it's Cream of Mushroom.

Which I never have on hand.

So this morning I got to thinking, gee, I wonder if it wouldn't be cheaper and easier to just make my own Cream of Whatever and not even bother with the store bought cans. No sooner thought than Googled, of course, and lo! What wondrous results to behold. So wondrous, in fact, that I'm impelled to share the recipe for what is a dry soup mix that stores on the shelf and, with the addition of water, makes delicious Cream of Chicken soup any time you feel the urge.


CREAM OF CHICKEN DRY SOUP MIX

Mix together in a bowl: 2 cups nonfat dry milk, 3/4 cup corn starch, 1/4 cup chicken bullion granules or powder, 2 tablespoons dry onion flakes OR 1 teaspoon each onion powder, basil, thyme and 1/2 teaspoon pepper. Store in airtight container at room temperature. To use: combine 1/3 cup dry soup mix with 1 1/4 cup water. Mix well in small saucepan, bring to a gentle boil, stirring constantly, until mixture thickens.

That's the basic recipe, which lends itself to variation. If you don't have the granulated or powdered chicken bullion, just skip that part and use chicken broth instead of water when making a serving of soup. Or use some other flavor of bullion in the mix, like vegetable, for instance.

I like this way of doing it -- a lot. When you're in the mood for the soup, all you have to do is scoop up a portion of the already mixed goodies, add water and, bingo! You're good to go. I'm sure this would work even faster with the use of the microwave but it certainly doesn't take long from the stove top. I'll bet this is a lot healthier than what's in the can, too, by golly.

As it turned out, the suggested portion was just right for the potato-chicken casserole I made this afternoon. For the potatoes, I used a couple cups of Tater Tots. I'd imagine you Coffee Mates in other lands have 'em, perhaps under a different name. They're basically shredded, cooked potato, formed into little tubular shapes. If you don't have any handy, just shred a couple cups of cooked potato for the following recipe.

First I greased my 8"x8" baking dish with olive oil, then covered the bottom with frozen Tater Tots. (As suggested, you can substitute a layer of shredded, cooked potatoes.) In a bowl, I whisked together 2 eggs, 1 cup milk and the above-mentioned portion of cooked Cream of Chicken soup (1/3 cup dry mix and 1 1/4 cups water, cooked until thick.) To that I added a cup of shredded cheddar cheese and about a cup of chopped, cooked chicken, then poured the mixture over the Tater Tots in the baking dish. Sprinkled a generous portion of Mrs. Dash chipotle seasoning over the top and baked in a 350 degree oven for 45 minutes.

In the picture above, there is a small serving of the finished casserole sitting in front of the plastic container with the dry soup mix. Those flecks in the mix are bits of the dried sweet basil. Hmmm. Dill would be good in that, too. I'll keep that in mind for future reference.

By the way, no tin cans were harmed in the making of these culinary spectaculars.


Thursday, February 14, 2008

Valentine Popover

Aww, it's hearts and flowers time again. The time of year when a Great Burning Question always comes to mind, namely: How many tons of chocolate will be consumed during this 24-hour period?

I'm sure there are numerous wholesalers and retailers the world over who have a reasonably close idea of quantities prepared and sold but there is no real way of knowing how much of that is actually nibbled and gobbled during the actual Valentine window of opportunity. Nor will the world falter in its perpetual spin if we don't have the answer. Maybe it's a Zen question after all.

In any case, I'll do my share for the cause. 'Cause I just love chocolate.

It's possible I've left a few clues here and there that there are other foods that warrant my devotion besides the wonderful product of the sacred cocoa bean. Like my ongoing love affair with all variations on popovers and Yorkie puddings and Dutch Baby Pancakes and the like. Which is why I couldn't resist trying out something called Caribbean Popovers the other day. I should have bookmarked the page because now I can't find it, thus I can't tell you what makes this particular version Caribbean in nature. Maybe the chef? It doesn't matter, I guess. I did my own variation on it, anyway, with speculations about other possible tempting toppings.

For one thing, I wasn't in the mood to haul out the popover pan (or, in my case, the muffin pan) to make individual popovers. I decided to do the whole thing in one swell foop and that required the use of my trusty enamel pie pan. Could have used any pie pan, you understand. It's just that the enamel one was on top of the stack. So you can do it either way -- individual popovers or the big "pancake" type of thing. The basic recipe goes like this ...

First you turn your oven on to 425 degrees fairyheight, slurp a little olive oil or butter in the pan and then let it heat in the oven while you mix the batter. I should mention the original recipe calls for half cream and half milk but I just used plain milk. That's plenty rich enough for me.

So, in a bowl mix 2 eggs, 1 cup milk, 1/4 cup flour and seasoning to taste. You can use plain salt, seasoned salt, a variety of Mrs. Dash -- whatever spice appeals to you at the moment. I find a wire whisk works great for batter but you can use a spoon or a mixer or whatever you prefer. Just whup it up nice and smooth. Grate up 1/2 cup of cheese, again, whatever kind appeals to you. I had cheddar on hand. No surprise. I almost always have cheddar on hand.

Pull the hot pan out of the oven and pour the batter into it. Quickly sprinkle the grated cheese over the top, leaving a margin around the edge. Put it back in the oven and set your timer for 15 minutes.


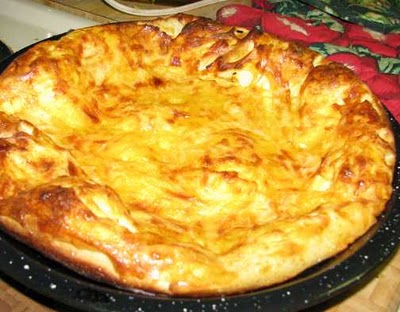
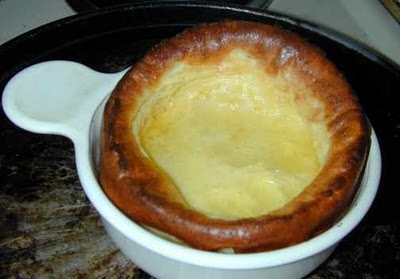
When you bring your masterpiece out of the oven, it should look like the above -- all glowing and fragrant and mouthwatering to behold. It will be risen a bit around the sides and the center will be all cheesy and nummy.

I cut it into pie wedges and ate it just the way it was -- and it was wonderful. How can I describe it? Sort of like a cheese omelet with a crispy crust. Yeah. That pretty much says it.

I think the next time I try one, I'm going to plop some salsa and sour cream on top after I bring it out of the oven. Regular salsa would be just fine but, to evoke that Caribbean charisma, maybe a fruit salsa with papaya in the mix, something done real quick in a little pot on top of the stove so it's nice and hot when you spread it on the "omelet"? Ohhhh, that sounds luscious.

In the meantime, here's wishing all you lovely Coffee Mates a fun and fabulous Valentine's Day. You really ARE special!


Monday, February 4, 2008

Whipped Is Wicked Good

My whole day yesterday was not spent involved in Super Bowl activities. No. What? You think I'm obsessed with football or something? I'm not, you know. I prefer to think of it as an annual aberrational syndrome with intense entertainment features. But I can survive the rest of the year without it. Coffee and chocolate make up for a great deal.

By the way, I want you to know -- I picked the Giants to win. Not only do I tend to support the Underdogs in any given situation, I don't think you'll find too many Raiders fans who like the Pats ever since that fateful January 2002 playoff game in the snow, when the infamous Tuck rule cost us dearly. It's about time the semi-perfect Pats were humbled. In a more just world, my Raiders would have done the job but, hey -- I'm happy that it was one of the Manning boys and Company, who handled it.

What was I doing that had nothing to do with football? Well, baking cookies, if you must know. Before you throw something at me, I wish to point the finger at a certain Old Grey Poet across the Big Pond. It's John's fault entirely for mentioning how much he and Graham enjoyed lemon curd on shortcrust tarts. Shortcrust. That translates to shortbread, doesn't it, John? In any case, that's how I took it.

Since shortbread happens to rate rather high on my list of Foods I Adore, I Googled a bit through a range of recipes for shortbread tarts. For one reason or another, I rejected everything I ran across -- until I hit mention of Whipped Shortbread Cookies.

Huh? Never heard of them. But what caught my interest was the person who mentioned them said she liked to do the thumbprint treatment and fill the depression with different jams or jellies. And I thought, "Aha! Lemon curd time!"

When I located the recipe, I was even more enthused. Very simple and requiring few ingredients. Although I will say a stand mixer makes it a lot easier because the best results apparently result from lots of mixing. That's not engraved in stone, you understand. One commenter was hand-mixing the ingredients. Said she was exhausted after about 4 minutes but the cookies still came out fine.


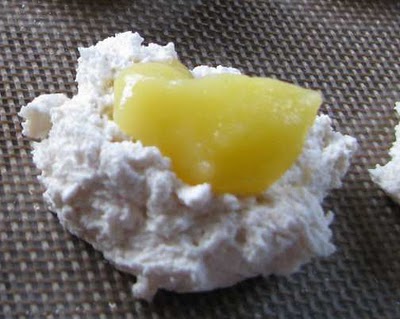
So, okay, to get what you see in the above photo, you do thusly: in your mixer bowl, put 1 cup (2 sticks) softened butter. Turn the mixer to somewhere in the midrange and let it whup that butter to a fluffy froth for about 10 minutes. In the meantime, measure out 1 1/2 cups of flour and 1/2 cup of powdered sugar and a 1/2 teaspoon of salt. When the butter is pale and fluffy, add all the dry ingredients. You can also add 1 teaspoon of whatever flavoring you wish. I used vanilla. Begin blending the dry ingredients into the butter. Stop and scrape sides of bowl as often as necessary but let the mixer work the contents for another 10 minutes. Really.

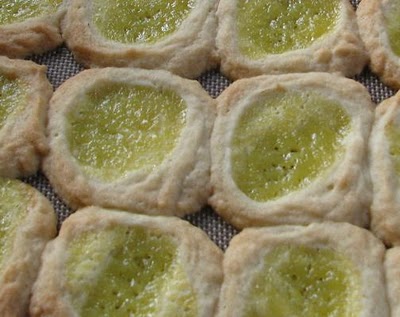
When you're done, the batter will be the consistency of very thick whipped cream. Using a couple of teaspoons, scoop up little globs of batter and drop them on your cookie sheet. This is what I learned: A rounded teaspoon of dough gives you very nice small cookies. A round tablespoon of dough will make cookies that are twice as big -- and twice as fragile, especially if you put any kind of filling in them. What you see above is the large portion of raw dough, complete with a generous blob of lemon curd. I was getting impatient an opted for the larger cookies so I'd get done sooner. Bad move. What you see below is the result.


Not only do the larger cookies run into each other, they are too fragile to hold up against that center weight of filling so it's hard to pick one up without having it crumble into several pieces. Trust me when I tell you, it's worth it to be patient and make the smaller cookies, okay?

I did the thumbprint part by dipping the point of the teaspoon in at an angle and then rotating it a bit. Works fine but be sure you don't go too deep or you'll mess with the structural integrity of your cookies even more. Who knew you had to be an architect to build cookies?

Okay, bake these little fellers in a 350 degree fairyheight oven. Small ones are done in 10 minutes. The bigger ones took 15. When you pull the pan out of the oven, let the cookies rest right where they are for a good 10 minutes. Give them a chance to firm up a bit before transferring them to a rack. In fact, I didn't even use a rack. Instead, I laid out a sheet of waxed paper and transferred the still-warm cookies to it. That's the way we used to do cookies before cooling racks became the In thing.

Now, pick up one of those cookies and take a bite. Prepare to be amazed. It's like chewing a mouthful of foam. The instant the cookie touches your quivering taste buds, it's already dissolving in a warm burst of buttery flavor. Then the filling comes along like a complimentary kiss of bliss. Before you quite know what's happened, both your hand and your mouth are empty and you are wondering if you imagined the whole thing. You take another cookie to convince yourself the experience was genuine because it's hard to believe in the reality of a cookie that seems less substantial than a dream of a cookie.

Are these cookies healthy for our bodies? Of course not! They are way too decadent to be healthy. On the other hand, they are nirvana for our Inner Sybarite. What can I say? We have to either develop monumental self-control or quickly share the whole batch (I got 3 dozen.) with as many other people as possible. Fortunately for me, as much as I love rich foods, my system can only ever manage a little bit at a time. My taste buds will be clamoring for an encore but my tummy says, "Take one more bite and I will make you frow up, fool!"

I can bend to that. These shortbread cookies are wicked good but they aren't the only thing around here that's whipped.

Saturday, February 2, 2008

My Lemon Jones

There I was, minding my own business, reading a book and contentedly digesting the meal I'd enjoyed from the Beer Butt chicken roasted earlier in the day. Then, without warning, a most formidable jones assaulted me. I wanted something lemon and I wanted it RIGHT NOW!

I put down the book and thought it over. Lemon pie, lemon cake, lemon bars ... all those things were out. Too much mussin' and fussin' for the occasion. I wanted something simple and fast. F.E.D., in other words. (Fast Easy Delicious) I recalled enjoying a dessert called Lemon Lush somewhere back in my checkered past but couldn't remember how it was made.

No problem. Google took me right to approximately seven-kajillion Lemon Lush recipes. Problem. They all required cream cheese, which I didn't happen to have on hand. I did find a Lemon Lush pie recipe that called for sour cream (which I DO have) instead of cream cheese but it was a pie. I wasn't about to embark on a pie, thank you very much.

Then I thought about lemon curd. I've never had it. When spotting it at assorted super markets, I always looked at the price and said, "Nah. Surely it can't be that hard to make from scratch." And then, of course, I'd forget about it and never make the attempt. But maybe Google could scare me up a lemon curd recipe. Maybe there was even such a thing as a microwave lemon curd recipe -- because, by now, my lemon jones was getting urgent.

Well, bless my soul. There are four-kajillion microwave lemon curd recipes. How could I have doubted it for a single moment? The one that called out to me the loudest was found at an appealing blog with a long-but-delightful name: Morning Coffee & Afternoon Tea and chocolate in between. I'll let you go there for the details but, quickly (and it IS quick), the recipe goes like this:

Melt 1 stick of butter (1/2 cup) in the microwave. (I did 2 minutes at 40% power.) While that's happening, grate the zest from your lemons. I only had one lemon but got a heaping teaspoon of zest out of it. Then I squeezed the lemon and topped that juice off with some from a bottle of RealLemon that I had in the fridge, making the required 1/2 cup. To that, I added the zest, 1 cup of sugar and 3 eggs and whisked them all up good. Then I slowly poured in the melted butter, whisking all the while. The lemon mixture was then popped into the microwave to nuke for 4 minutes, taking it out and giving it a good whisk at the end of each minute.

Just to be sure, I actually nuked it 6 minutes. Different microwaves have different power levels and I have no idea how mine compared with hers. Anyway, the curd was slightly thickened, which is apparently proper. I understand it get thicker as it chills. One site mentioned it was supposed to end up the consistency of mayonnaise.

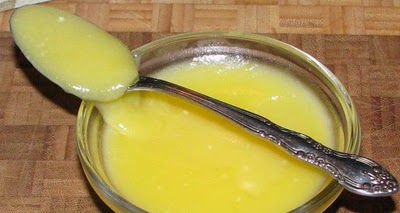
Unable to make myself wait until it chilled in the refrigerator, I spooned some of it in a small bowl and tucked that in the freezer. After about 20 minutes, it had indeed thickened up a bit. Almost immediately after the above picture was taken, I was sitting at the table, slurping up lemon curd like it was going out of style.

Was it good? Oh. My. God. Although the various sites mentioning this delightful treat all assured me lemon curd can be put on anything, they also promised it was good all by itself. And it is. Oh yes indeedy. Although I think next time I make it, I'll try 3/4 cup of sugar instead of the full cup. This batch isn't really too sweet but it's teetering right on the edge.

You might note, at the Coffee/Tea site, she has provided a link to the page where she gives us a recipe for Lemon Scones. That's more than I'm willing to tackle tonight, especially since my lemon jones has been appropriately mollified for the nonce. (I love saying "nonce.") But I do believe I'll check it out later. In the meantime, I understand lemon curd goes well on toast.

You Coffee Mates across the Big Pond are the experts on lemon curd. If you have any particular suggestions for its use, I'd welcome the input. And just how thick IS it supposed to be, anyway?

Friday, February 1, 2008

Tailgate Touchdown

Okay, as you can plainly see, this is not an excellent photo. It is, however, another example of the camera being smarter than I am because it managed a fairly decent result in spite of the fact that I had the mode dial set to Landscape.

Thwap!!

I could have redone the photo shoot in Auto -- except I had eaten the evidence before I realized a crime had been committed. Some days are like that.

In any case, what that picture represents is my preparation for sustenance to get me through Super Bowl Sunday. I call it Dee's Tailgate Stack Snack. I can safely assure you it is easy, tasty and wonderfully filling. And this am the way it goes ...

First you have to have bread. I made a loaf of bread machine Ciabatta, for which the recipe can be found at the link. Easy peasy. You can use any bread, though. French or sourdough will work just fine.

Lay your bread slices out on a pizza pan or cookie sheet and spread them with refried beans. On top of that, stack a layer of sour cream. On top of that, stack a layer of salsa. On top of that, stack a layer of finely grated cheddar cheese. Bake in a 350 degree oven until the cheese is melted.

Nom, nom, nom!

Since my Ciabatta slices are long, I cut them in half for easier handling. I'm so full after eating four of the halves, I'm able to look forward to eating the remaining two halves for a midnight snack. That bodes well for Sunday. I can munch to my heart's content all through the game, including the half-time show and the Super Bowl commercials. Heck of a deal.

Gee, I sure hope they do a good one with the Clydesdales this year. I love those big guys.


Tuesday, January 15, 2008

Comfort Food For Jena

My friend Jena stayed home from work today. She never calls in sick unless she's really sick and today was that kind of day. In an effort to help, several of us bombarded her with thoughtful suggestions for comfort food, none of which seemed to appeal to her. As one of our number pointed out, our "help" didn't do our invalid any good but all of us knew what we were going to have for dinner tonight. The amusing thing is, I think every one of us went with one variation or another of the dish Wolfie suggested. She didn't name it but I've called it Wolfie's Polenta Pie and, in her own words, this am how it goes:

I brown some sausage (the recipe I have doesn't call for the sausage, but my family and I love it), then add the chicken broth and some water. Bring it to a boil. Slowly pour in the polenta, stirring constantly. When it's all mixed in and starting to bubble and pop, take it off the heat and add some olive oil (or butter), salt & pepper to taste, and herbs if you want them. I usually add sage and a bit of thyme. Stir that up good, then add a big ol' handful of cheese, whatever flavor you like. Once that's stirred in and melted, flatten it out in the pan. I use a big, oven safe skillet to do all this in. Once you've gotten it flattened out, crack 8 eggs on top. I try to get mine evenly around the pan so each person gets a yolk on his or her slice. Bake in 350 degree oven for about 20 minutes. When you take it out, the eggs are still gonna look runny, but that's ok. Top the whole thing with another big ol' handful of cheese, and put it back in for another 10 minutes. The eggs will be perfect, the cheese will be melty but not quite crunchy, and the cornmeal mush will be creamy and yummy. If you can stand it, let it sit for 10 or 15 minutes. That way you can cut it into slices like a pie. If you can't wait that long, use a spoon, and spoon an appropriate amount out on plates. YUM!!!!

Yum, indeed. Now, Wolfie has three big man-tummies to fill when she fixes a meal. Her version was a bit much for me. But I hauled out a couple of my six-inch Corning Ware bowls for Dee-sized portions and had at it.

There was no sausage, darn it, but I had a pound of hamburger that needed cooking up so I crumbled it into the frying pan, seasoned it heartily and set it aside. Then I did the microwave routine with the corn meal: in a large bowl, 3 cups chicken broth, 1 cup corn meal, whisk together smoothly. Cover loosely with a lid, nuke 5 minutes. Whisk again, nuke another 5 minutes. Take out and add grated cheese and either a pat of butter or a glug of olive oil.

I had carefully spooned portions of the polenta into the two baking dishes before I realized I hadn't added the cheese and butter. Yike! It's like a receiver in football -- you don't think of anything but that ball until you've caught it. Then you can think about running for the touchdown. There I was, thinking touchdown and the ball wasn't even there yet.

I sighed and scraped the polenta back into the big bowl and added the cheese and butter, then carefully portioned it out again. Then I cracked one egg on top of each. (Had I picked some up yesterday, I'd have spread a layer of salsa and then added the egg.) As I put the dishes in the oven, I was eye-level with the top of the stove -- that's when I realized I'd forgotten to put in the hamburger!

I looked back at the dishes in the oven. Back at the waiting hamburger. Muttered "Mein Gott in heffen!" and slammed the oven door shut. Set the timer for 15 minutes, added the rest of the shredded cheese and cooked the pies another 10 minutes.

Took some pictures. Here's where I learned the camera is smarter than I am. The quality of the photo in the LCD screen is not the same as on the computer screen. The camera told me to raise the flash. I said, "Nah, this looks like plenty of light," and merrily snapped off 3 shots. Finally, just to play fair, I took 1 shot with the flash. Guess which one turned out?

The Polenta Pie turned out, too. I didn't even lose out on the hamburger. Simply spooned a glob of it onto the pie and worked it in as I ate. No problem.

Except by the time I was halfway through, I was so full I felt like I was waddling while sitting still. Covered the dish and left it on the table. I'll go back and finish it off for my midnight snack. The other one should nuke up nicely for meals tomorrow. I'm in 'em.

Jena, I sure hope you feel better by now. I want you to feel good enough to have some of this scrumptious comfort food, too.


Sunday, January 13, 2008

Sarda -- Sorta

It constantly amazes me how vast is the range of food adventure in this world. I'm just talking about the simple stuff. Nothing fancy. Nothing exotic. Just good plain food. You'd think, after living nearly seven decades on the planet, I'd have sampled pretty much everything. On a regular basis, I keep discovering I'm not even close. Sometimes I think that's why the concept of reincarnation appeals to me. How else am I going to have enough time to try it all?

Take corn meal. One of the staples in your kitchen. Cornbread. Cornmeal muffins. Cornmeal mush. Tamales. Anadama bread. I know I've had corn meal in one or two other things but that's about all I can think of offhand. And yet, just today, my favorite Marine (you know who you are, Gunnymom) tipped me off to a dish made with polenta, cheese and spaghetti sauce. That's all she said about it but it struck me as a possible addition to my F.E.D. list. With that in mind, I fired up Google, typed in those three magic ingredients and sat back.

Wow! Knocked my socks plumb off. There are a ton of variations on that basic three-ingredient combo but they all start with the polenta. And polenta -- correct me if I'm wrong -- is simply corn meal mush. But, oh my, the wealth of polenta-based recipes is boggling. What follows is my adaption of one of the first recipes I ran across. It was simple enough that I was able to whup it up during half-time of the Bolts and Colts game today.

It appears to be what is perhaps a dim version of an old Sardinian dish called Polenta Sarda. One source insists it's best made with pecorino sardo, a Sardinian sheep's milk cheese. Philistine that I am (because one does with what one has), I turned my version into a three-cheese affair and not one of those cheeses were ever introduced to a sheep, Sardinian or otherwise. But I'm certainly open to a future acquaintance. Pecorino is a wonderful cheese -- when you can get it.

Three-Cheese Sorta Sarda

First you make your corn meal mush. Your choice of liquid is flexible. Water, broth, milk, combinations of these -- whatever works. You put 2 3/4 cups water in a large bowl, add 3 teaspoons chicken bullion powder and 1 cup of corn meal. Whisk them good, put them in the microwave covered with a piece of wax paper and nuke the mixture for 5 minutes, on high. At the end of 5 minutes, whisk mixture again, recover with wax paper, nuke for another 5 minutes. When time is up, whisk in 1 fat pat of butter and 1 cup shredded cheese, whatever flavor you have on hand. (I had cheddar.) The texture will be smooth and creamy. Test taste. You probably won't need any other seasoning but if you want, you can add anything you wish at this point.

In the meantime, put 2 tablespoons of olive oil in a big skillet over medium heat. Add roughly 2 cups mixed veggies, whatever combo you wish (I had a frozen mix of cauliflower, broccoli, green and yellow squash and carrots, which I partially thawed by running warm water over the veggies in a strainer.) and 1 tablespoon of minced garlic. Cook, stirring occasionally, about 5 minutes. Add about 2 cups of any pasta sauce you may like (I had some Ragu.), stir well, simmer for 5 to 8 minutes.

Plop two or three big globs of the hot polenta on a dish. Spoon some of the veggie mixture on top of that. Sprinkle with crumbled feta cheese, to taste, and a dusting of grated Parmesan. Try not to moan too loudly as you eat.


If you're serving two or more, there won't be any leftovers. Not the case with me, of course, so I did this with the leftover polenta: lined an 8" x 8" baking dish with plastic wrap, spread the polenta inside, flipped the ends of the plastic wrap over to cover and put the dish in the fridge. Later this evening, when I got hungry for supper, I took a table knife and cut a row of polenta cubes out of the dish and dumped them in a soup bowl. Then laid a couple slices of cheese over them. Then a layer of the veggie mix. Then 2 or 3 minutes in the microwave. Nummy, nummy.

Haven't decided what particular thang I'll do with the rest of the leftover polenta but there are intriguing directions to explore. Chocolate has not been ruled out.

Tuesday, January 1, 2008

Resolved: More French Toast

I must consider the posting of this photo as the first coinkydink of the New Year. In the wee hours, my daily post from the LOL Cats site came in and this was their lead photo. Ah, I said to myself. A most appropriate "message" picture to begin my blog posts for 2008. Halfway through reading the related comment section, John's notify message came in so I clicked over to his site. I was delighted to see he had posted the same picture!

That's good. Pictures like this should get around. In fact, this one has been "getting around" for at least a couple of years. Digging for origins, I find it floating about as early as 2005 and I think -- but can't verify -- it was originally an AP wire photo. Several sources point out the soldier is Israeli and that the photo was taken in Palestine.

In another context, that sort of identification might be more important. In this context, a soldier is a soldier, is a mother's son -- or daughter -- in harm's way. Nobody escapes the effects of the harm, whether giving or receiving. How terribly important, then, are the moments of human tenderness and love -- to balance, to heal.

The transition from last year to this year was smooth, though not exactly as planned. Though I am neither mouse nor man, I know what happens to "best laid plans" so there was no real surprise and adjustments were minor. My original intent was to fix myself a glorious repast for midnight snacking, accompanied by a split of the bubbly. Toward that end, I baked a loaf of bread so I could fashion a dish of baked French Toast. I was going to put the French Toast dish together and let it sit and soak, not moving it to the oven until about elevenish. That was a fairly unrealistic plan. Everything smelled too good to wait, causing me to eat at somewhere between 9 and 10 which, in turn, caused me to fall fast asleep before the midnight hour.

That's okay. I woke up somewhere between 1 and 2 in the aye-em and proceeded to do the bubbly part of the celebration while checking email and cruising the web. There was a slight delay putting the bubbly part in action. You know that old saying, "Champagne taste and beer budget." Fortunately for me, a champagne I happen to like is priced in the beer budget category. The splits come with twist-off caps instead of corks. That's nice -- except when you run into one of the twist-offs that refuse to separate themselves from the bottom part of the twist.

Well, that was plumb humiliating. There I was, champagne flute at the ready, champagne chilled and enticing -- and I couldn't get the damned thang open. After much grunting and cussing and straining, I dug a pair of pliers out of the tool box and coerced the lid off its foundation, oblivious to its protests. I must say, after all that effort, the champagne tasted more sublime than usual.

As for the baked French Toast, I can't give you exact measurements because the building of it was decidedly instinctive and subject to available ingredients. That is not a negative, actually. I think it shows how flexible this dish can be. Essentially, it consists of two layers of sliced bread, divided by whatever ingredients you desire as stuffing. Here's what I did ...

In a greased 8 x 8 inch Pyrex baking dish, I laid out 4 slices of bread with the crusts removed and saved for future bread cubes or crumbs. Then I slathered a generous layer of sour cream over the bread and sprinkled it liberally with Mrs. Dash Chipotle seasoning. Sprinkled over that was roughly half a cup of minced onion, sliced tomato, about a dozen half-slices of cooked bacon and a cup of shredded cheddar cheese. Then I laid four more slices of decrusted bread on top of everything. Mixed up a blend of 3 eggs and roughly 4 cups of milk, seasoned with salt and pepper. Poured it slowly over the contents of the baking dish, making sure the bread was thoroughly soaked. Sprinkled the top with Hungarian paprika and let it sit and soak for maybe an hour. (One can cover it with plastic wrap and let it sit overnight in the refrigerator, then bake the next morning if desired.) Put it in a 350 degree fairyheight oven for 45 minutes.

Oh my. It was totally gorgeous, Coffee Mates. The bread was swollen with eggy-milky goodness and the cheese and sour cream melded with everything and the fragrance was nearly stunning. I have found the dish to be superb both fresh and, later on, nuked for a couple of minutes in the microwave. I'll wager it freezes well, too -- provided it lasts long enough to need to freeze it.

I know I'll be making baked French Toast more often. There are so many variations one can try. I wish I'd had some salsa for this version. A layer of refried beans and a sprinkle of chopped olives would have been nice, too. And, darn it, I forgot I had some perfectly good jalapeƱo peppers in the fridge! Also, there are the sweeter versions, using sliced apples and brown sugar and butter and cinnamon, for example. Many of the recipes I found utilized cream cheese in the fillings but I think sour cream or yogurt or ricotta all do the same thing and do it well. This is definitely what you'd call a versatile dish.

Until now, I've only ever had the more traditional French Toast. You know -- slices of bread that have been soaked in a milk and egg mixture that has been seasoned to be either sweet or savory, then fried in butter until golden and served with butter and syrup or fruit and whipped cream. Using the soaked bread to form a baked sandwich of sorts is a new experience for me -- one I enthusiastically encourage you to try. The range of possible fillings is infinite, the effort involved is negligible and the results are spectacular.

Make the project one of your New Year's Resolutions. It's always nice to resolve something that is attainable and fun, don't you think?

Monday, December 24, 2007

Quick Fix

Awwww. Don't you just love it when the kids get excited over the jolly elf?

Here's something I got all excited about just a little while ago and now I've got to share it with you. I've been goofing around all day, taking my time, fixing different things for Christmas dinner tomorrow. The idea, of course, is to do up as much ahead as possible, right?

Well, it's all been coming along nicely but when I took a break to listen to the Broncos and the Chargers play tonight (Eeeuuu! Didn't Denver take an awful whuppin'?) I got to thinking about the fact that I haven't made holiday candy in years. Candy making always seems fairly fussy to me. I know -- there are lots of easy-peasy recipes but, as a general rule, it's just not my thang.

Still, for whatever reason (I blame it on the very dull second half of the game), I just really, really wanted to fix some candy. I spent most of the fourth quarter doing a Google cruise for easy candy recipes, emphasis on easy. It also helped if the recipe called for ingredients I actually had on hand. And then I found one for peanut butter candy that was so simple, I could hardly believe it would be worth doing. On the other hand, peanut butter struck a resonant chord in my Sweet Tooth gland and it didn't call for all that much either in the way of time or ingredients. This am the way it goes ...

RIDICULOUSLY EASY PEANUT BUTTER CANDY

The first thing you do is haul out a 2-cup measuring cup. Pour in 1/2 cup of honey. Then grab a teaspoon and glop in 1/2 cup of peanut butter. Put it in the microwave and nuke it on high for 40 seconds. Lick the spoon while you're waiting.

When you pull the measuring cup out, the honey will be hot and the peanut butter will still be gloppy. Not a problem. Whup it a bit with the spoon -- okay, get a clean spoon -- and the peanut butter will blend right in.

Now you take 1 cup of instant dry milk and stir it in to the mix 1/2 a cup at a time. Blend it good. I don't know if different kinds of dry milk have different textures. Mine is granulated so the mixture looks all nubbly, and that's perfectly okay.

Lay some waxed paper or foil across a plate and spread the candy out to about -- I dunno -- a quarter of an inch thickness. It starts to set up pretty fast so you might not want to dilly dally too long. When you have a nice patch of candy formed, put the plate in the refrigerator and lick the spoon again. And the measuring cup. It's good to clean things up as we go along.

Roughly half an hour later, pull the candy out of the fridge. It will be nicely firmed up and will still have the nubbly texture. Turn it over onto a smooth surface, peel off the waxed paper (or foil) and cut it into pieces with a table knife. I guess I did them an inch or so square. I ended up with somewhere close to 50 pieces -- counting the ones I ate. It didn't take long to notice, as I laid them out on the plate, that the honey content was going to make the pieces stick together, meaning the candy was going to have to be kept in the fridge. I thunk on that for a bit and came up with what I'm convinced is a perfect solution.

Just happen to have some honey-roasted, sesame-coated cashews. And I also just happen to have a dandy little chopper but a coffee grinder or even a blender will do the same job. Tossed maybe a quarter-cup of the nuts in the chopper and pulsed it until they were ground down to the consistency of, say, corn meal. (I'm assuming you could do the same thing with just about any kind of nut you have handy.) Dumped the lot in a small bowl and took it to the table where the candy pieces were trying to meld themselves back together again.

While it's true the honey makes them a bit tacky, the oil in the peanut butter keeps them from sticking to your skin -- so I took each piece and rolled it into a little ball about the size of a big hazelnut. Then I took half a dozen balls at a time, dropped them in the cashew meal and tossed them a bit until they were thoroughly coated.

Shazaam! It seems to be working. I put the plate of peanut butter balls back in the fridge -- just in case -- and brought three of them in here, all tucked in together in a small dish. They show absolutely no indication of melding behavior. And now I'm wondering how it would be to toss them in some cocoa, like you do with truffles. Hmmm ... I'll have to think on that.

Oh! There's quite a bit of the cashew meal left so I put a lid on it and I figure I can sprinkle it on top of something later. Like baked squash or green beans or a casserole or ... whatever.

And now I have to get back to my goofing around. Christmas is fast approaching and -- wait! Do I hear Santa?

Friday, December 14, 2007

By Their Fruits Ye Shall Know Them

I wish to make an announcement. (Insert clink, clink, clink of spoon on rim of coffee mug.) Is everyone listening? Good! I just wish to go on record about a seasonal controversy that comes up around this time every year.

FRUITCAKE HAS BEEN GIVEN A BUM RAP!

Seriously. I can't think, offhand, of any food item more maligned than the fruitcake. Well, maybe Twinkies. Really, the only thing Twinkies and fruitcake share in common is their longevity and I'd like to point out the former owes its shelf life to chemicals while the latter becomes gracefully aged through the judicious use of good booze. There is a difference.

It is true that there are some genuinely horrid fruit cakes out there. Abominations that deserve the contempt or horror they provoke in innocent victims. I shudder to think of all the folks who have been traumatized by their awfulness. These people, quite understandably, have been ruined for the Real Thing and wouldn't eat a slice of the best fruitcake in the world if you held a gun to their heads and threatened them with forced viewing of every episode of the Gong Show that was ever filmed.

This is probably an inflammatory statement for some but, personally, I blame it on the overuse and misuse of candied fruit and citron. I know. Some folks actually like that stuff and, hey, that's cool. Really. But I submit to you that a fruitcake blessed with bits of unsullied dried fruit -- and even canned or fresh fruit -- all saturated with either good juice or good liquor -- will lift the plainest fruitcake onto orgasmic plateaus of culinary excellence.

Let me entice you with a baby step into the realms of fruitcake splendor. Today I made nearly seven dozen of the most sublime, decadent, wickedly delicious chocolate fruitcake cookies it has ever been my pleasure to inhale. Yes, chocolate and fruit DO go together wonderfully, thank you very much. Think of them as sorta-kinda fruity brownies. They're soft and rich and luscious and ... and ... sinful. Yes! That was the word I was looking for. Sin without guilt but with a redeeming afterglow. Heavenly. If I may put "sin" and "heaven" in the same context.

MOJO COOKIES

Ahead of time -- at least 1 hour ahead, preferably overnight, to give the fruit time to absorb the liquid and puff up all tender and nummy:

Coarsely chop up a mixture of dried fruits -- your choice. Remember, I forbid the use of candied fruit and citron. You'll want between one and two cups of fruit. I had a mixture of dried, sweetened cranberries, dried apricots and a small can of chunk pineapple. Put it all in a small sauce pan and add in the pineapple juice (roughly 2 ounces) and about 2 ounces of Triple Sec. The original recipe calls for a 1/2 cup of rum, and that's fine. So is the same amount of Applejack or any other booze you chooze -- uh -- choose. I just didn't want to waste the pineapple juice and Triple Sec has a complimentary orange flavor. If you don't want anything alcoholic, orange juice works wonderfully well. Bring fruit mixture to a boil and turn down immediately to a simmer. Let it bubble away long enough for most of the liquid to be absorbed and cook down (about half an hour), turn off the heat, put a lid on it, and walk away.

When you're ready to do the cookies:

Preheat oven to 350 degrees fairyheight.

In a small bowl, mix 3 cups flour, 3/4 cup cocoa, 1 teaspoon baking soda and 1 teaspoon salt.

In your mixer bowl, put 1 stick softened butter (1/2 cup), 1 cup brown sugar, 1/2 cup granulated sugar and 1/2 cup sour cream. Or yogurt. Or, as I did, 1/2 cup milk that's been clabbered with a tablespoon of lemon juice. Vinegar will work if you don't have lemon juice. Beat until blended and smooth.

Add 2 eggs and 1 teaspoon vanilla. Beat until well blended.

Add the fruit mixture, including any liquid that is not yet absorbed. (Most of it will be if you waited long enough.) You will have to slap your hands to keep from nibbling so much of those plump, juicy jeweled bits that you don't have enough for the cookies. Self-discipline is a Good Thang.

Add the flour mixture, 1 cup at a time, scraping down the sides of the bowl as necessary. Once all the flour is incorporated, scrape off the beater and lick whatever remains on it before you wash it off. With a spatula, stir in 2 cups (1 package) of chocolate chips or an equivalent amount of chopped dark, semi-sweet chocolate. (If you're lucky enough to find some raspberry chocolate chips, go for it!) Add a cup of chopped nuts --any type you like-- and get out the cookie sheets. You can grease the cookie sheets or, better, line them with parchment paper.

These are easy-peasy drop cookies so all you need now are a couple of teaspoons. The cookies won't spread too much so you can place them fairly closely on the sheet. I got 15 to a batch and they ran roughly 2 to 2 1/2 inches across, working their way up to 3-inchers as I got bored with baking.

Put them in the oven for 12 minutes. Cookies will be fat and tender-soft. Let them sit on the pan for 5 minutes after you take them out, then transfer to racks to cool. You may sample some while still hot but try to restrain yourself. I just hate it when I eat faster than I bake. It's like skating uphill. Backward.

There you have it. My contribution to the holiday festive feasting frenzy. And your gentle gateway to wicked good fruitcake. Trust me on this.

Saturday, November 24, 2007

Shake and Flake

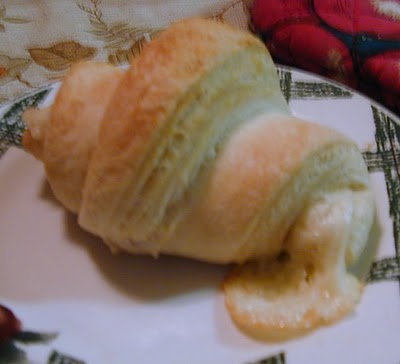
Okay, that photo isn't nearly as sharp as it should be and I do apologize. It's just that the croissant was as good as it should be and I was probably quivering in anticipation of ravishing it's flaky magic before too much more time passed me by. That's because this is a homemade croissant -- something I have never before even wanted to attempt -- and although it doesn't achieve the Fast in my F.E.D. requirements, it certainly manages Easy and Delicious quite handily.

This all began yesterday when I was contemplating what to do with the T-Day leftovers. I don't know about y'all but I've found it to be true that the leftovers are often tastier than the original dish. I have been known to make the original just so I could do the leftover part. And I was thinking a hot chicken sandwich with dressing and cheddar cheese sauce on a croissant would be really fine and wonderful. There are two problems with that. One: Lee doesn't carry croissants at the market and, two: croissants are terribly messy to eat.

Yes they are. Think about it. You have this wonderfully, incredibly flaky bit of bread nirvana to consume. And you do. And when you look around, you see at least 37% of it has flaked off in your plate, on the table and in your lap. Croissants, along with phyllo dough, are the dandruff factories of the bread world. They shed themselves everywhere. And you certainly don't want to waste a single rich and delicious flake so you lick your finger and dab at all those loose little tender-crispies and you lick them off your finger and dab some more. At some point in the process, you look up and everyone in the cafe is staring at you.

Maybe it was the frantic moaning as you were lickin' and dabbin'?

Anyway, just for winks and giggles, I cruised around checking different croissant recipes. All of them seemed to require a great deal of effort and a huge amount of butter. Recipes using the muscle of a stand mixer showed some promise that made me pay closer attention. Then I found a croissant recipe geared specifically to the mighty bread machine. That got my attention. The fact that it only required a stick and a half of butter made me really check it out. "By golly," I said to myself, "I think this is doable."

I wish, now, I'd taken pictures as I went along. In case y'all have never done this, either, pictures are helpful. I'll try to verbally visualize everything for you, okay?

In the bread machine, put 1 1/4 cups lukewarm water, 1 1/2 teaspoons shortening, 2 1/2 tablespoons sugar, 1 1/2 teaspoons salt, 3 cups flour and 1 package (2 1/4 teaspoons) yeast. Put it on the dough setting for French bread, which will knead it for 25 minutes (awesome!) and let it rise for 75 minutes. At least, that's the drill on my Regal Kitchen Pro. I'm sure your bread machine is quite similar.

When the dough cycle is done, you'll want to dump it out onto a lightly floured surface. I have a small sifter I use for this sort of thing -- a little bit on the work surface and a little bit over the dough, just so we don't stick to each other. Pat out the dough in a rectangle shape and place it in a greased 9x13" (or similar) pan, cover it with plastic wrap and leave it in the freezer for one hour.

After the freezer treatment, I used a wide spatula to remove the dough from the pan, then flopped it onto the lightly floured surface and rolled it out in a rectangle that was maybe 1/2 an inch thick. The dough was surprisingly easy to roll, even after it had been in the freezer. But the rest periods throughout this process "relax" the dough so it's easier to work with.

Now you take your cold butter -- 1 1/2 sticks -- slice it into thin patties and lay the patties out in the center third of the rectangle. Leave a bit of a margin at the edges because you don't want butter squirting out when you're rolling the dough. Fold one side of the rectangle over the butter in the middle. Then fold the other side over that, like you're folding a letter to stuff in an envelope. Press and pat a bit with your hands, then take the rolling pin and gently roll out the rectangle shape again. Repeat the fold and roll-out process until you've done it three times.

Now you can put the folded loaf of dough into a covered container or a plastic bag and place in the refrigerator for one hour. Be sure to leave room for expansion because the dough will rise a bit, even in the cold. The idea, of course, is to keep dough and butter chilled and to allow the dough to relax for easier handling.

When the hour is up, once again do the roll and fold routine for the three sets. Take your time. No need to hurry, nor is there any requirement for muscle. Just a gentle, persistent rolling pin attack. Then back into the plastic bag and the refrigerator for 2 hours this time. (I don't know why two instead of one. That's what the recipe says.)

When you bring the dough out this last time, you're supposed to roll out a rectangle that ends up only 1/8" thick. That's a thick that's mighty thin. I suppose I could have done it but there was an impressive sheet of dough when it was still -- I dunno -- at least 1/4" thick and I decided that was close enough for government work.

Okay. I could have gone two ways on cutting out the long triangles to make the croissants. I could have run a horizontal cut the length of the rectangle, dividing it in half, and then do the vertical and diagonal cuts. That would have given me 16 smaller croissants. I chose to go for the bigger dudes because, remember, I had a hot chicken sandwich in mind somewhere at the end of this adventure. So I pulled out my trusty pizza cutter -- which is the most efficient way I can think of to cut raw dough -- and I cut my rectangle (which had the length running from side-to-side) in half on the vertical. Then I cut each half in half, also on the vertical. That gave me four rectangles that have the long sides going bottom-to-top instead of side-to-side. Now I take the pizza cutter and run it diagonally from the lower right-hand corner of each rectangle to the upper left-hand corner. (Lefties will probably do it in the opposite direction.)

Cool. Now I have 8 long triangles. I also have some mozzarella cheese. It isn't called for in the recipe but I couldn't resist cutting 8 little bars of cheese that would fit comfortably at the base of each triangle, tucked into the beginning of the roll up to the tip. Hey! You know it is impossible for me to comfortably do a recipe exactly as given. I would go into some kind of trauma. Anyway, that's the explanation for what's oozing out of the croissant above. They didn't all ooze but some did. No problem.

Because I was so engrossed in rolling up the little mozza sticks in the dough, I completely forgot I was supposed to whisk up one egg and brush the dough with it before I even cut it into triangles. Oops. You can do that if you want. It's supposed to give the croissants that nice shiny brown glaze. If I remember next time, I'll probably give it a shot.

When you place the rolls on a greased cookie sheet, be sure to have the point of the triangle on the bottom or you will cook up some wildly phallic specimens. You're supposed to curve them into a horn shape at this point but I didn't cut the triangles wide enough so mine are more like crescent rolls. Not a problem. We're thinking sandwich, not horny. Cover the rolls with wax paper or a cloth and let rise in a warm place until double in size. Gently brush with the beaten egg mixture (which I didn't do) and bake at 375 degrees fairy height until golden brown. There was no time given in this recipe so I took a wild guess. Twenty minutes seemed to work fine.

The croissants? Oh my. They're not like what you'd get in the store and I'm sure they're not what you'd get at a sidewalk cafe in gay Paree. This version comes out like a cross between the ultra-flaky incarnation and the lightest dinner roll you can imagine. There were still lick and dab flakes to clean up but not nearly as many as with a full-bore croissant. I think I ended up with the best of both worlds -- light and fluffy and fragrant and flaky -- but not too much of any of it. As Goldilocks said, "Mmmm-mmmm. This is just right!"

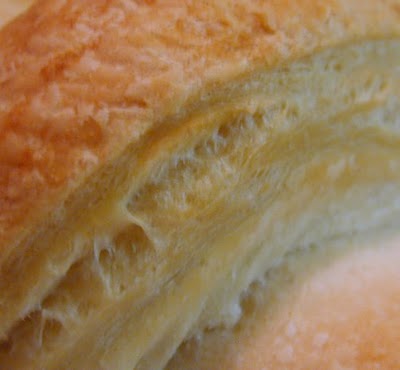
Here's a close-up, so you can see it really is beautifully flaky. I still haven't done the sandwich, though. Got too full, doing my quality control testing. Not to worry. Sometime this afternoon or evening, it will be sandwich time. Oh yes indeedy!

Wednesday, November 21, 2007

Talking Turkey and Teachers

Isn't he just flippin' gorgeous? This is a wild turkey, photo courtesy of the Public Photo Gallery of the Pennsylvania Game Commission. He is puffed up in all his glory to impress the adoring females and I think he succeeds. I'm certainly impressed -- with what a major job it would be to pluck all those feathers. You'd have to start sometime around last August to be done by Thanksgiving.

Actually, I was looking for one of those pictures that were available not too long ago of a turkey bearing a sign that said something like, "Save a turkey. Eat ham." I did find one but it involved (gasp!) payment. Not that the photo wasn't worth the price, you understand. It was quite similar to the one above, only the bird was wearing an "Eat Ham!" sign. I decided I'd rather spend the money on the real thang if I was gonna do it.

There are, of course, lots of photos floating around the Internet of Bush doing the traditional Thankgiving gig where he officially pardons a big white turkey. These are often accompanied by pointed, pungent captions and, while tempted, I decided to restrain my mean streak, telling myself, "Why bother? Bush is too easy a target. There's no sport in it."

For myself, I am saving a turkey this year. There is a chicken thawing in the refrigerator as we speak. I'm going to brine it and then roast it with an apple juice-molasses baste. I haven't figured out all the accompanying elements yet but I'm about to go on a hunt for some kind of slightly different pumpkin pie recipe and then I'll proceed to make it with the winter squash I have in the freezer. Sort of a faux pumpkin. Well, not really faux. Pumpkin is a type of squash, isn't it? I could do the same thing with sweet potatoes but I only have one of those and I have other plans for it.

Another thing I'm going to make is my favorite dinner roll recipe. It fits my F.E.D. standard (Fast.Easy.Delicious) perfectly. It comes from my favorite eighth grade teacher, Mary Capps, who is still going strong after all this time.

That year was notable for the number of teachers we went through. I can't remember all the names but there was one handsome male teacher who had a wonderful Heathcliff aura about him. All the girls had a crush and we were devastated when he was let go due to a little drinking problem.

Then there was "Polly," another male teacher, so named for the parrot association because he was such a puffy, pompous little fellow. He once went through all the desks during recess and confiscated comic books, which he tucked into the inside pocket of his suit jacket. He played innocent when outraged children discovered the loss and we were all mystified as to who the culprit might be. Until later that afternoon, when he informed one of the boys that if that unfortunate didn't shape up, "this is going to come off!" and he pulled wide the lapels of his jacket for emphasis. At which point, the pilfered comic books fell out on the floor and the whole room collapsed in laughter. Polly didn't last long after that.

The final teacher that year was a stumpy little woman who used to tell us stories about her adventures at the state insane asylum (as it was called then) when her husband worked there. Once she was chased across the lawn by an inmate. Terrified, sure she was going to be murdered, she stopped to catch her breath. The inmate ran up, tapped her on the shoulder and said, "Tag! You're it!" She also chased me up and down a couple of aisles one day, swinging a yard stick. She missed me and accidentally hit one of my girlfriends, who was innocently sitting at her desk, watching the show.

I tell you all this to give you an idea of the framework in which Mrs. Capps did her magnificent stuff. In between each teacher, she was called in as a temporary until a new candidate could be hired. She was so cool. No nonsense. We didn't get away with anything -- and I swear we learned more during her multiple brief sojourns than at any other time. We respected her -- and we all loved her. I still love Mary Capps.

She donated this recipe for a local cookbook project, in honor of another woman she admired, so it's got some respectable mileage on it. If you decide to try it, you'll understand why it's been passed along.

ONE HOUR YEAST ROLLS (no kidding) In a mixing bowl, put 1 package (2 1/4 teaspoons) yeast, 3/4 cup lukewarm water, 3 tablespoons fat (solid or oil), 1 tablespoon sugar and 1 teaspoon salt. Let yeast dissolve. Add 2 cups flour and knead until smooth. Let rise in warm place for 30 minutes. Shape into rolls, place in greased pan and let rise 15 minutes. Bake at 350 degrees fairy height for 15 minutes.

Fast. Easy. Delicious. I'm telling you.

Thursday, November 1, 2007

Another Addiction

You remember how I was whining the other day because I didn't have any baking pans or dishes small enough for individual Yorkie puds? Remember how I mentioned ordering some 6-inch cast iron skillets just for that purpose? And I'm glad I did. Got a great deal on some refurbished Lodge Logic pre-seasoned puppies (and free shipping) so there's no way I'll complain. Still, there was a moment of epiphany this morning when I had to just stand there and thunk my forehead with the heel of my hand and say, "Fool! Back to the scullery with you, wench!"

See, I have four -- count 'em, folks, FOUR -- Corning Ware individual (5 1/2 inch) baking dishes that I've been using as soup bowls. Corning Ware goes in the oven. Corning Ware works just perfectly fine for individual servings of whatever. Sheesh!

Just to prove it to myself, I whupped up a batter in small proportions while the Corning Ware was heating in the oven, laced with a teaspoon each of olive oil and butter. One egg came to 2 ounces so I added 2 ounces of flour and 2 ounces of milk, a bit of salt and a teaspoon of rice vinegar. (I like to fiddle with different vinegars.) The batter was ready by the time the butter/oil mixture was beginning to pop and sizzle so I poured it in and popped the whole thang back in the 400 degree oven. By the way, just in case, I had the Corning Ware dish sitting in the middle of my beat up old pizza pan. I wasn't sure if the batter amount would be contained or if any of the oil would spill over. It was and it didn't so all turned out okay.

There wasn't as much rise with this Yorkie as the monster the other day and I'm wondering if the difference is not letting the batter sit for a few hours. So many of the recipes recommend this and that's what I did with the big one. Nevertheless, my little pudding came out so beautifully I almost couldn't bring myself to eat it.

If you believe that, I have a bridge I want to sell you.

While the Yorkie was ballooning away for its 15-minute baking period, I mini-diced a small potato and fried it nice and golden-crispy in some olive oil. Added seasoning and a spoonful of flour and tossed everything around until the potato bits were well-dredged. Added about a cup of milk, half a cup at a time, and kept stirring until everything was nice and thick. Threw in a handful of precooked shrimp, then stirred in about half a cup of shredded cheddar, removed the pan from the heat and put a lid on it until the Yorkie came out of the oven.

Well, good golly, Gertie. Ladled about half of my tater/shrimp mixture into the Yorkie -- which I had slid from the Corning Ware onto a dinner plate -- and sat down with a fork and sufficient gusto to obliterate the whole thing without even raising a sweat.

Excuse me. Ladies don't sweat. We glisten. But I didn't even have to do that. My only regret is that I didn't make enough batter to do a second one later, for the rest of the tater/shrimp stuff. That's okay. I've got some homemade jalapeƱo bread and a toasted slice of that will do quite well as a base. But that's for later. I'm still full and content from lunch. I'll tell you what -- it would not surprise me to find I've acquired a new addiction. That doesn't alarm me. One could do much worse than getting hooked on Yorkshire puddings.

Tuesday, October 30, 2007

Bacchanalian Biscuits

Okay, let's be fair. Those could just as easily be men waiting for the perfect woman. Sure, you can tell the sex if you know a bit about bones but I don't think that picture is going to give you the necessary clues.

Anyway (number one), it's just a photo that always gives me a chuckle because, truthfully, I think perfection would be not only a bit intimidating, it could become downright boring. A few flaws here and there add character and zest to a personality.

Anyway (number two), skeletons go with Halloween and Halloween is almost upon us so this seemed fitting. That's my story and I'm sticking with it.

Anyway (number three), I forgot to recharge the batteries for the digicam so I don't have a picture of the result of the kewl new biscuit recipe I found. Yeah. You had to know I'd get back to food, one way or the other.

It sort of started with John and his Winter Chicken stew because I only used part of the chicken for the stew. Some of it went into the stew, some into the freezer, but all the scrap meat went into a roasting pan and then the oven. This morning I dredged through the roaster mess, scooping out fat and bones and chunks of skin and gristle until I was left with only lovely bits of meat and jellied juices. Looked like chicken gravy material to me, that's what.

Then my friends, Jack and Nanley, allowed as how they'd stop in for lunch after they pulled a morning run up Floras Creek, looking for potential venison. Hooboy, I said to myself. Bet they'd appreciate a hot lunch of chicken gravy and biscuits because it's a bit on the nippy side out there. (By the way, Nanley is actually Nancy but I've always called her Nanley and I don't have a clue why. It works for us.)

The gravy was easy. In a small skillet, I caramelized half a Vidalia sweet onion with some pretty fair chardonnay and added it to the chicken and jellied juices in the roasting pan. Then a little sea salt and seasoned pepper, bring it to a mild boil and add some thickening persuasion via corn starch (I think you Brits call it corn flour?) and the chicken gravy was almost as good as chocolate.

Jack and Nanley didn't know it but they were about to become my official Taste Testers for the biscuits. I tried out the recipe yesterday (in halved proportions) and liked it okay but felt the buttermilk was a bit overwhelming. Today, my approach was to do the full recipe but substitute beer for part of the buttermilk.

I can hear you muttering, "Is the woman mad? Wine in the gravy. Beer in the biscuits. Next thing you know, she'll be putting whiskey in the coffee."

Heh! Yup. Yuppers. That's what we did. When I look at what I've just written, I have to admit it sounds like a bacchanalian orgy of truly decadent proportions. It wasn't. Honest. And anyway, the biscuit project was a success. The beer proved to be a perfect balance to the buttermilk. And the biscuits themselves are wonderfully light and moist, even after they get cold. That's the best part. The next-to-best part is how much fun they are to make. Here's how it goes:

First you preheat the oven to 475 degrees fairyheight and spray (or oil or butter) an 8" cake pan.

In a mixing bowl, combine 2 cups flour, 1 tablespoon baking powder, 1 1/2 teaspoons salt and 1/4 cup sugar. Mix well. Cut in 4 tablespoons butter until there are only pea-sized lumps.

Stir in 1 cup buttermilk and 2/3 cup beer. (If you don't want to use beer, milk, cream or water will work just fine.) Don't overmix, just blend everything good. Let stand a few minutes. The dough will be VERY wet, like cottage cheese. That's the way it's supposed to be. Now comes the fun part ...

Toss a cup of flour in another mixing bowl and line up that bowl, the bowl with the biscuit mixture and the greased pan. Grab a couple of soup spoons and use them to extract a lump of dough from the biscuit batter and dump it into the flour. Now, give the flour bowl a couple or three gentle tosses to spin the dough lump, covering it completely with flour. Dust your hands with some of the flour, pick up the dough ball, then toss it back and forth between your hands, shaking off the excess flour. It's like playing with a water balloon.

When the lump of dough is pretty well dusted off and more or less round (if you define "round" as squiggily-lumpy-funny), place it in the greased pan. Continue with dough ball after dough ball, tucking each one in snugly against the others. You want the biscuits to grow UP instead of out so crowding is a Good Thang.

Put the pan in the oven and set your timer for 20 minutes. When the biscuits are done, pull them out of the oven and let them sit for a couple of minutes. Then dump them out of the pan, break them apart and serve immediately to the cheering multitudes. When split open and covered with chicken gravy -- or ANY righteous gravy -- these biscuits will fill your tummy, soothe your soul and cure the heartbreak of psoriasis. They'll make you smile, too. What more can you ask from a comfort food?